Advanced Rest API Connector with Local Variables
Local variables are used to store data specific to a single task execution. They can be initialized with a starting value and then updated or referenced as the task runs. Each task keeps its own set of local variables, ensuring that the data is kept separate from other task executions.
Local variables can either be dynamically populated with data from the results of task steps or manually set with predefined values. This flexibility makes them useful for both automated data handling and customized setups. Click here for more information about the Local Variables feature.
Create your own example using local variables in a way that best fits your understanding. For a more in-depth look at how to work with local variables in tasks, you can explore the detailed text tutorial below, complete with images for guidance. Alternatively, if you prefer a more interactive learning experience, check out our video tutorial on the YouTube channel.
Where could we use local variables? For example, we can use them to retrieve a token. Let's say we're logging into a website, we obtain a token, and then in subsequent steps, since we already know the user's token, we can perform actions on the website under their token—essentially operating behind the scenes, beyond the login process.
Configuration
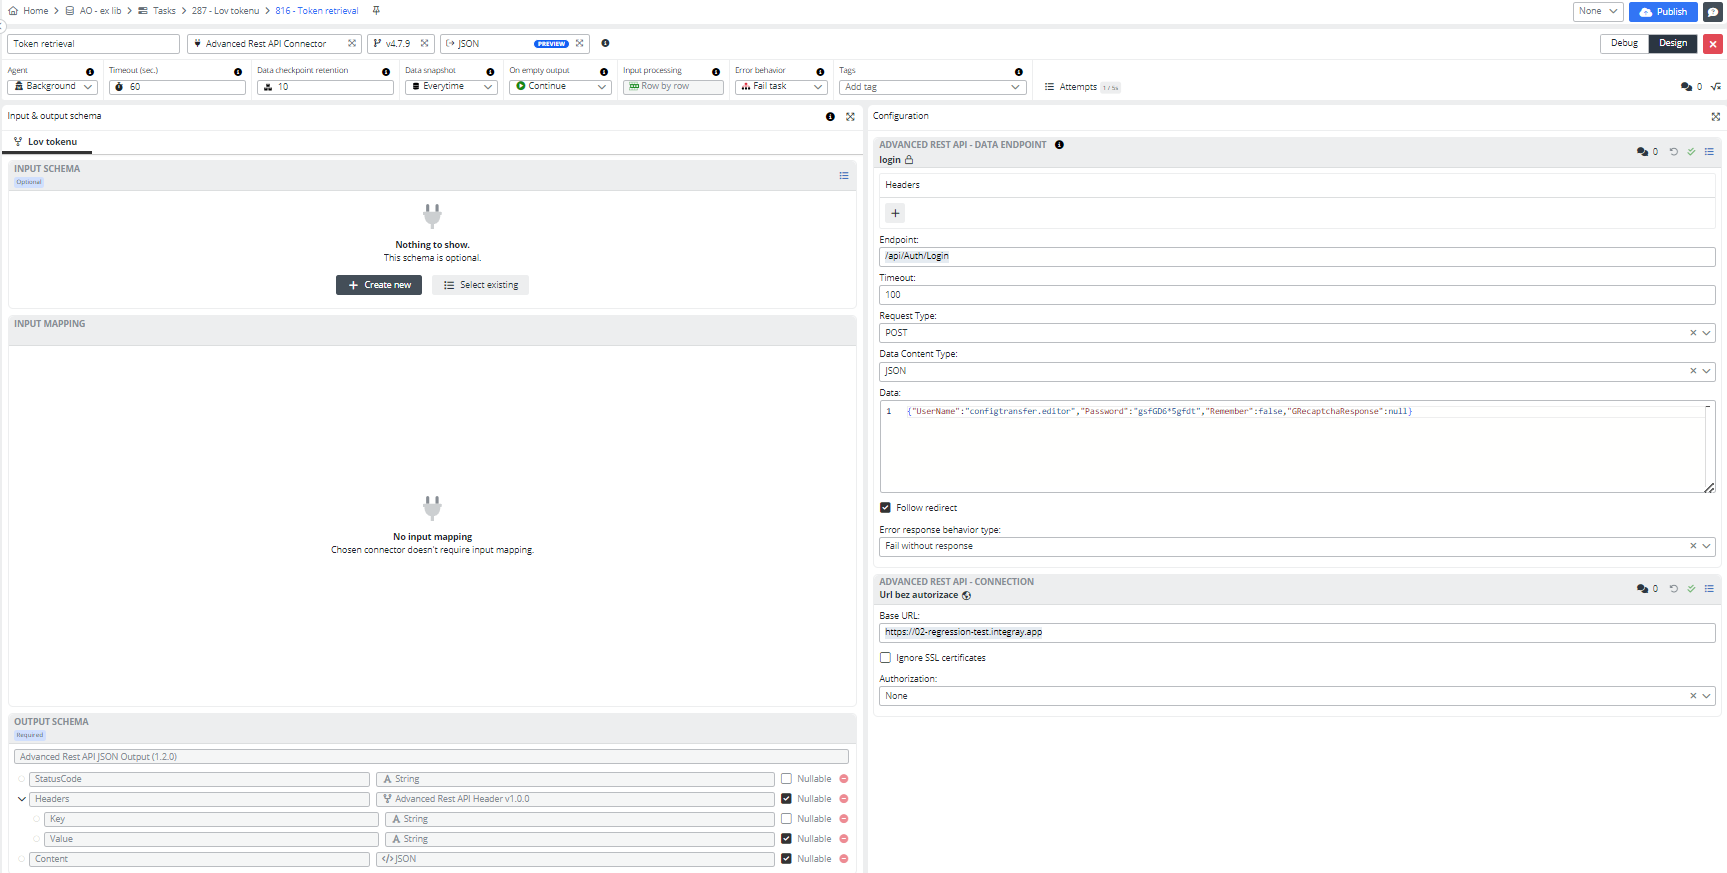
Add a first Task step:
- Connector: Advanced Rest API Connector
- Connector action: JSON
Fill in the Advanced Rest API - Data Endpoint configuration fields:
Endpoint- Endpoint URL pathTimeout- 100Request type- POSTData Content Type- JSON{"UserName":"user.name","Password":"password","Remember":false,"GRecaptchaResponse":null}Error response behavior type- select from the dropdown list
Save the configuration.
Fill in the Advanced Rest API - Connection configuration fields:
Base URL- base URLAuthorization- None
Save the configuration.
Retrieving a token and inserting its content into the Token Value in the output schema.
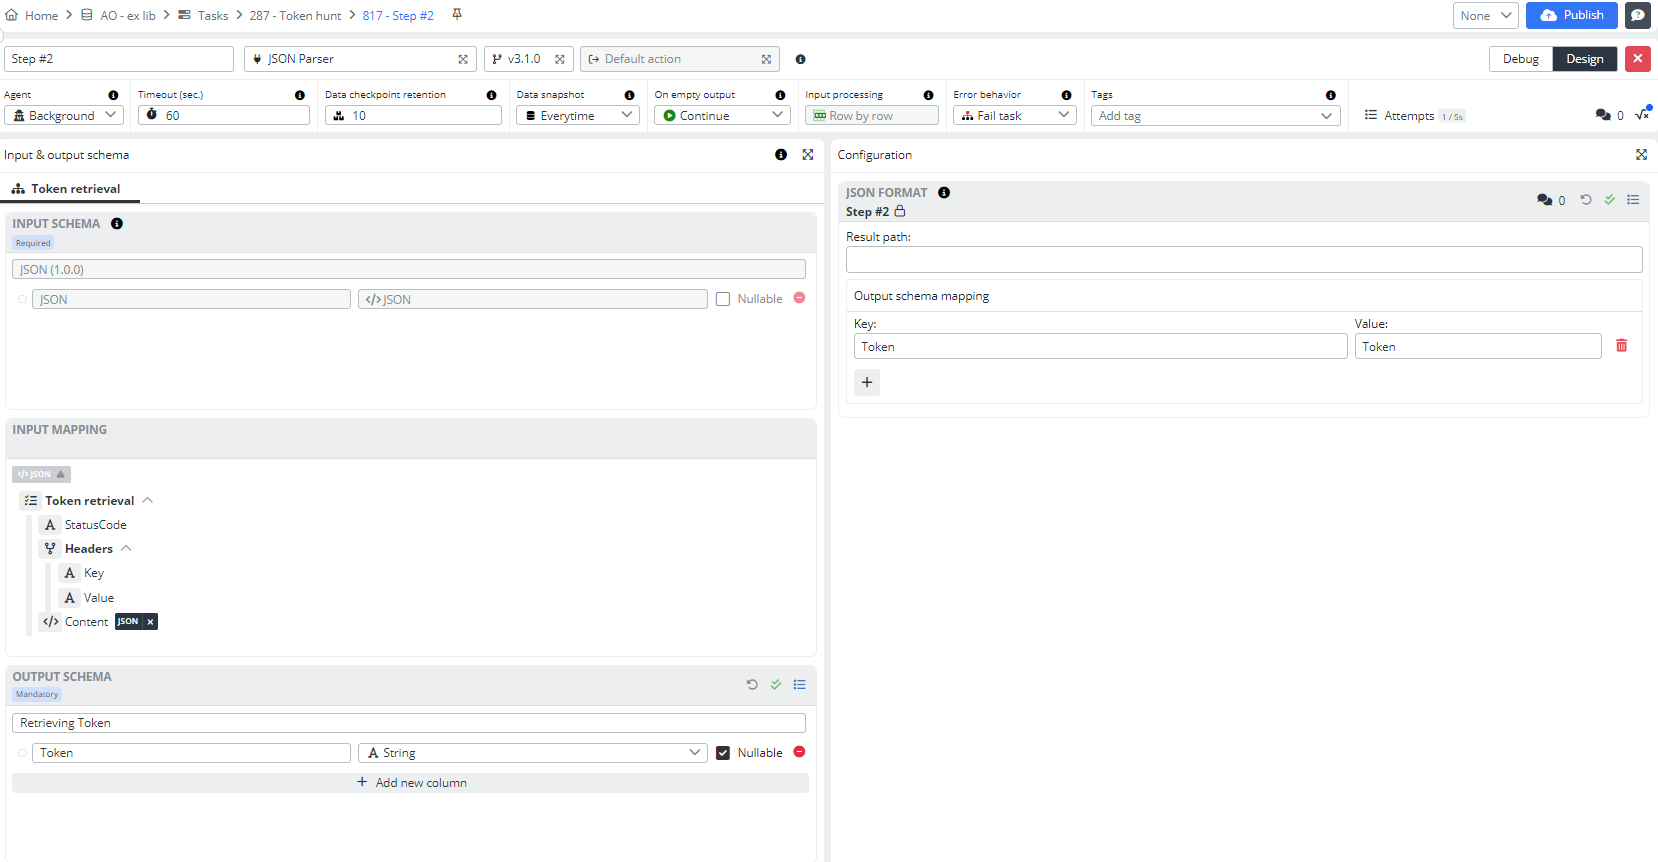
Add a second Task step:
- Connector: JSON Parser
Open the Task step editor. Select the Input schema JSON. Create a new custom output schema and name it Retrieving Token. Add a new column, Token, with the string data type and nullable value. Pin the input mapping.
Fill in the JSON Format configuration fields, creating the output schema mapping key:
Key- TokenValue- Token
Save the configuration.
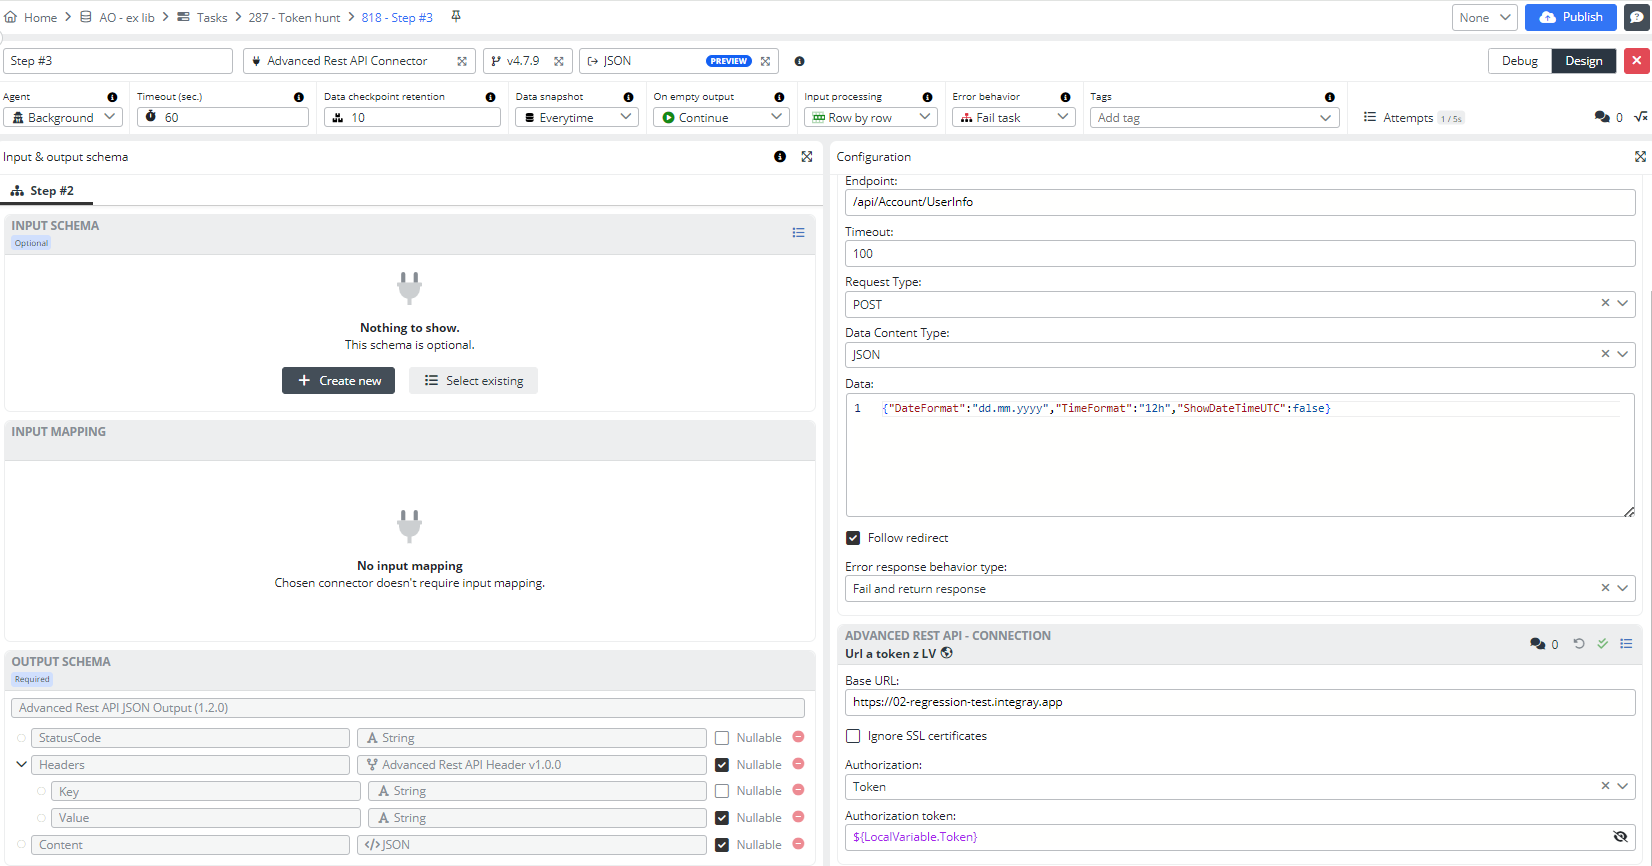
Add a third Task step:
- Connector: Advanced Rest API Connector
- Connector action: JSON
Fill in the Advanced Rest API - Data Endpoint configuration fields:
Endpoint- Endpoint URL pathTimeout- 100Request type- POSTData Content Type- JSON{"DateFormat":"dd.mm.yyyy","TimeFormat":"12h","ShowDateTimeUTC":false}Error response behavior type- select from the dropdown list
Save the configuration.
Fill in the Advanced Rest API - Connection configuration fields:
Base URL- Base URLAuthorization- TokenToken-${LocalVariable.Token}
Save the configuration.
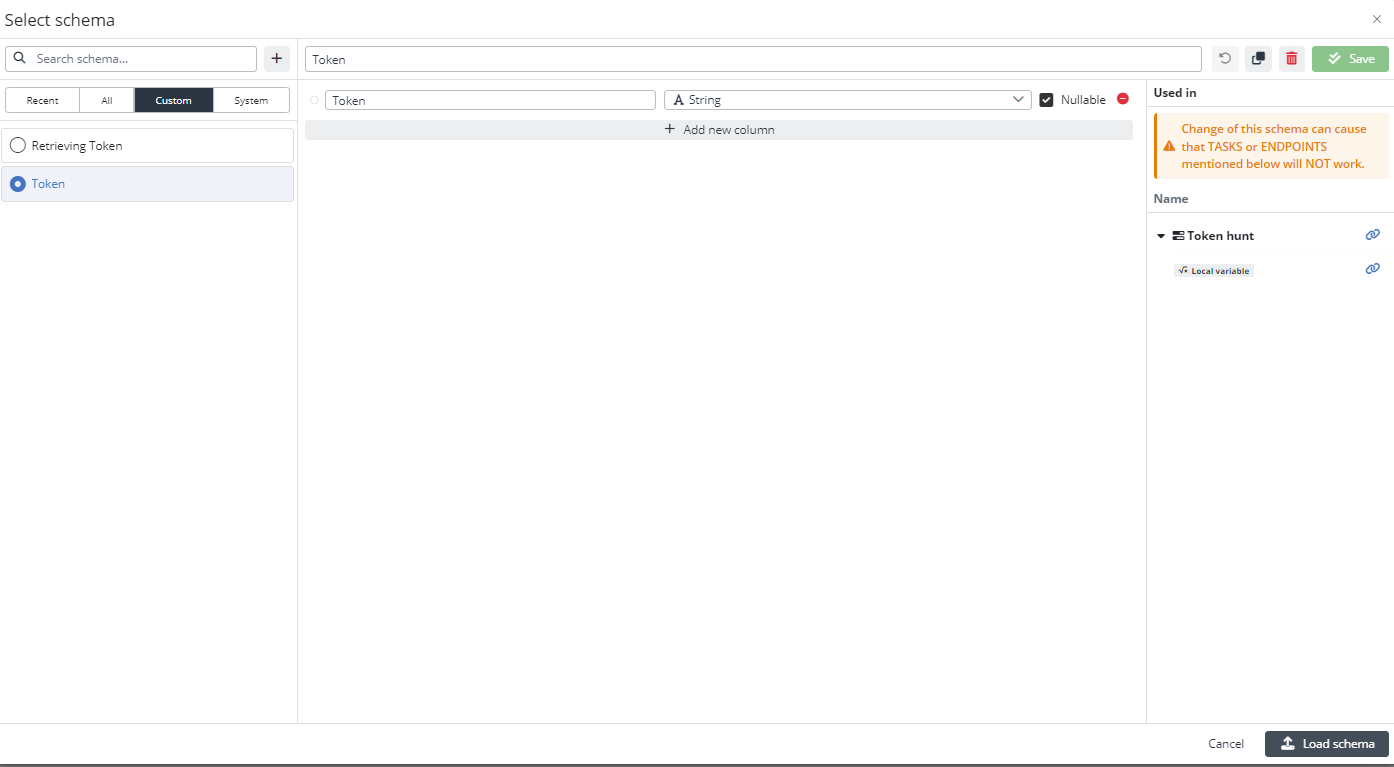
Now, let's fill in the Local Variables. Create a new custom schema and name it Token. Add a new column, Token, with the string data type and nullable value. Use this schema for Local Variables.
You can see that the value in the schema is empty, but that's not important, we will fill it in our task. Click on Local Variables in the second step and map the value that comes from the JSON Parser to the Local Variables schema.
Great! The task is created; now, all that's left is to publish it and run it.
Result
As a result, we have a successfully completed task.
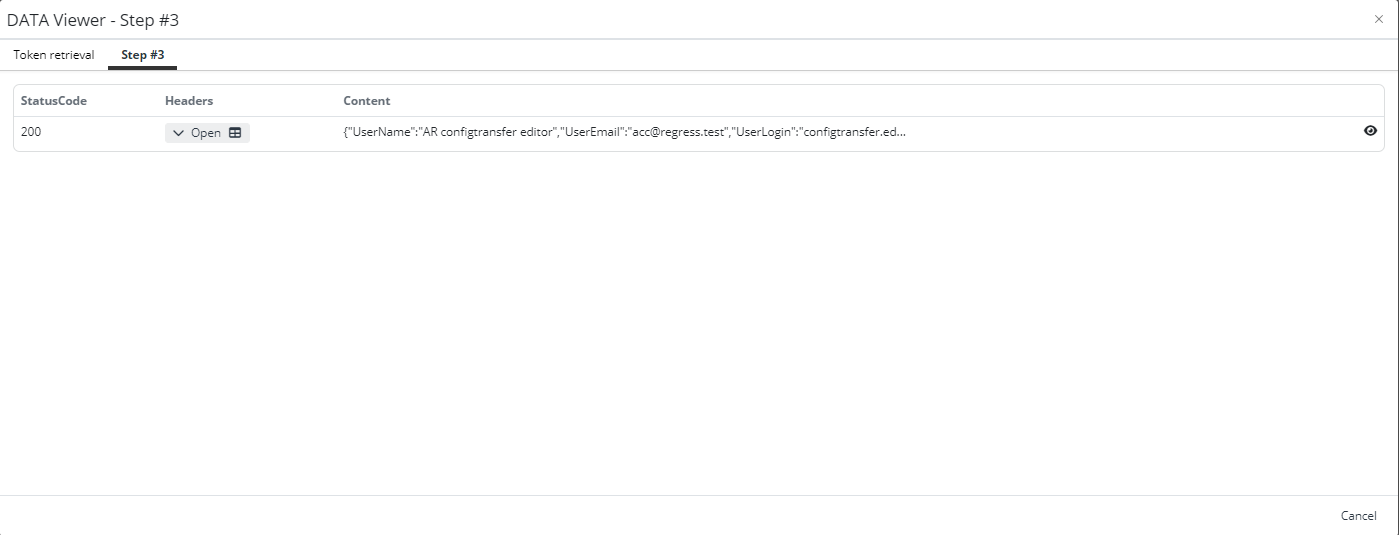
Let's open the Data Snapshot.
As you can see, we received "Request successful." The server has responded as required.
Open Local Variables in the second step, and we will see that the Token field is filled with the Token value.
The use of local variables allows task-specific data to be dynamically stored and applied, enabling seamless and universal integration of the entire system. That's all from this example.
