Node.js with Local Variables
Using inputData, we can create a new array of objects where each field maps to corresponding values, maintaining original data types. This setup allows data transformation and customization, with Local Variable schema values updated as specified in the Step configuration. If Local Variables are disabled for the Step, the Task’s Local Variable values are used instead.
If you prefer a more interactive learning experience, check out our YouTube channel
Prerequisites
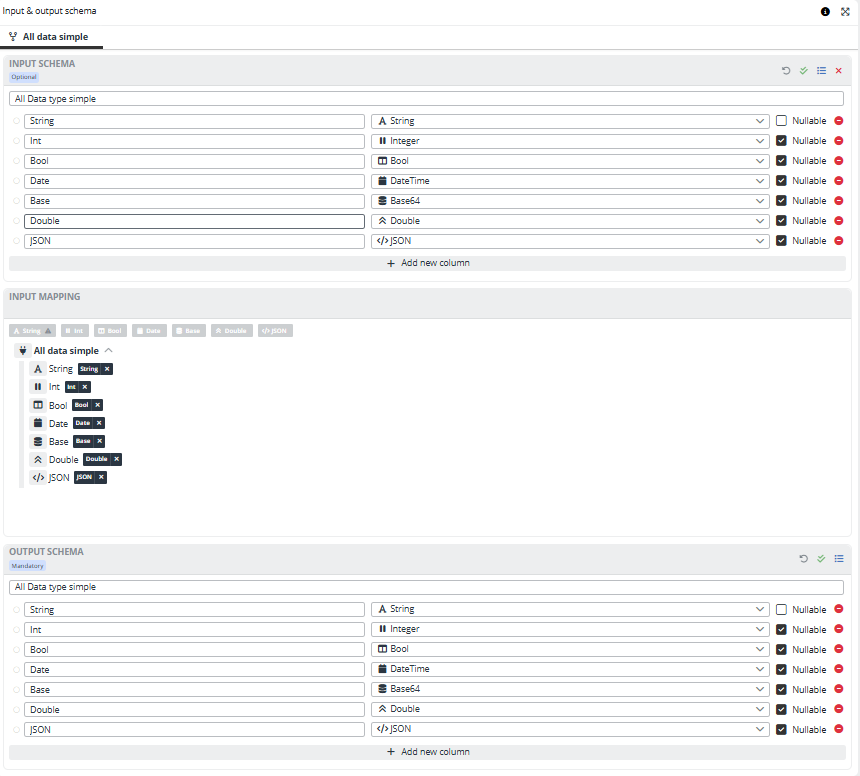
To start, let's create two new Data Schemas:
- All Data type simple - schema of all data types with non-nullable string value
- All Data type simple modified - schema with nullable string value
Create an Endpoint.
Save the Endpoint and proceed to create the Task and connect the Task to the Endpoint.
Task with Local Variables Configuration
Add a Task: All data type Simple
Select All Data type simple as Local Variables Schema to the Task, and fill in the Default value for String variable.
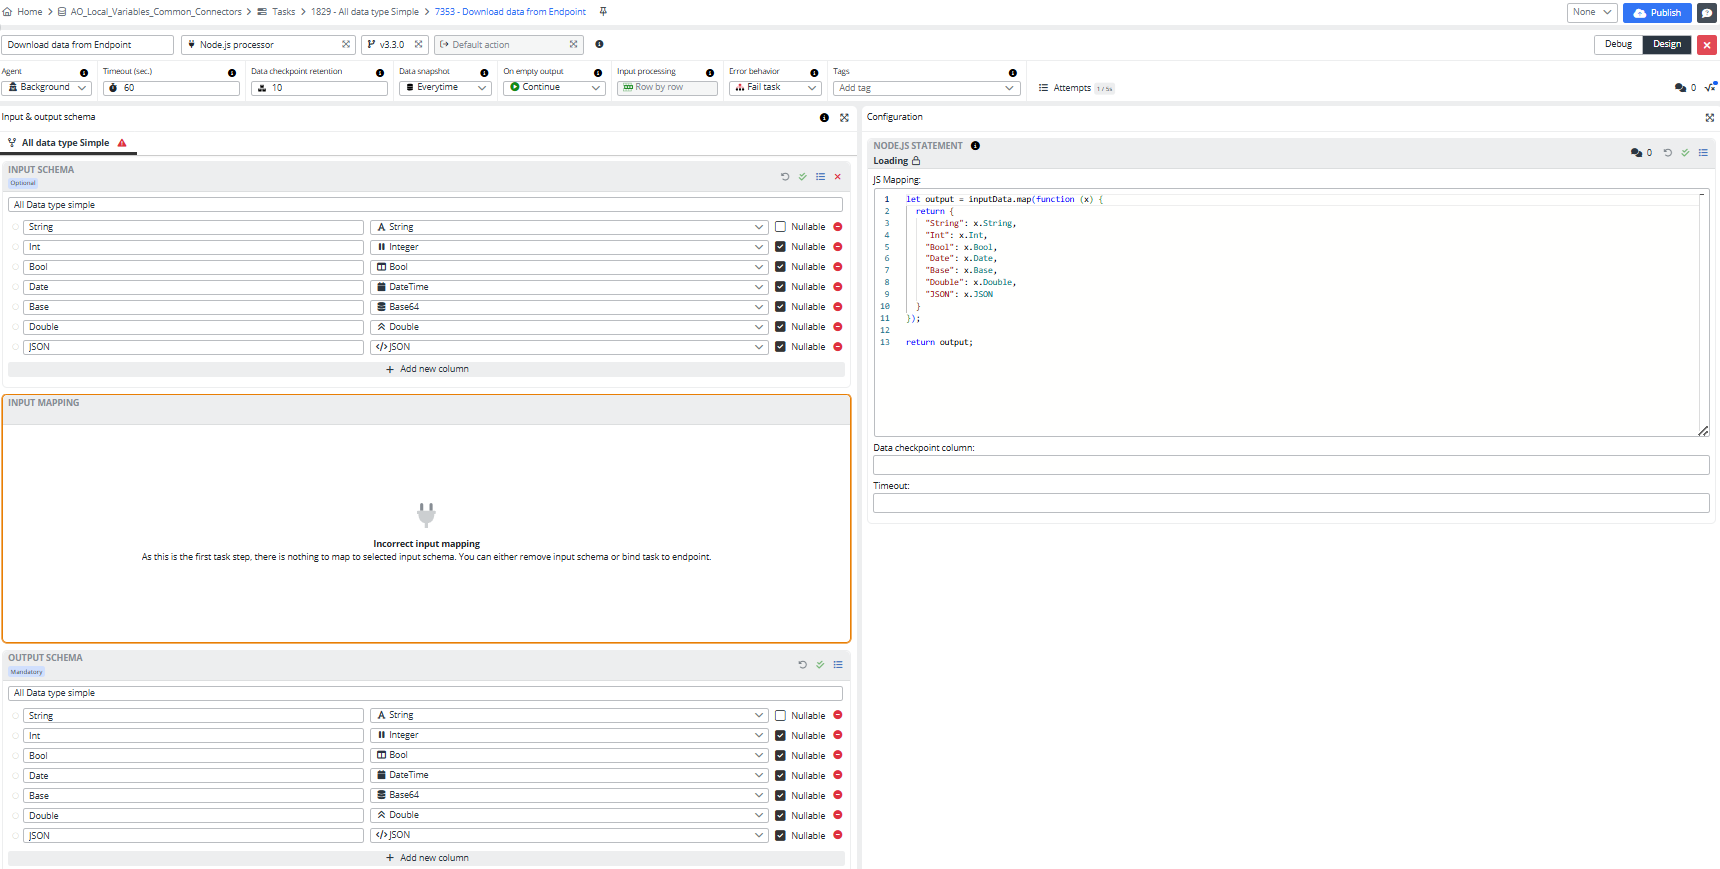
Add a First Step:
- Step name : Download data from Endpoint
- Connector: Node.js Processor
- Connector action: Default action
- Input schema: All Data type simple
- Output schema: All Data type simple
- Configuration:
let output = inputData.map(function (x) {
  return {
    "String": x.String,
    "Int": x.Int,
    "Bool": x.Bool,
    "Date": x.Date,
    "Base": x.Base,
    "Double": x.Double,
    "JSON": x.JSON
  }
});

return output;
Now open Set local variables by clicking on the variable icon in the upper right corner of the Step details. Then Assign a specific value from checklist for all variables except string. Save it.
Close the Step.
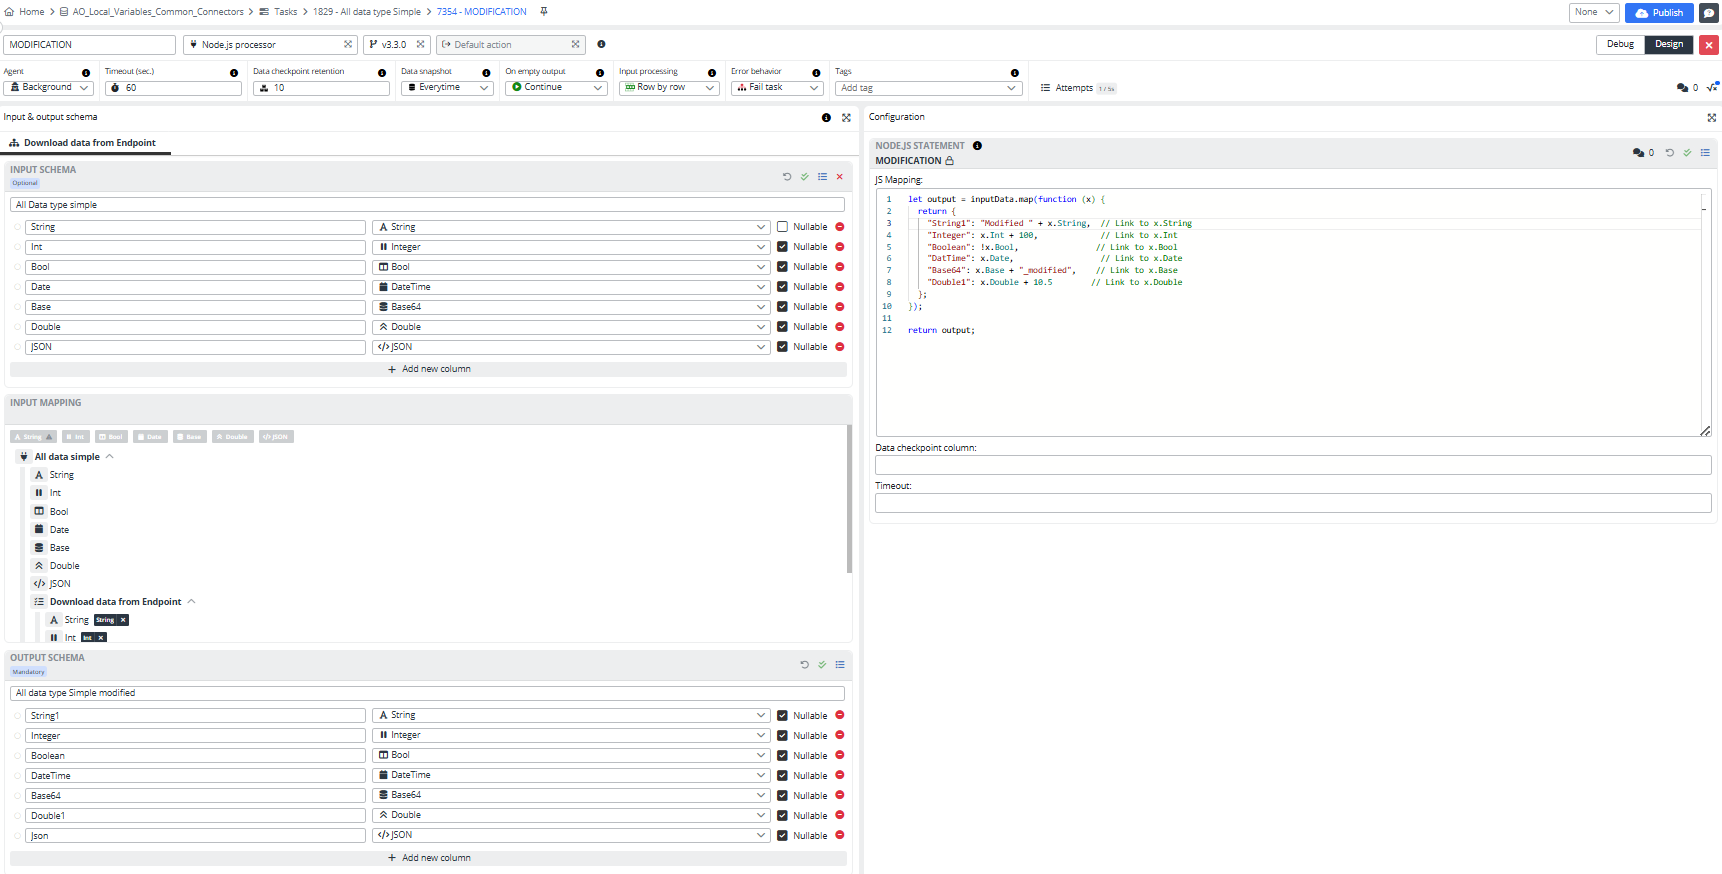
Add a Second Step:
- Step name : Modified
- Connector: Node.js Processor
- Connector action: Default action
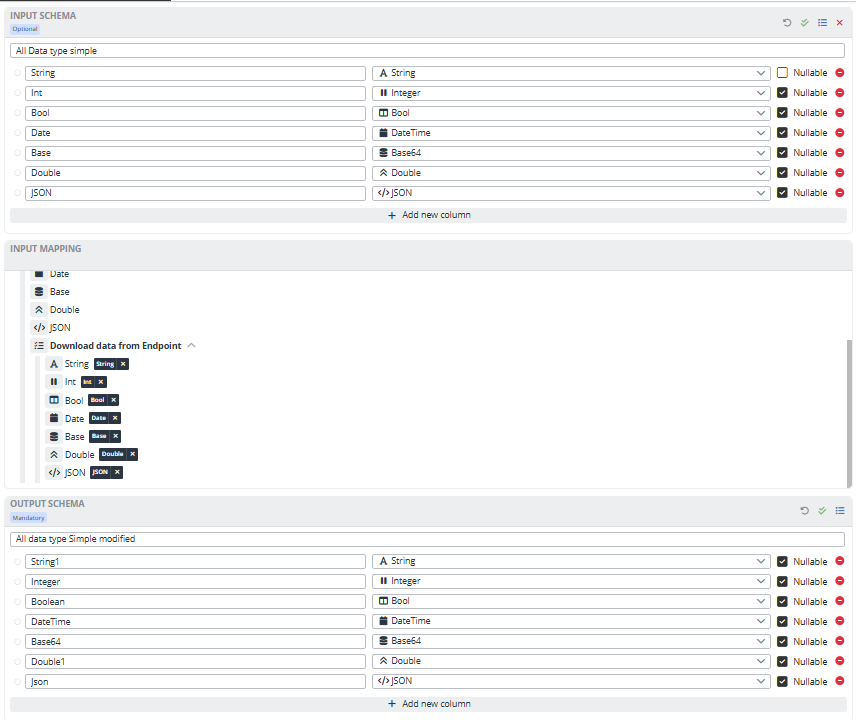
- Input schema: All Data type simple
- Output schema: All data type Simple modified
- Configuration:
let output = inputData.map(function (x) {
  return {
    "String1": "Modified " + x.String,  // Link to x.String
    "Integer": x.Int + 100,             // Link to x.Int
    "Boolean": !x.Bool,                // Link to x.Bool
    "DatTime": x.Date,                  // Link to x.Date
    "Base64": x.Base + "_modified",    // Link to x.Base
    "Double1": x.Double + 10.5        // Link to x.Double
  };
});

return output;
Open Set local variables at the Second Step. Then Assign a specific value from checklist for all variables except string. Save it.
Connecting Endpoint with Task
Close the Step, change the Task trigger to Endpoint, and bind Endpoint POST Async to the Task.
After bind, Endpoint will change to Synс. You will see it in the Start Task section, under the binded Task the checkbox next to Start Task Async will disappear.
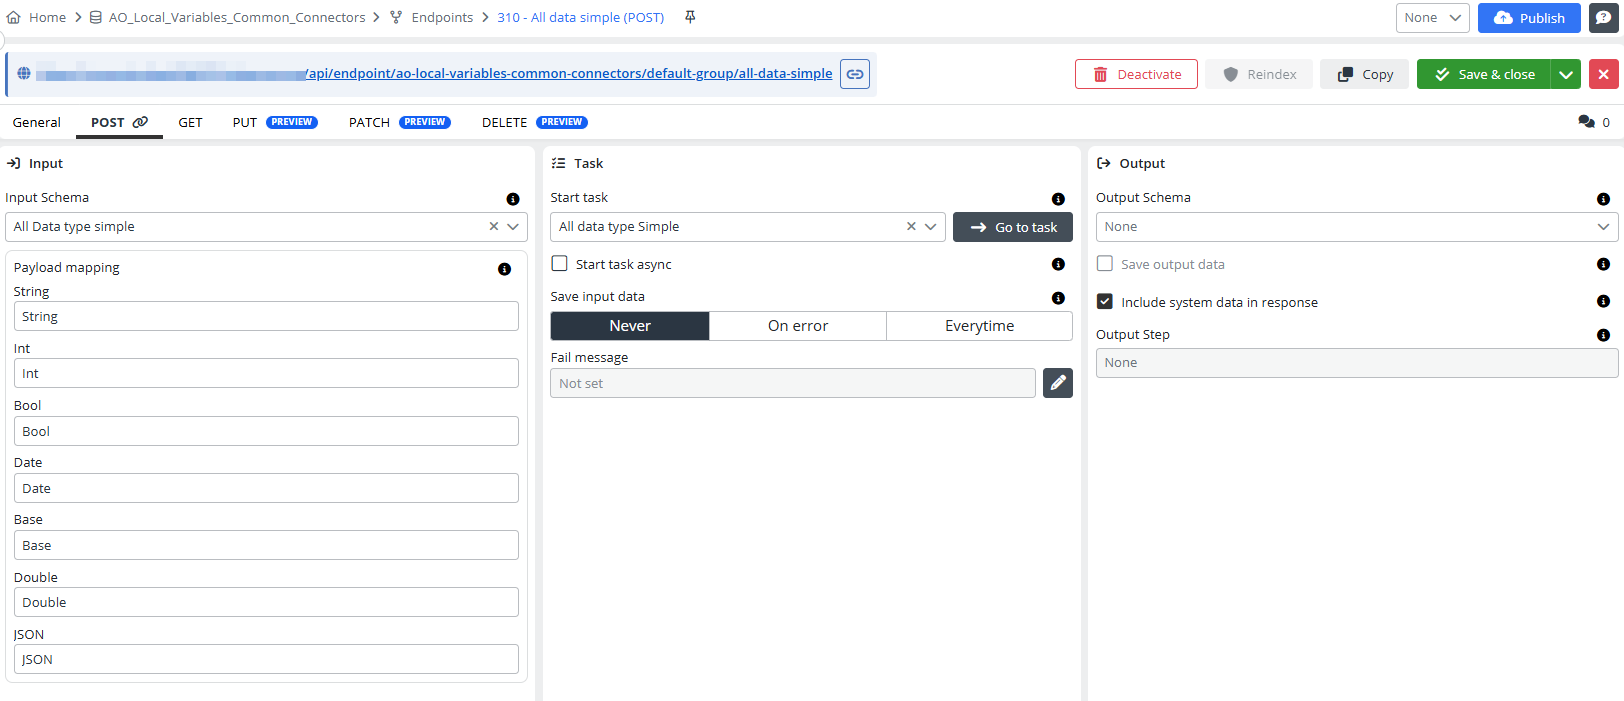
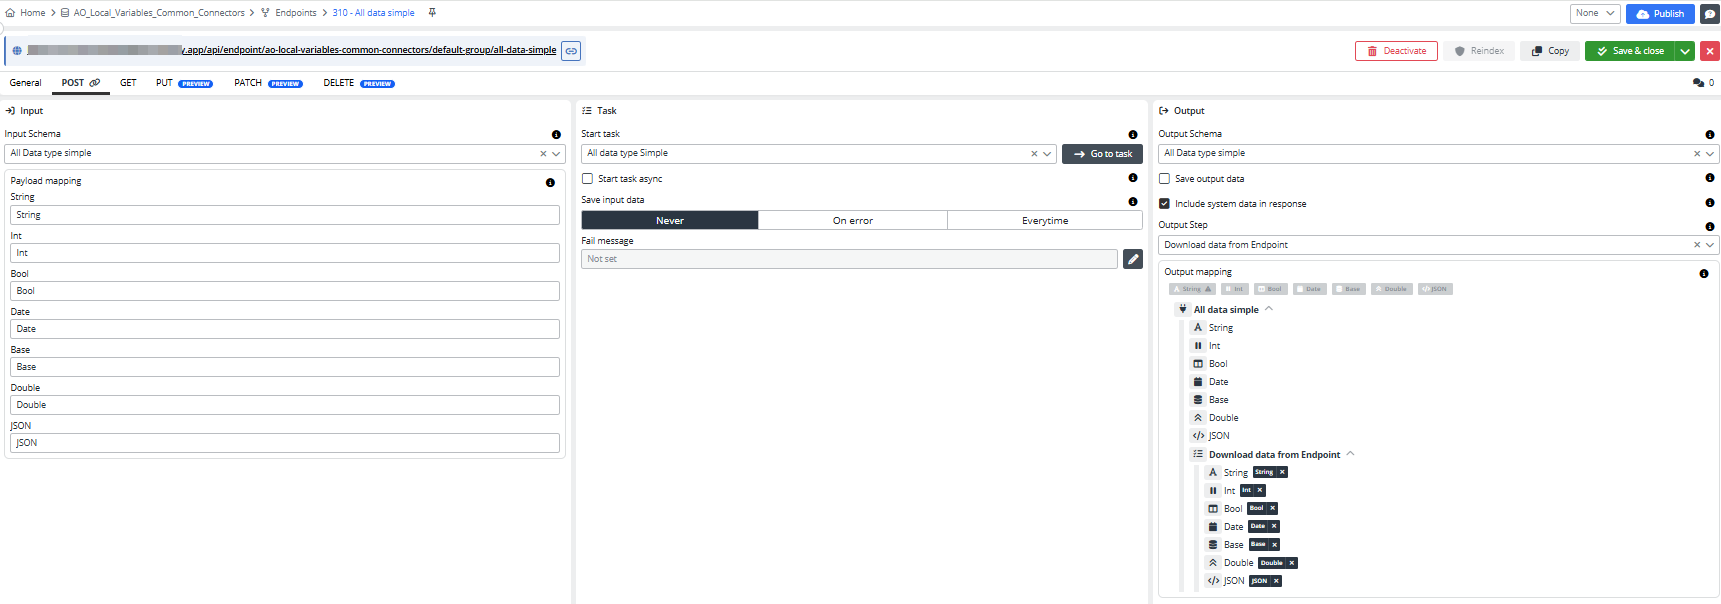
Open the Endpoint and add the Input:
- Input Schema: All Data type simple
Save the Endpoint, go to the task, and pin the mapping in the first step.
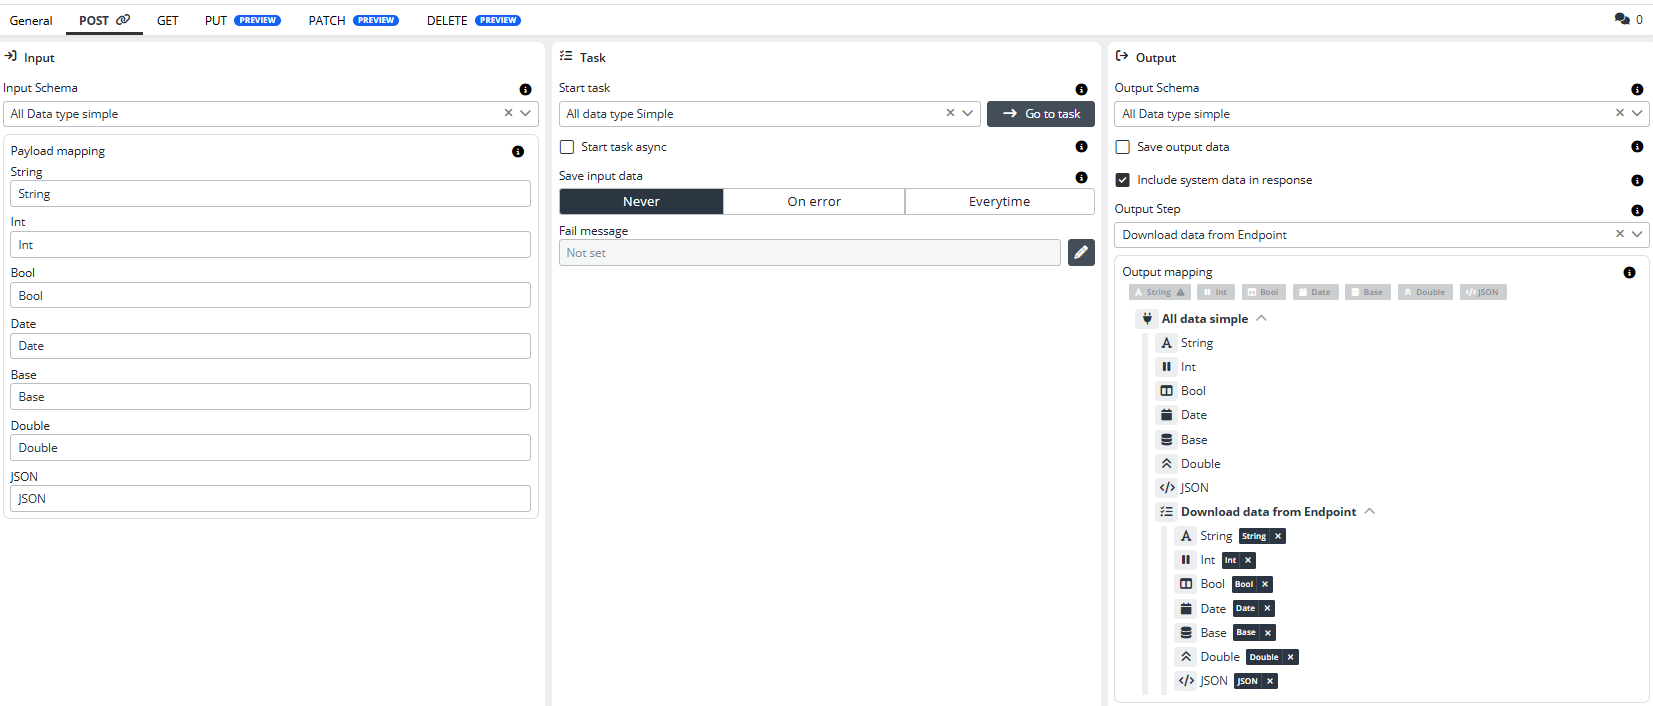
Then go to Endpoint and add the Output:
- Output Schema: All Data type simple
- Output Step: Download data from Endpoint
Save&close the Endpoint, go to the task, and pin the mapping in the second step.
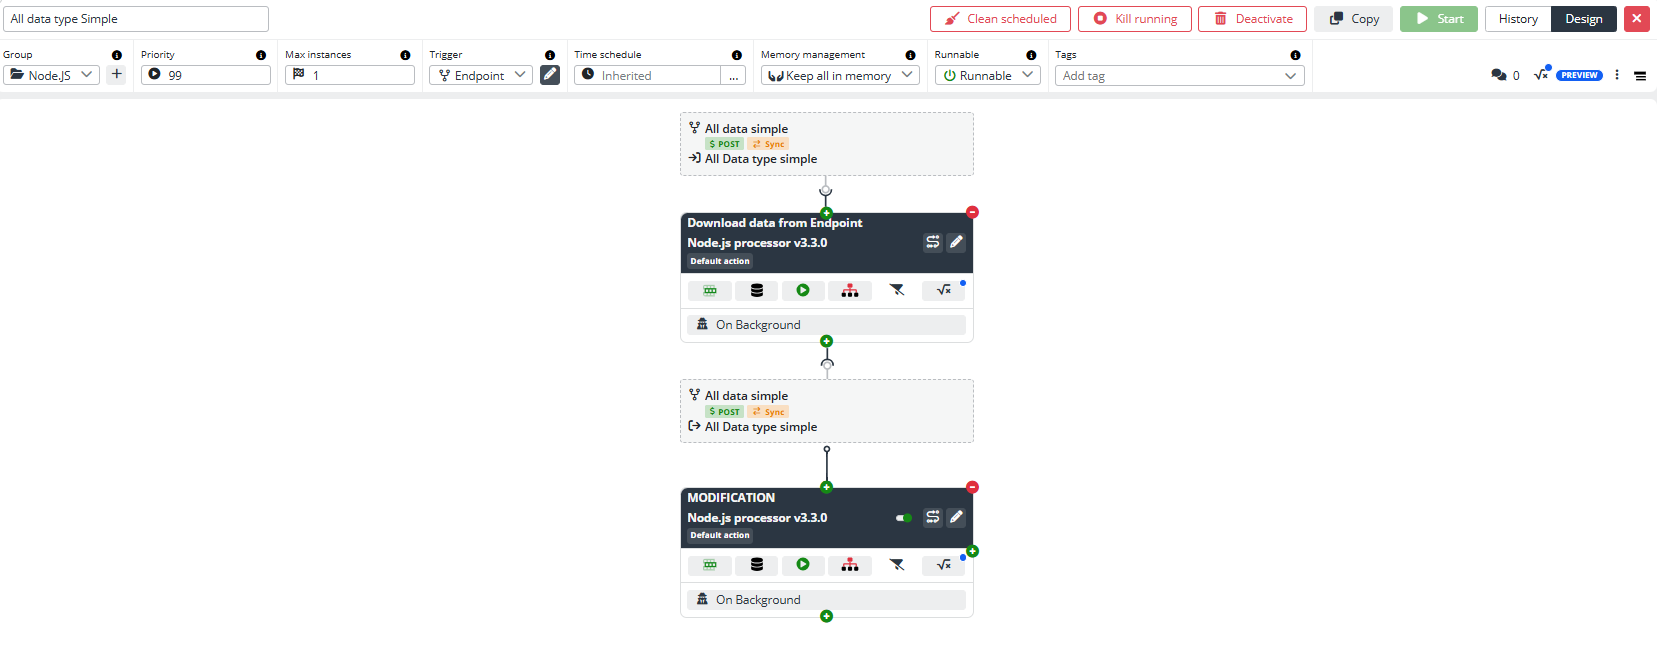
Close the step. The detail of the task can look like follows:
Now we have completed all the settings. Let's close the step and Publish the Task. But that's not all. In order to run this task, we will create another task in which we will add values for all types of variables used in the first task.
Endpoint for running All Data Task Configuration
Add a Task: Endpoint for running All Data Task
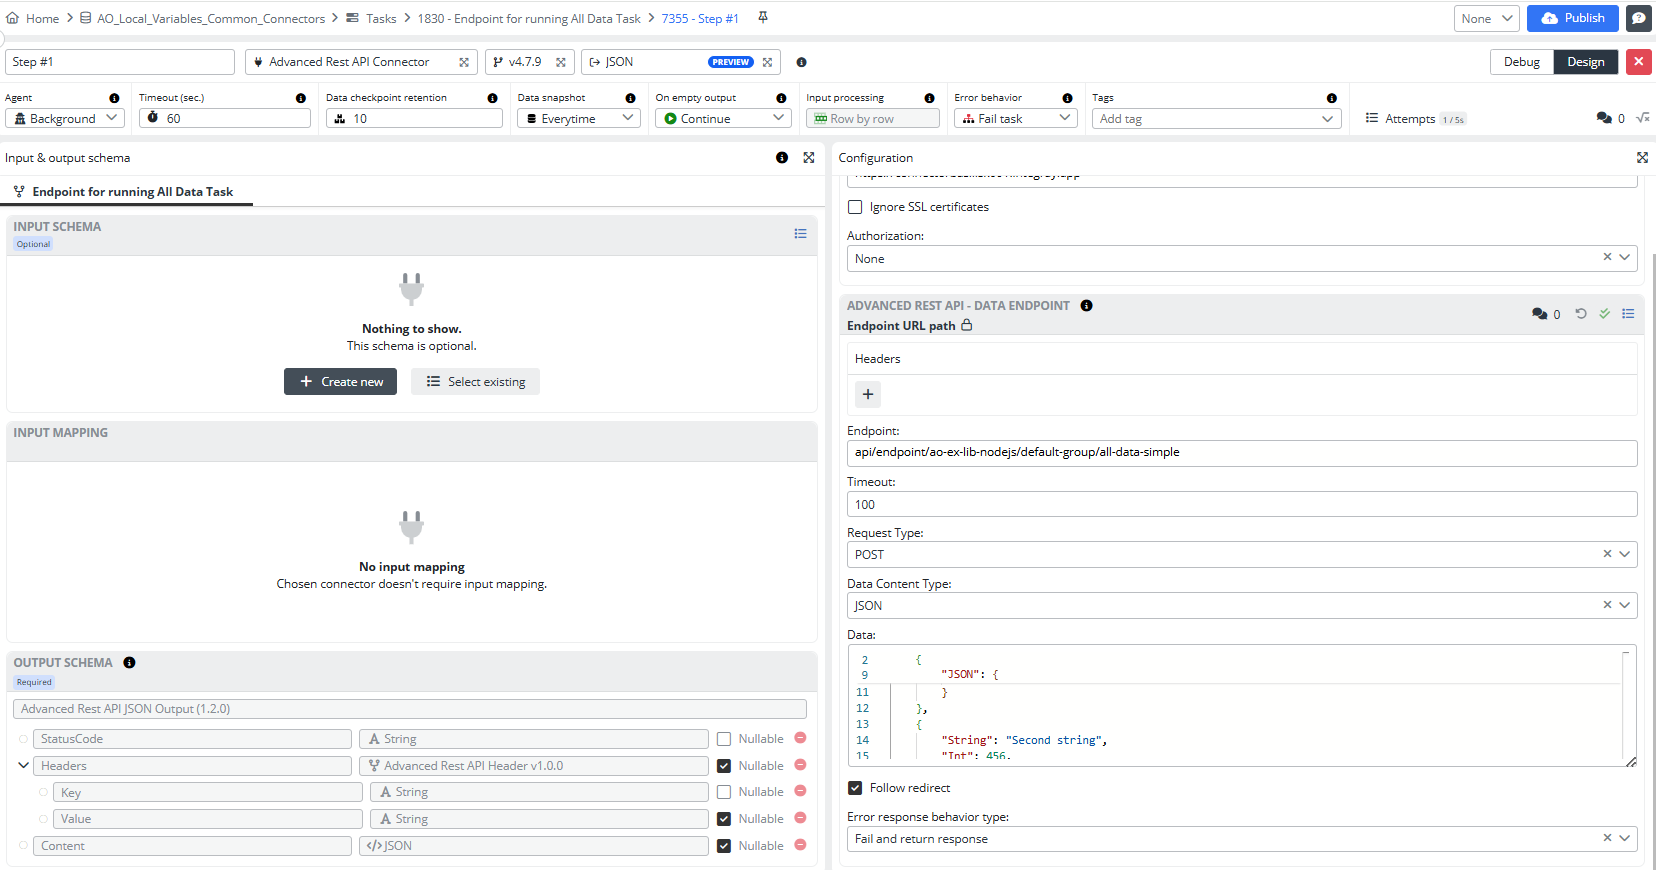
Add a first Task step:
- Connector: Advanced Rest API Connector
- Connector action: JSON
Fill in the Advanced Rest API - Data Endpoint configuration fields:
Endpoint- Endpoint URL pathTimeout- 100Request type- POSTData Content Type- JSON
[
    {
        "String": "First string",
        "Int": 123,
        "Bool": true,
        "Date": "2024-09-19T10:45:00Z",
        "Base": "BaseValue",
        "Double": 123.45,
        "JSON": {
            "key": "value"
        }
    },
    {
        "String": "Second string",
        "Int": 456,
        "Bool": false,
        "Date": "2023-12-01T12:00:00Z",
        "Base": "AnotherBaseValue",
        "Double": 678.90,
        "JSON": {
            "anotherKey": "anotherValue"
        }
    }
]
Error response behavior type - select from the dropdown list
Save the configuration.
Fill in the Advanced Rest API - Connection configuration fields:
Base URL- base URLAuthorization- None
Save the configuration.
The task is created; now, all that's left is to publish it and run it.
Result
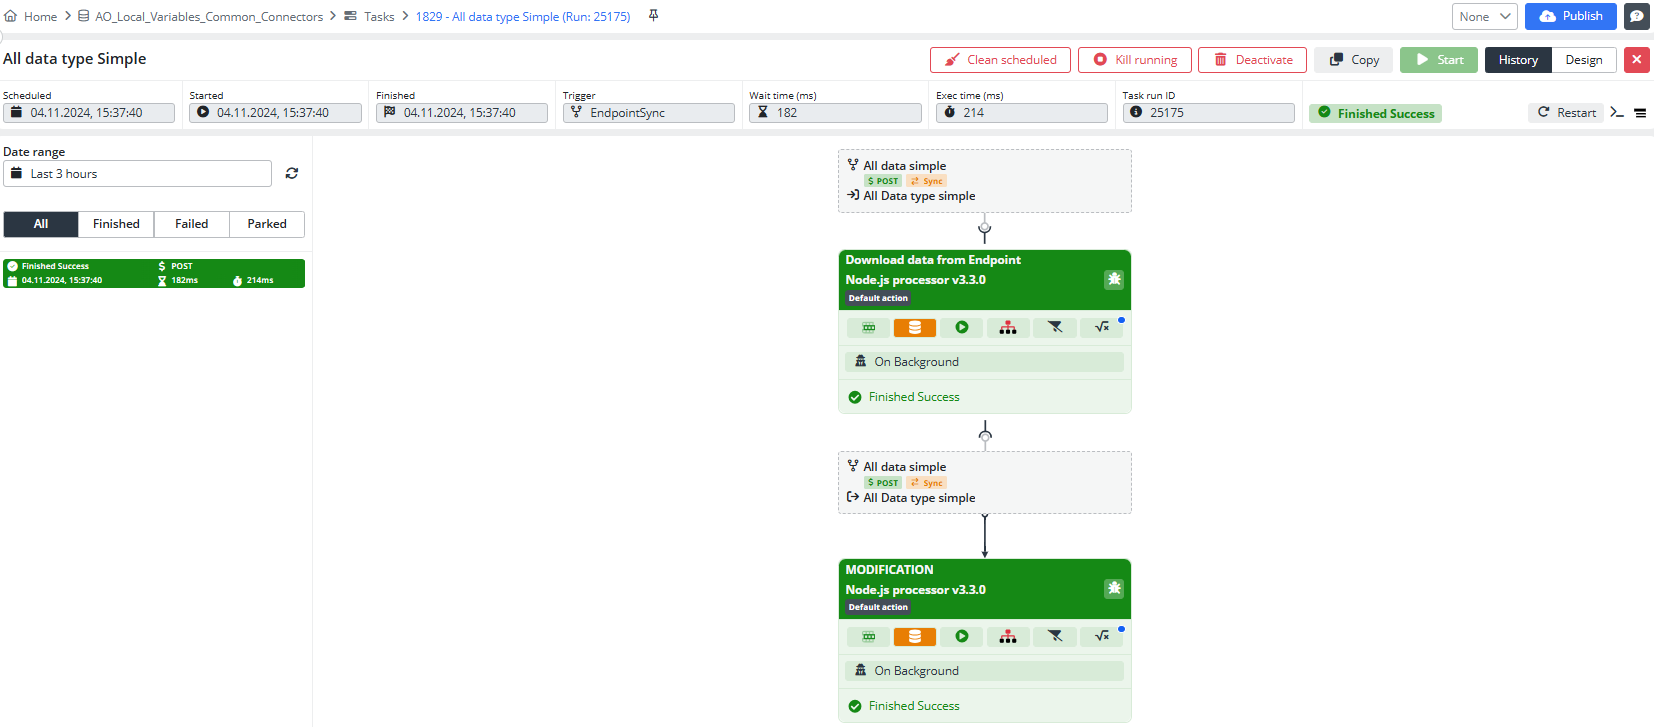
As a result, we have a successfully completed task Endpoint for running All Data Task.
But to see how Local Variables work, let’s go to the first created task. Open the history, and we’ll see that the task also completed successfully.
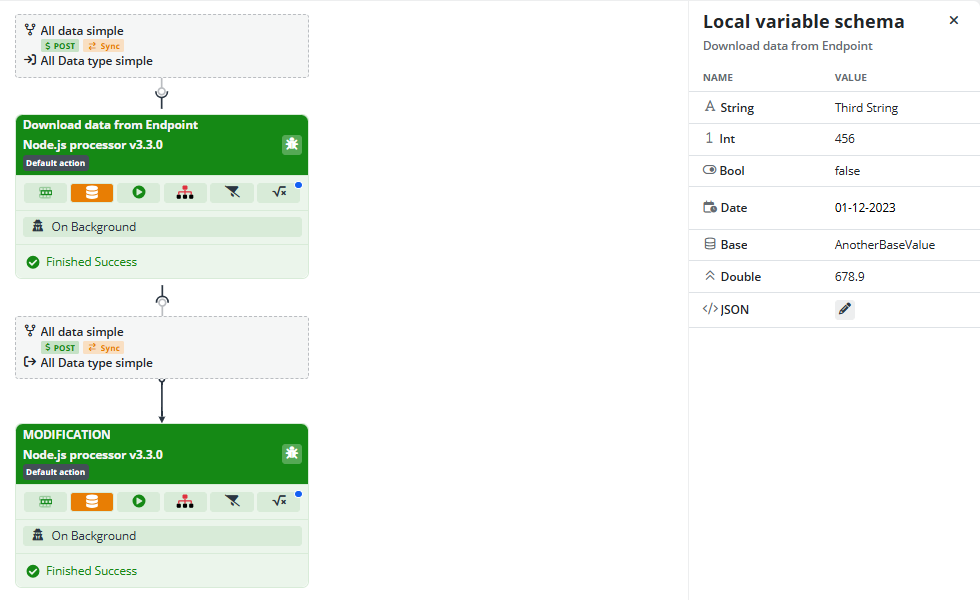
Click on the Local Variable icon for the first step, and we’ll see that we received input data for all data types except the string. The string value was not assigned, so it took the value from the Task’s Local Variable.
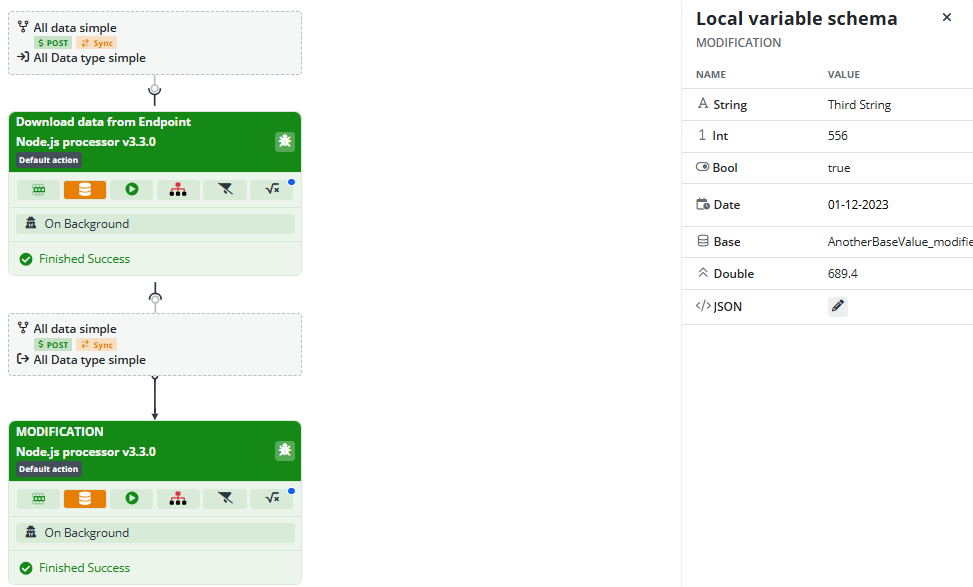
For the Local Variable of the second step, we see the modified input data, but again, the string value is taken from the Task’s Local Variable.
We can use input data (inputData) to create a new array of objects, where the fields of each object (String, Int, Bool, Date, Base, Double, JSON) take values from the corresponding fields in inputData.
This allows a simple transformation of input data, transferring values from one data structure to another while maintaining the same data types for each field.
Then, we can modify data as it’s being processed, which is useful for customizing and transforming input data.
Finally, we see that the values in the Local Variable schema have changed to those we specified in the Step configuration. If we disable Local Variables for the Step, we will get the values assigned to the Task’s Local Variables.
That's all from this example.


