Item create
In this example, we will guide you through the process of creating a new item on a specific board on the Monday.com using just two straightforward steps.
Prerequisites
To successfully configure the Monday Item Create connector, you must obtain two key pieces of information:
- the Api token
- the Board ID
You can acquire these details by visiting support.monday.com. The Api token serves as the authentication mechanism, ensuring secure communication between Integray and Monday.com, while the Board ID identifies the specific board where a new item will be created. Once these prerequisites are met, you can seamlessly proceed with configuring the connector.
Configuration
Add a new Task and name it Monday item create.
Add a first Task step:
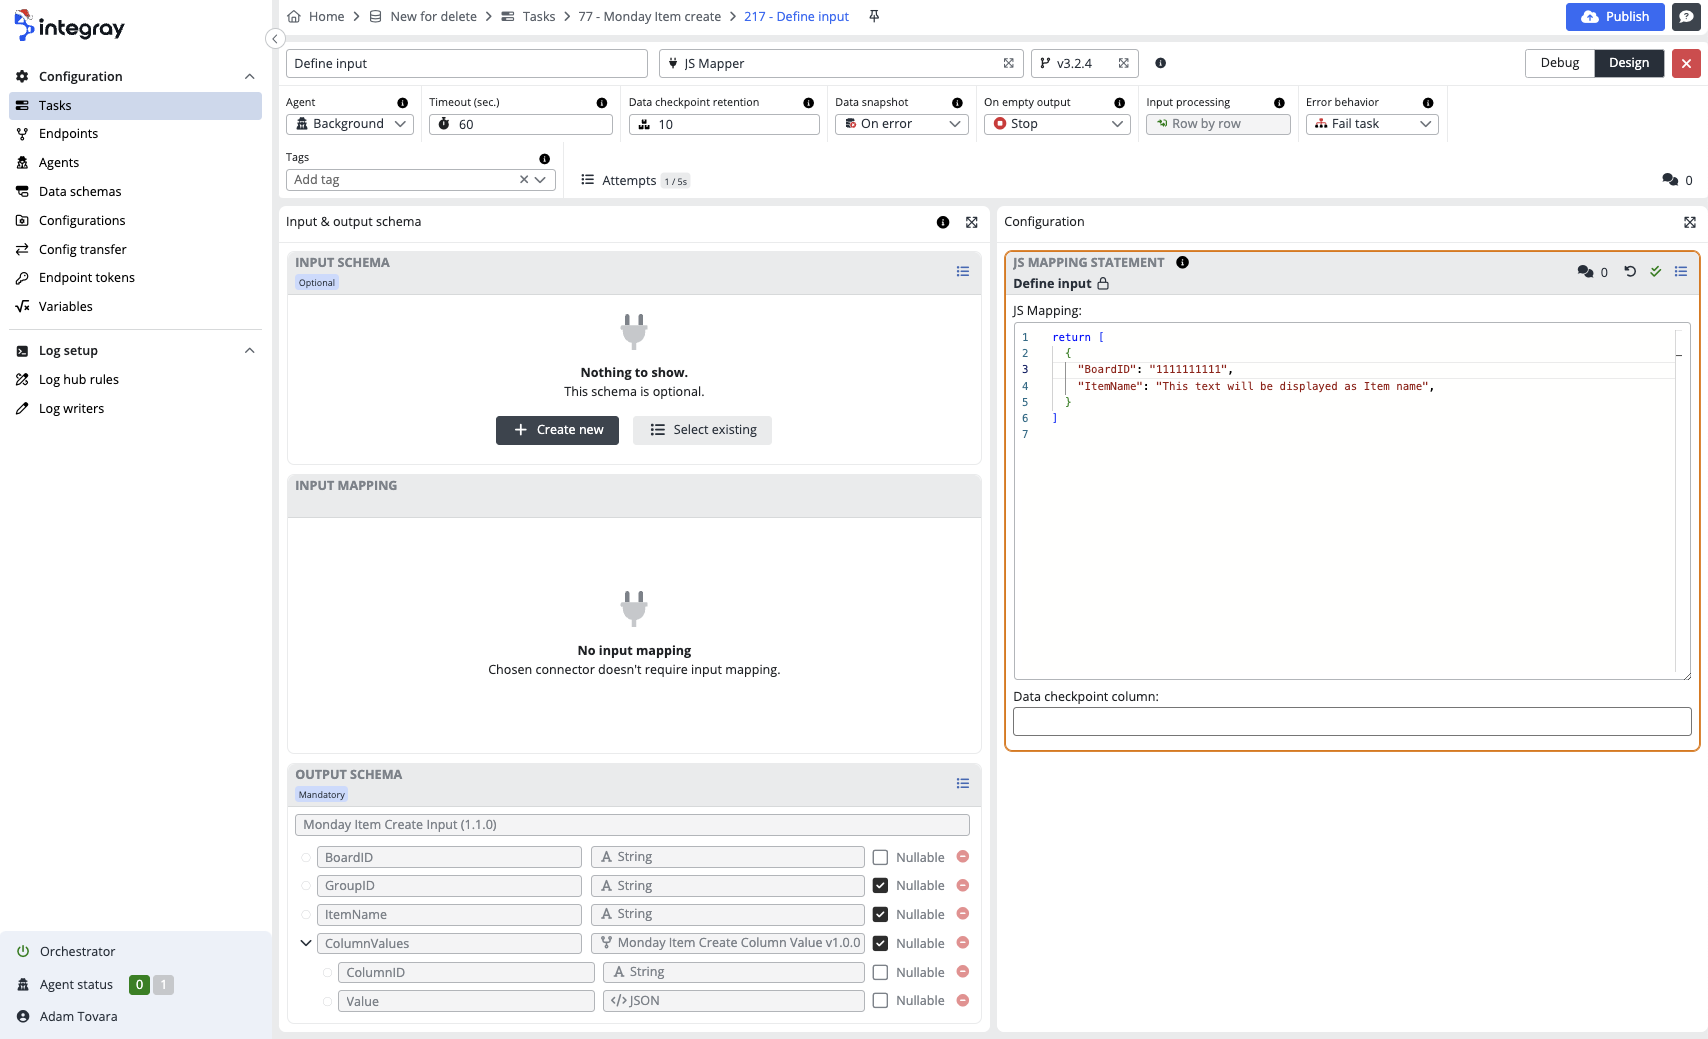
- Step name: Define input
- Connector: JS Mapper
Open the Task step editor by clicking the button with the pencil symbol.
Insert the following code into the JS Mapping statement configuration.
return [
  {
    "BoardID": "1111111111",
    "ItemName": "This text will be displayed as Item name",
  }
]
Adjust the configuration based on your own BoardID value.
Select the Output schema Monday Item Create Input.
The setting of the first step can look like follows:
Add a second Task step:
- Step name: Create item
- Connector: Monday Item Create
Open the second step's Task step editor by clicking the pencil symbol button.
In the configuration section, insert Api token.
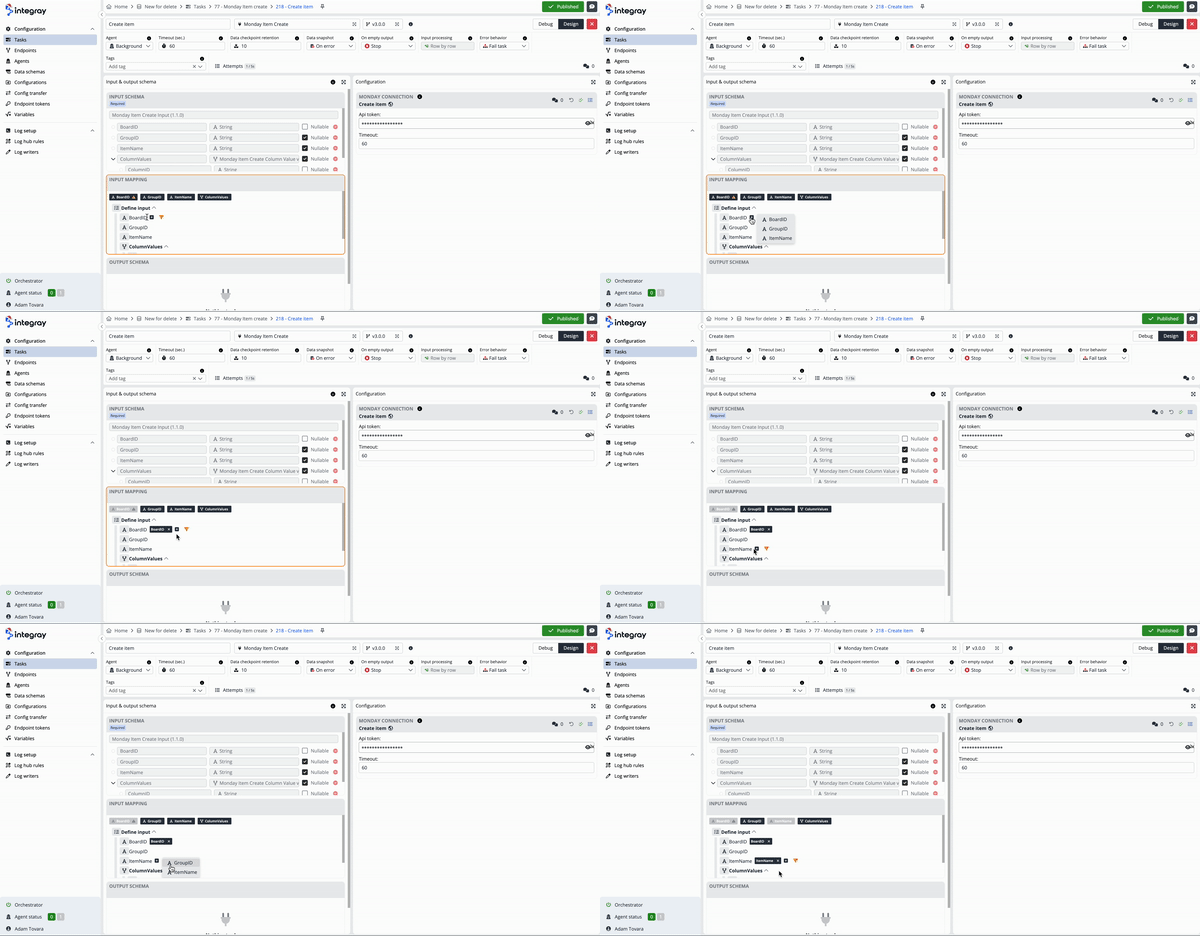
In the Input mapping section, map the values BoardID and ItemNamefrom the input.
Press the Publish button.
Execute the task.
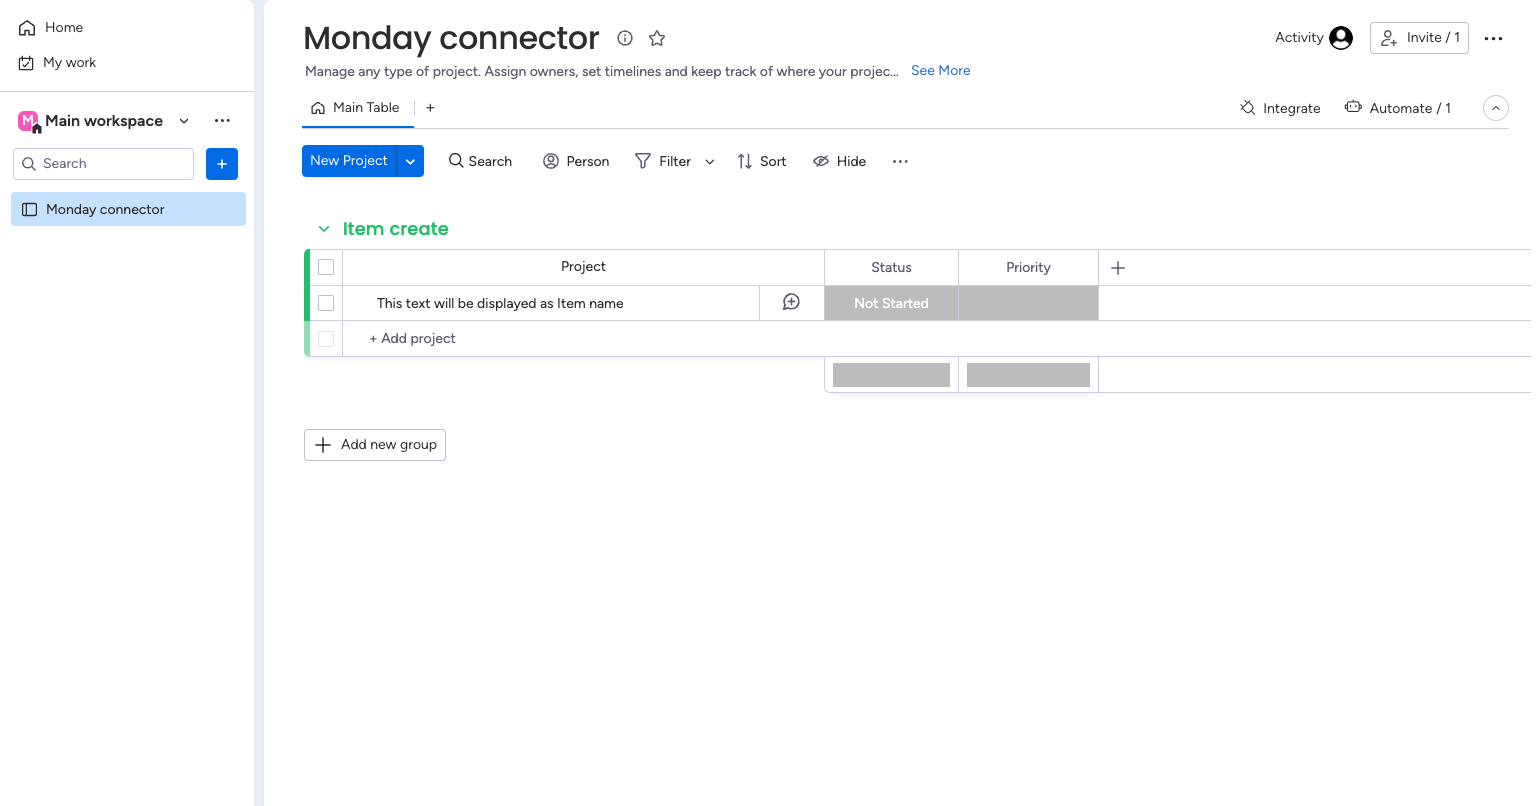
Result
Upon successfully executing the task, a new item is seamlessly generated within the specified Monday.com board. This outcome exemplifies the effective integration capabilities, showcasing the immediate impact of utilizing this connector in your workflow. The clarity in the result ensures you can confidently incorporate the Monday Item Create connector into your processes, streamlining item creation and enhancing collaborative efforts within the Monday.com work management platform.


