Design view
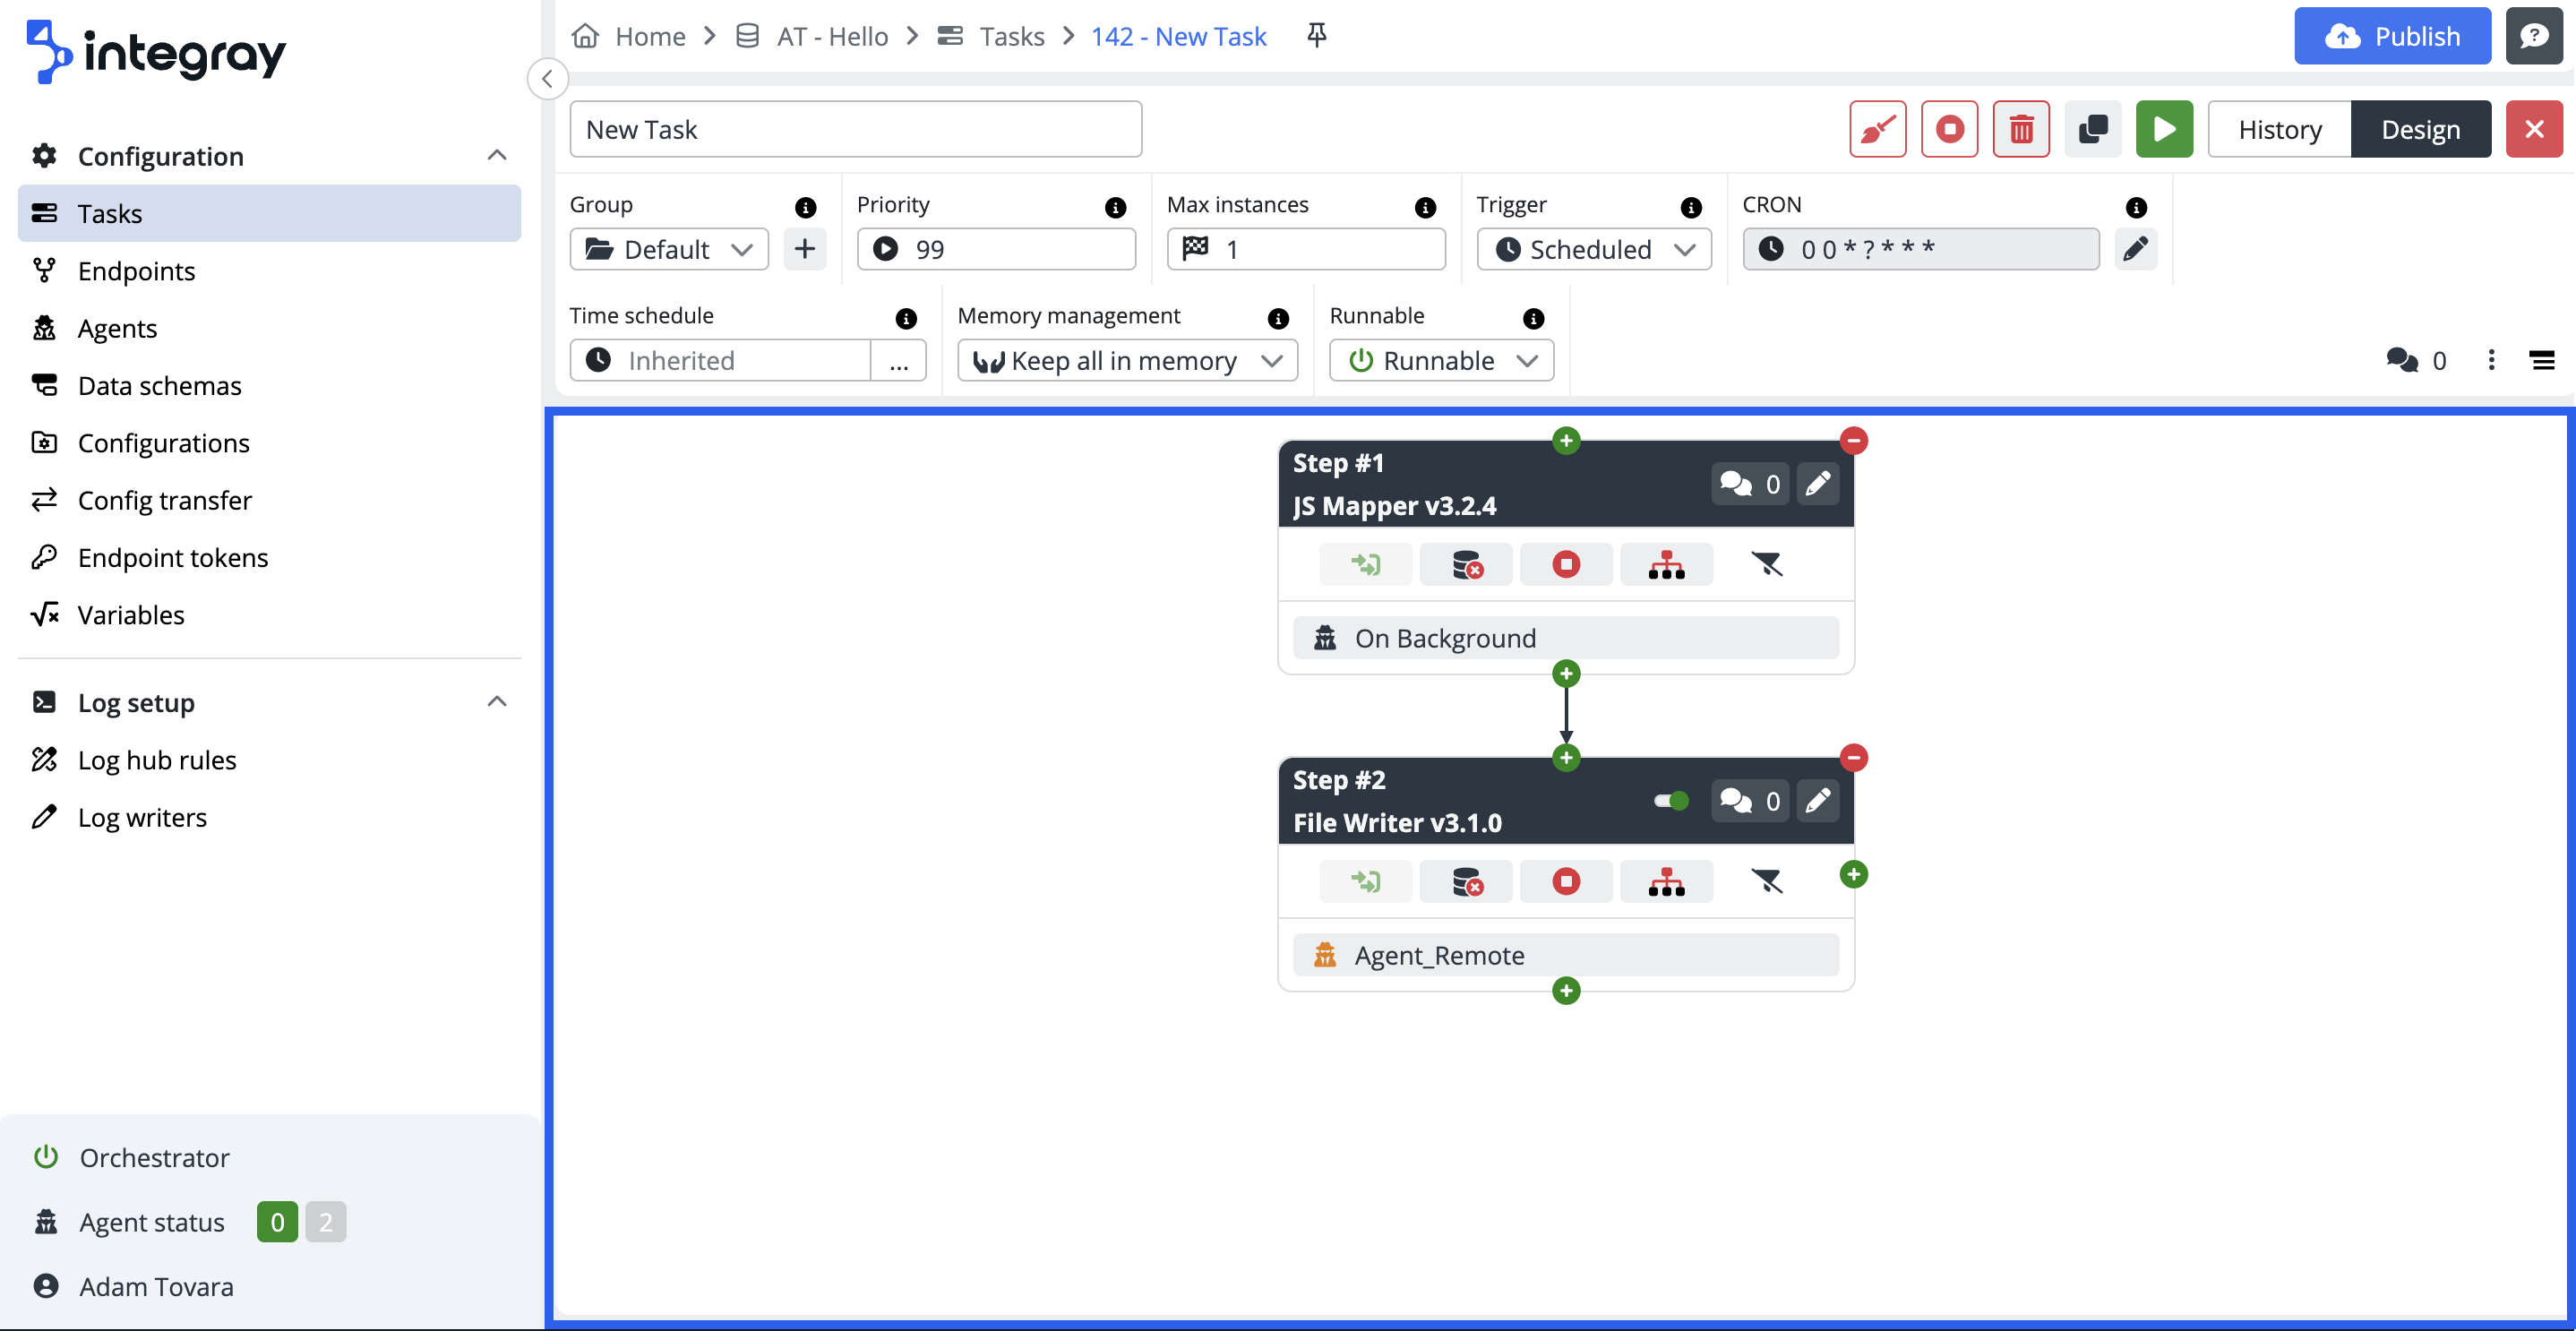
The design view is the default view for the task and is active when a new task is created. This view is used to configure the task and the task steps.
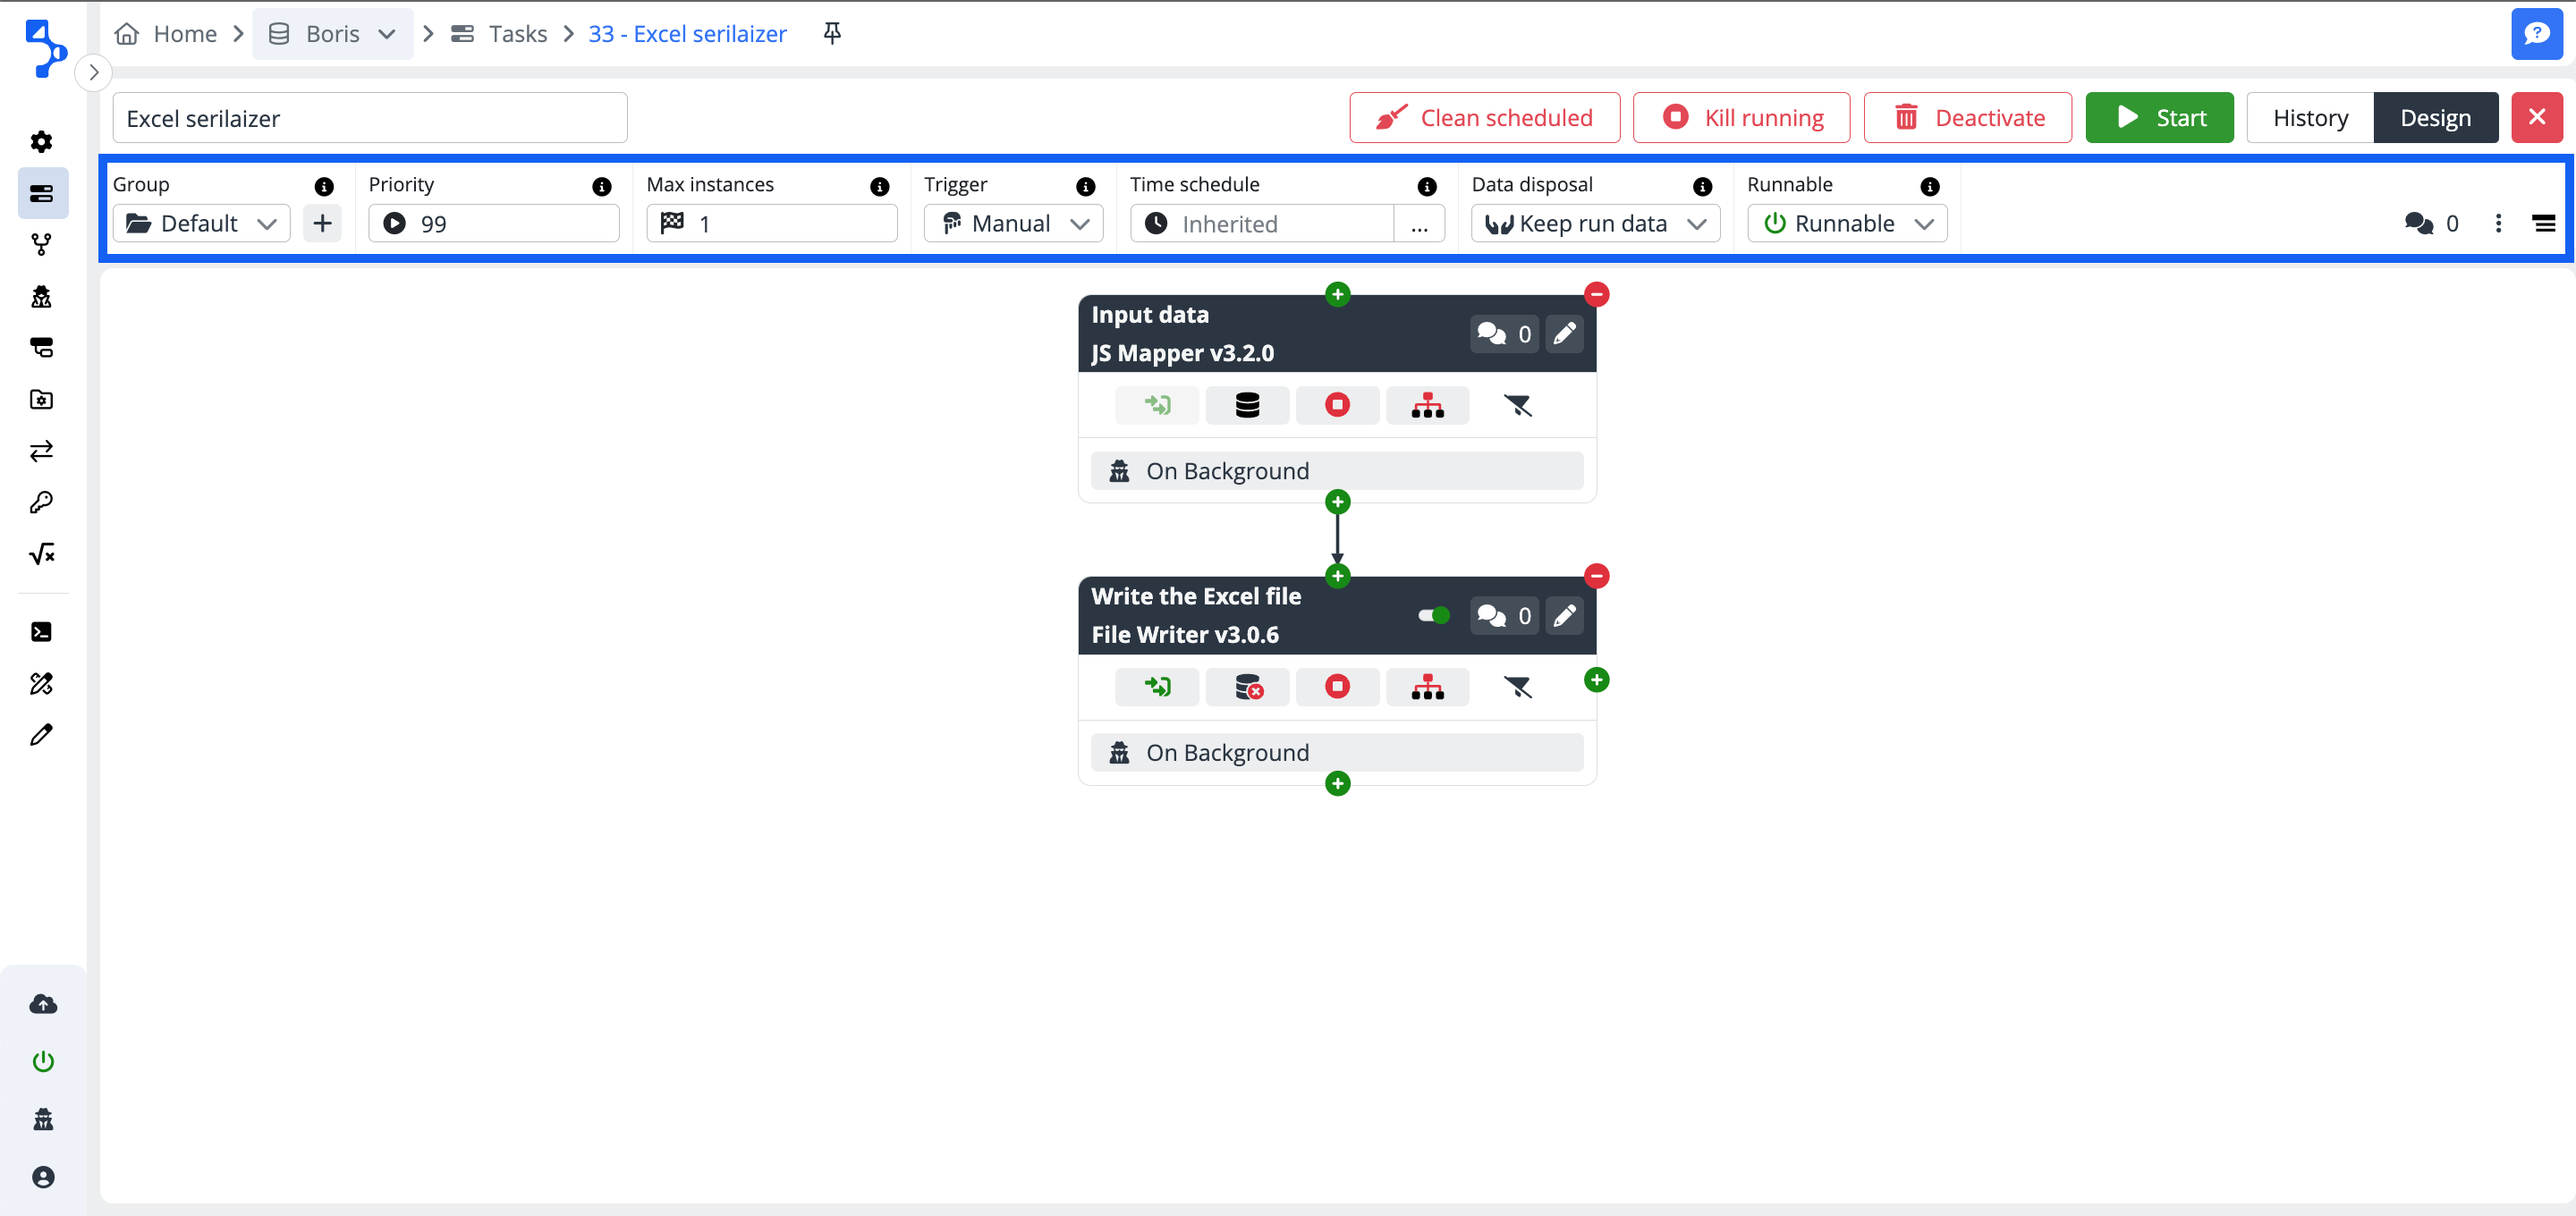
The Design View is divided into three main sections: the Task header menu, previously described in the preceding chapter; the Task header design menu, offering configuration options for the entire task; and the Task design editor, a dedicated workspace showcasing configured steps of the integration task.
Task header design menu
Group
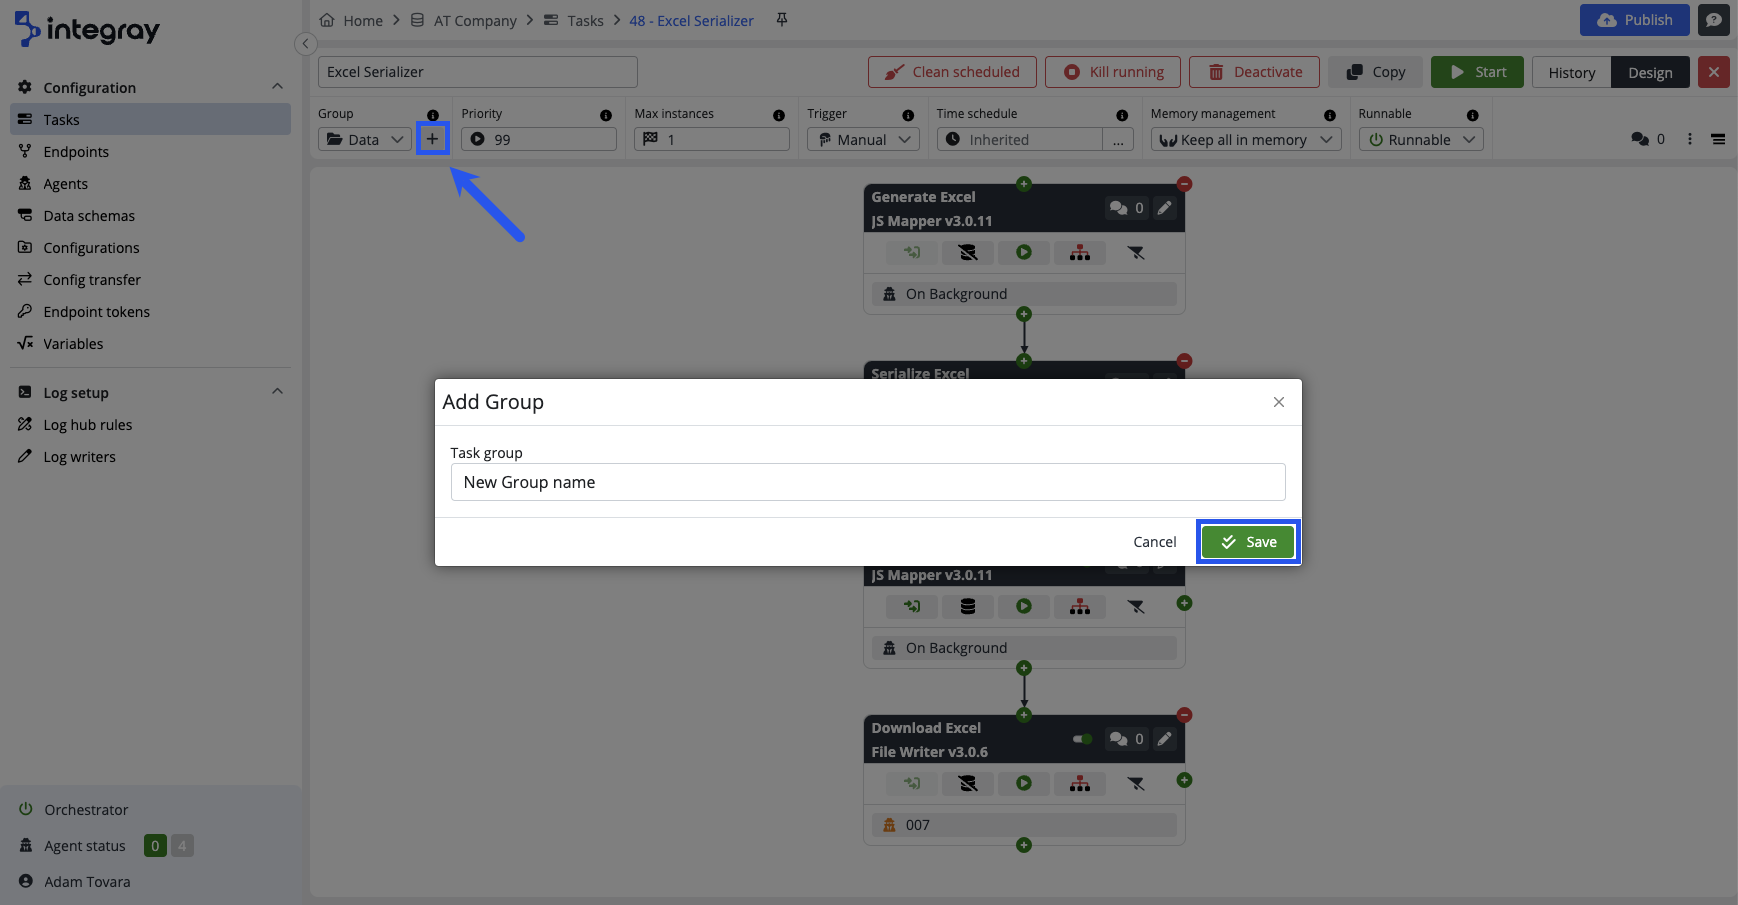
Tasks can be arranged into Groups. When you create a new task, the platform offers you the default group. Select the relevant group you want to group your task by from the list. If the group does not exist yet, create a new one. Click the button + plus and add a new task group in the pop-up window and save. The new group will be selected and will be added to the list of existing groups.
Priority
The tasks in the platform are processed/integrated in parallel task runs. You can run maximum parallel task runs based on your purchased license. For the details please see the platform webpage https://integray.com. If you run at the time more task runs then allowed maximum parallel task runs defined by the license, the priority plays an important role. The integrations are processed according to the set priority. Each Company must have a set default priority. Every integration Task configured within the Company does have the option to set its own priority which has precedence before the Company setup. The task priority defaults from Company setup.
Priority precedence
Priority value range: 1 - 99. Lower value has precedence.
Max instances
Specifies the maximum of concurrently running instances on this task. If the queue of scheduled task runs is long and processed slowly, check the license parameters as well.
Trigger
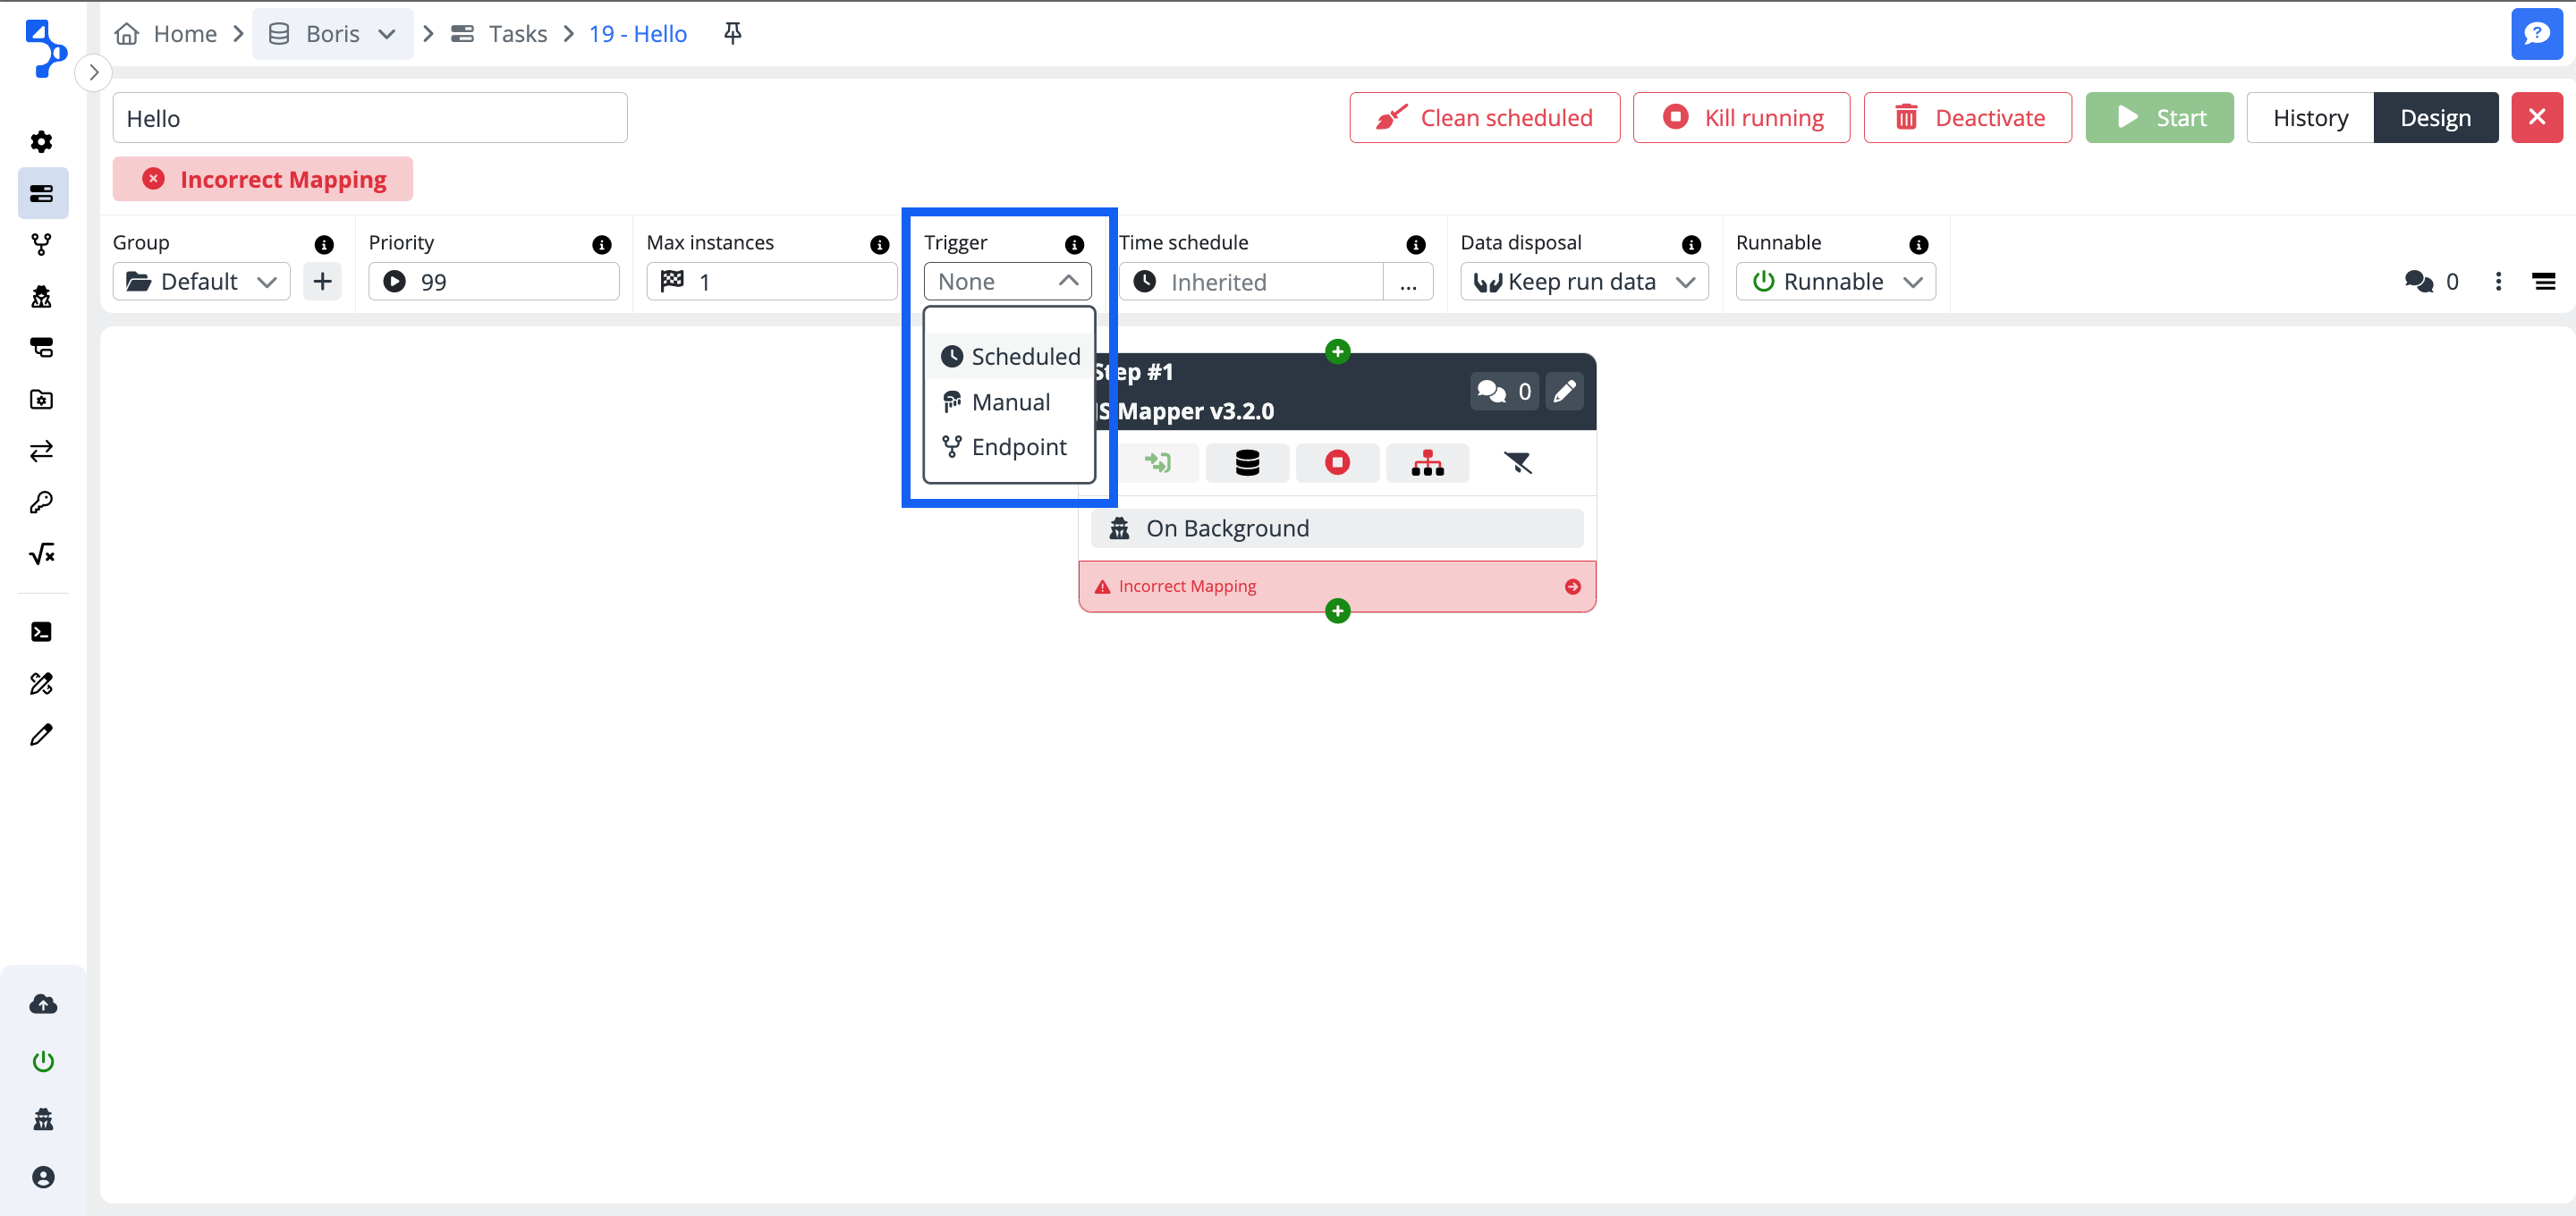
Set up the trigger to start the task. The trigger is displayed on the Task list under the label Trigger. You have three options to initiate the task:
-
Manual - You must start the task manually using the Start button.
-
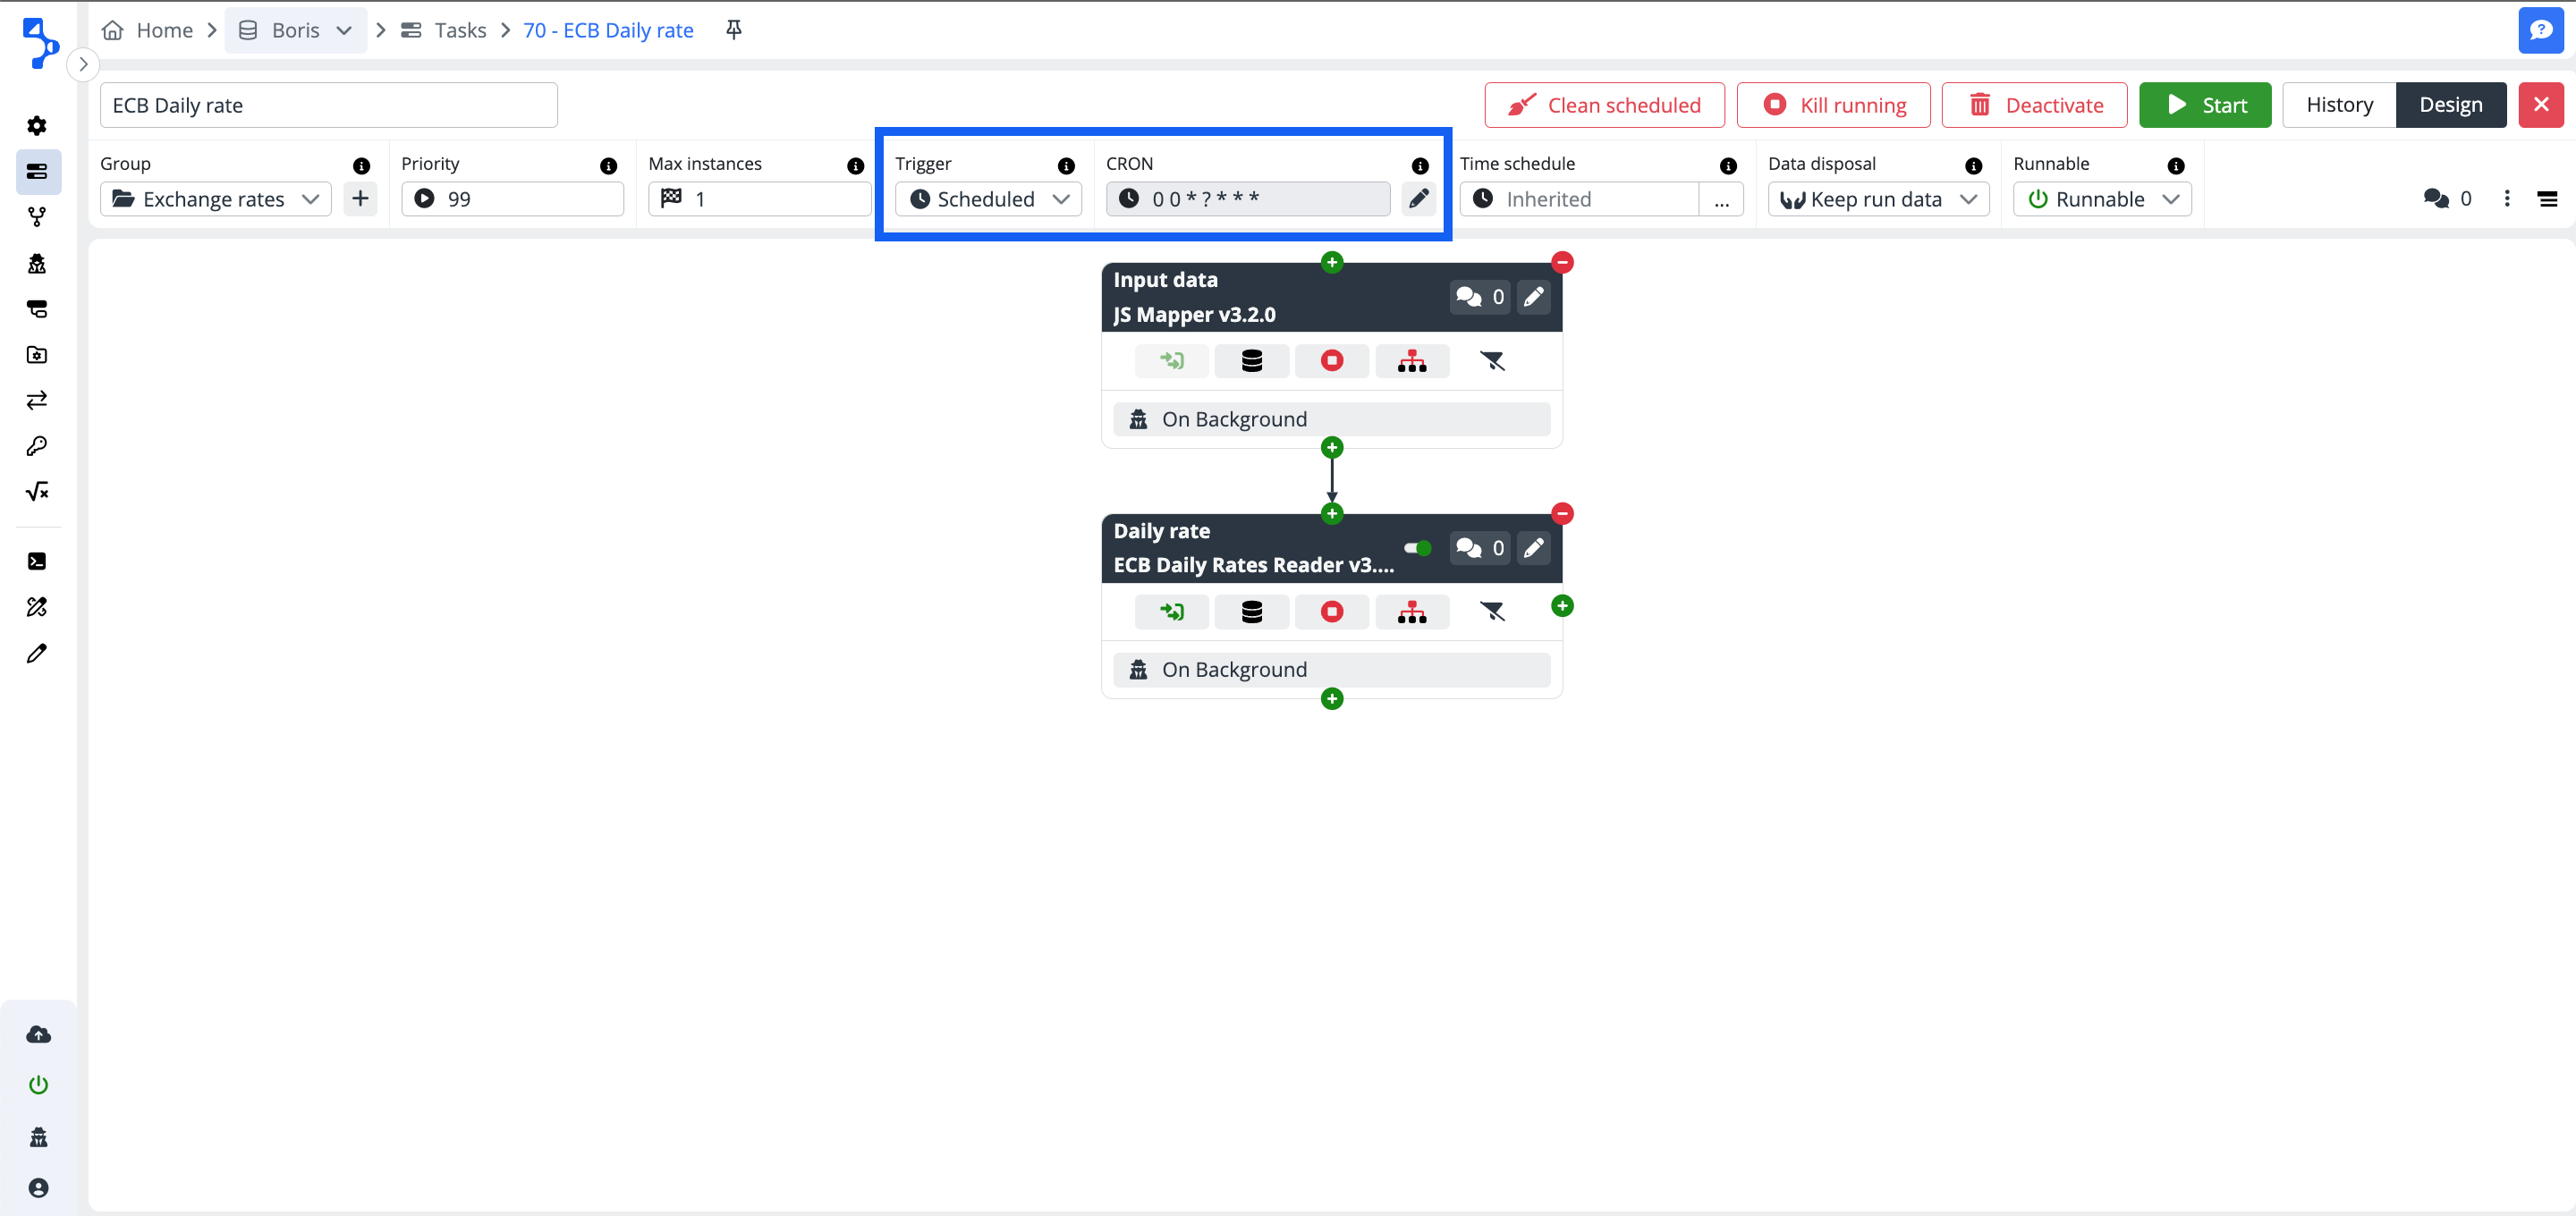
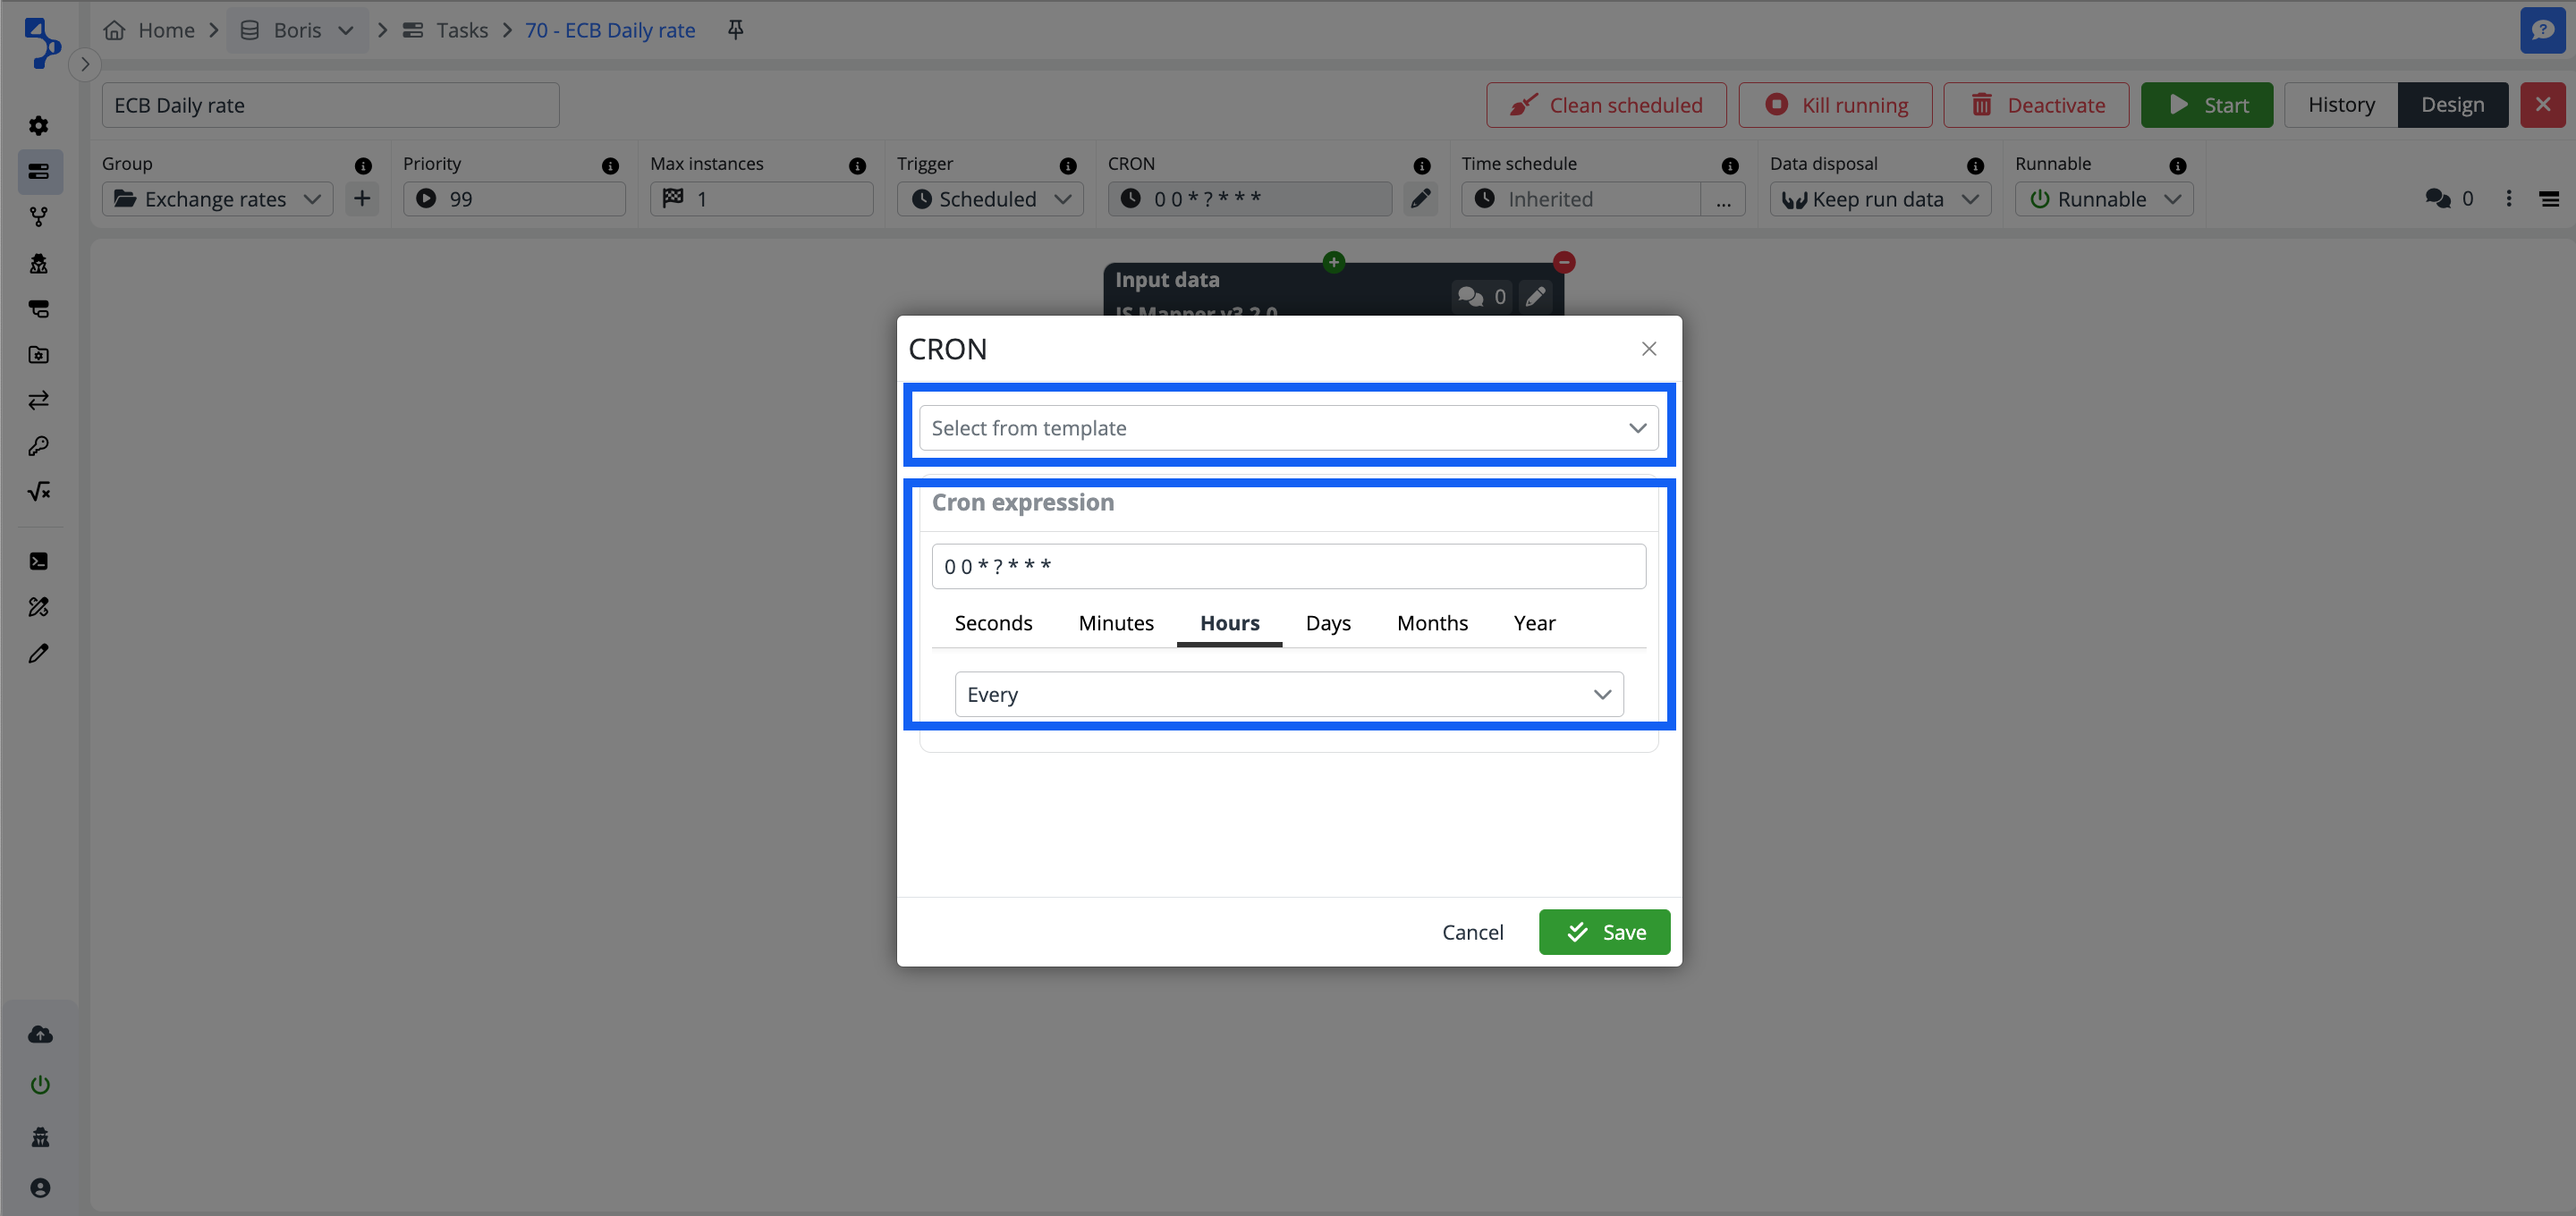
Scheduled - You must schedule the task using the CRON definition. If you select the trigger scheduled an additional field to enter the CRON definition will be displayed next to the Trigger combo box. CRON wizard supports the user setup.
-
CRON - CRON is a job scheduler for jobs that should run periodically at fixed times, dates, or intervals. Click the pencil button and open the CRON wizard to set the schedule for the task execution.
Expression Meaning 0/30 * * * * ? Fire every 30 seconds 0 0/2 * * * ? Fire every 2 minutes 0 0 12 * * ? Fire at 12pm (noon) every day 0 15 10 * * ? Fire at 10:15am every day 0 15 10 15 * ? Fire at 10:15am on the 15th day of every month You also have an option to select an option form available template settings and use it or select, modify to your needs, and use it.
For more information and examples see the quarz scheduler documentation or cron expression generator site.
Option Random
CRON in Integray is enhanced and offers an option Random for specified time units. This option randomly (with the time unit where you use the random setting) triggers the scheduled start. You will find versions:
Random,Random between,Random day of the month between, andRandom day of the week between. The benefit of the random options is the ability to start the integration task runs at different times and optimize the performance.Time zone setting
CRON always respect the Time zone settings in Application Settings.
-
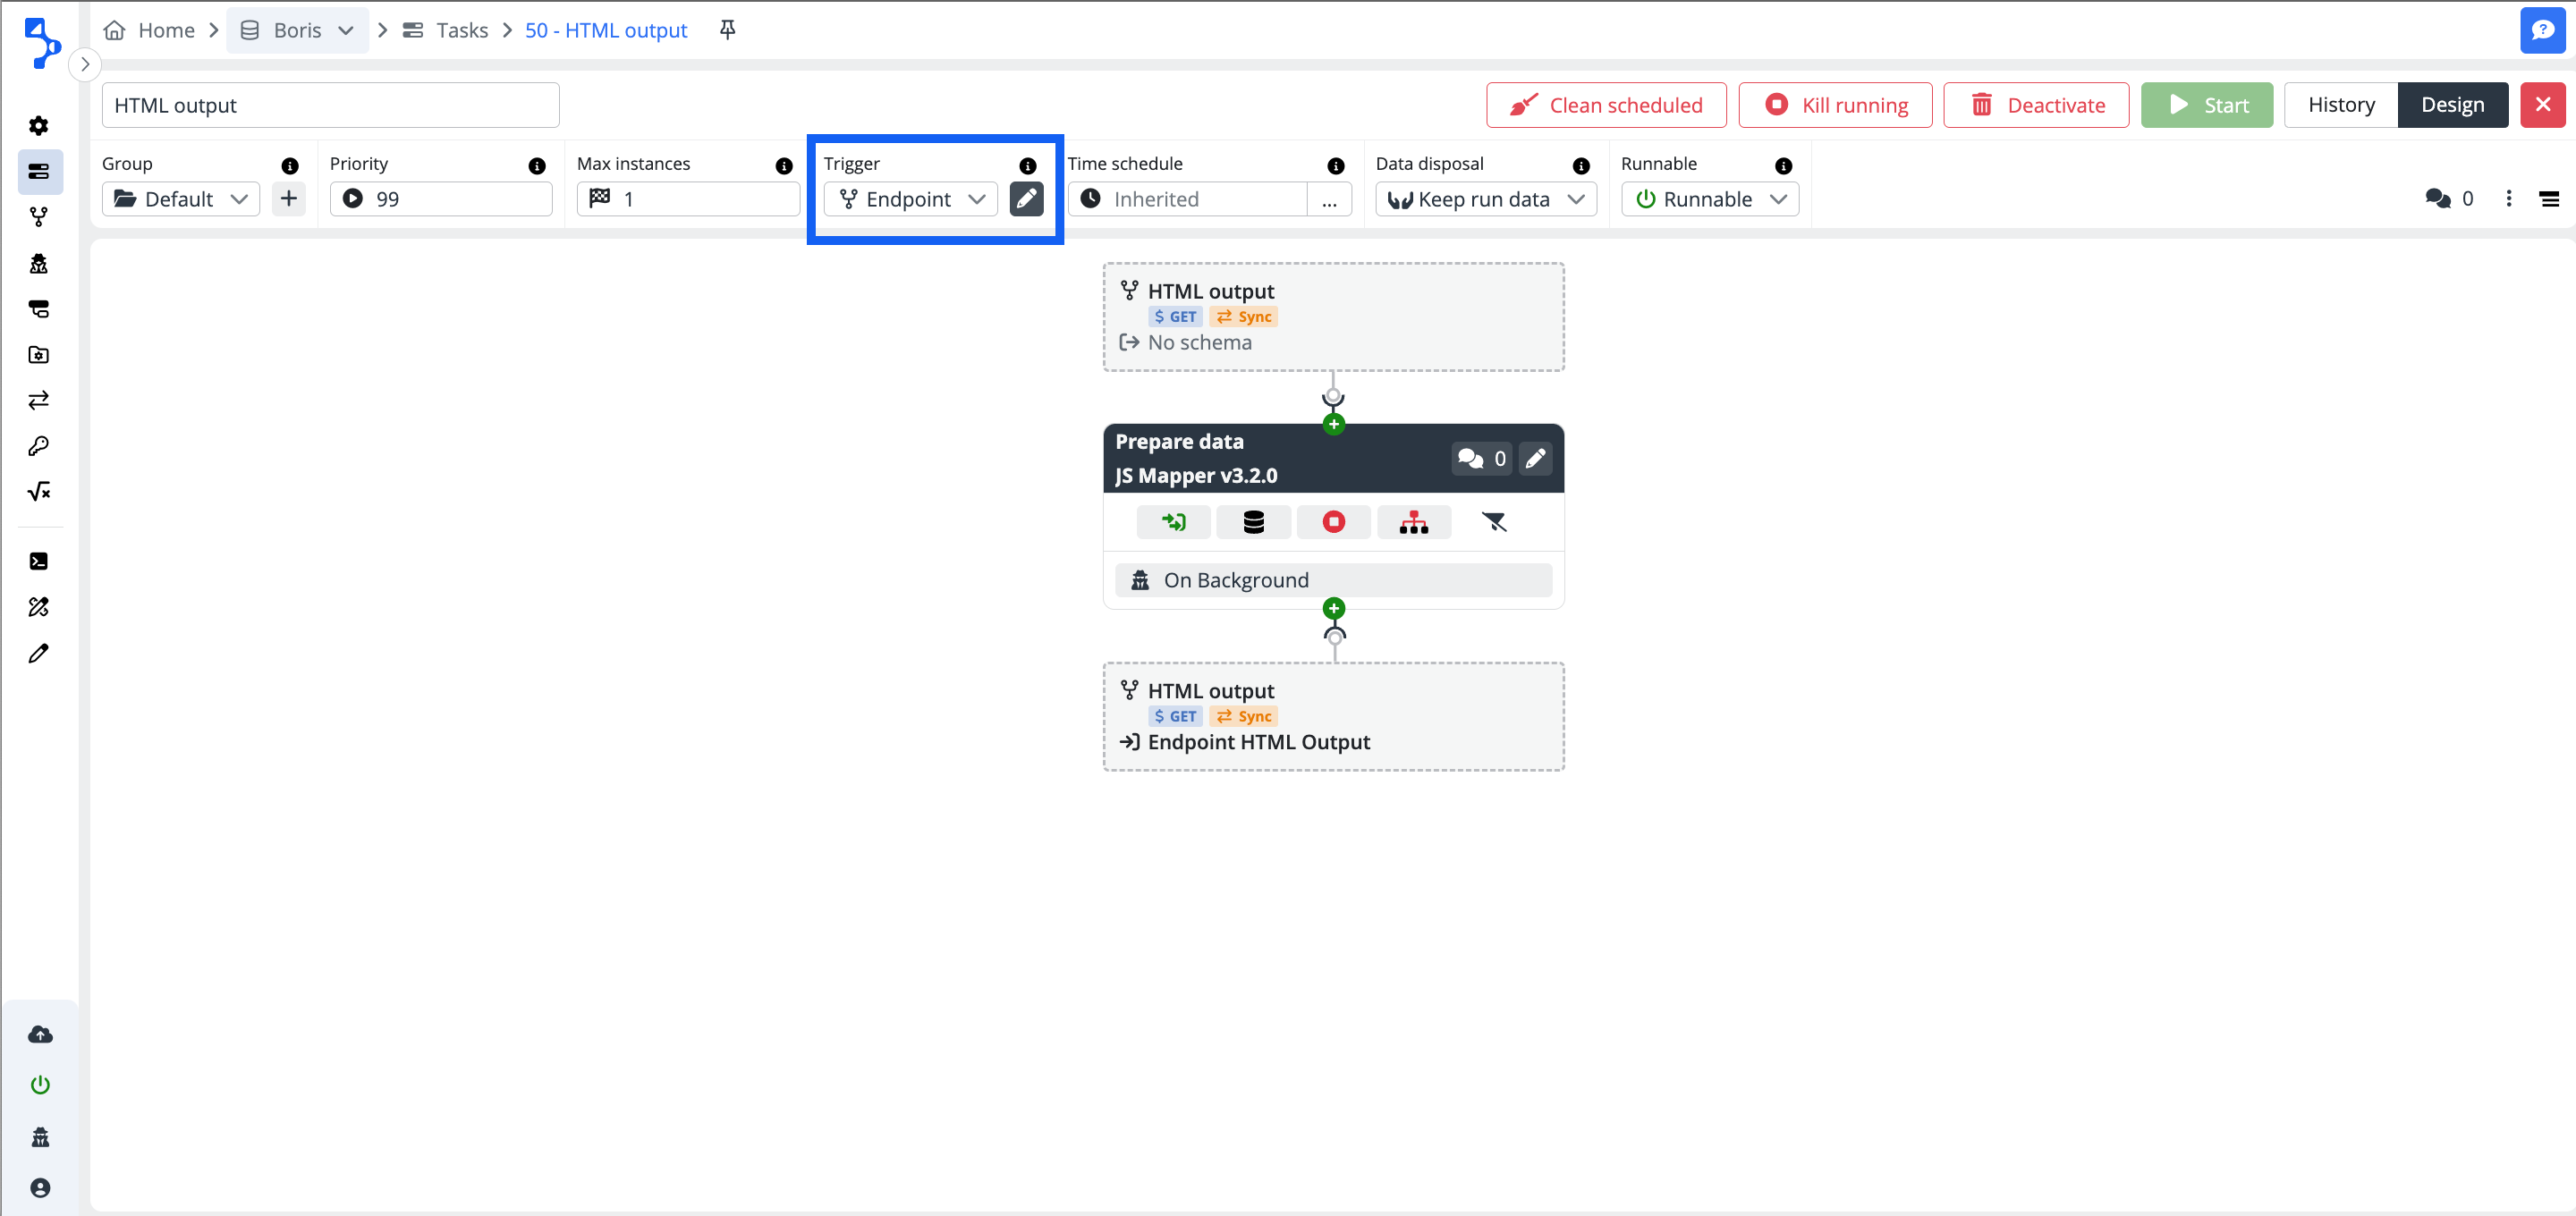
Endpoint - The task set to start by endpoint data availability.
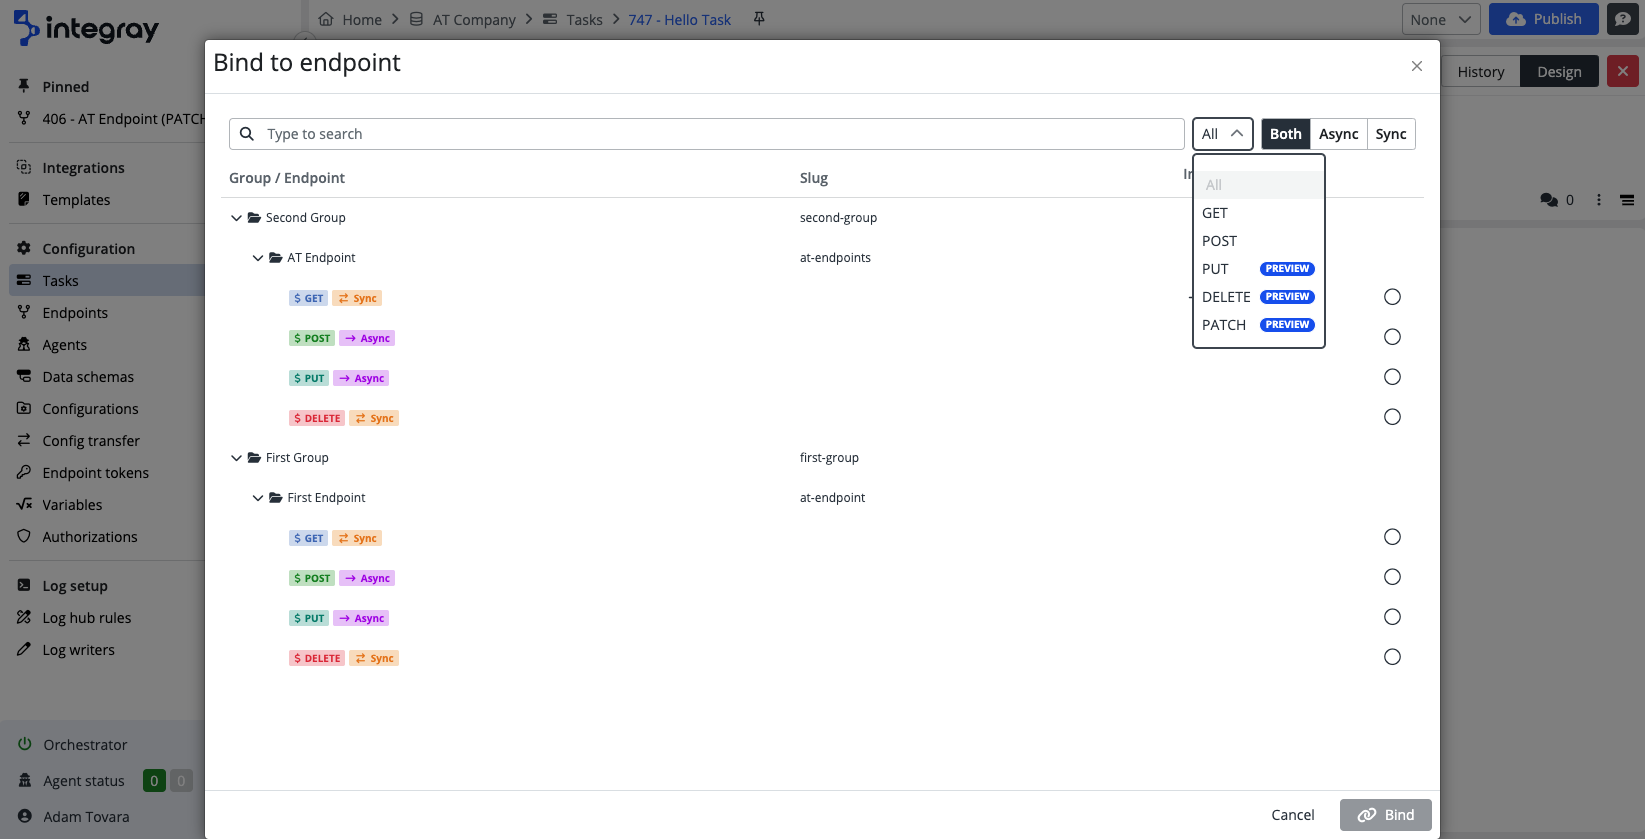
The task needs to be bound with the existing endpoint. After selecting the option endpoint, a modal dialog window Bind to endpoint will be displayed. The modal window contains the available configured endpoints for the respective company. In case the list of the endpoints is extensive, the set of built-in filters and full-text search are available to find and select the correct value.
The built-in filters: You can filter based on the HTTP method (
AllorGET,POST,PUT,PATCH,DELETE). The filters:AsyncSyncorBothare filtering based on the task run start.The trigger displayed on the Task list - GET in case of the GET method or POST in case of the POST method and so on for other HTTP methods (PUT, PATCH, DELETE).
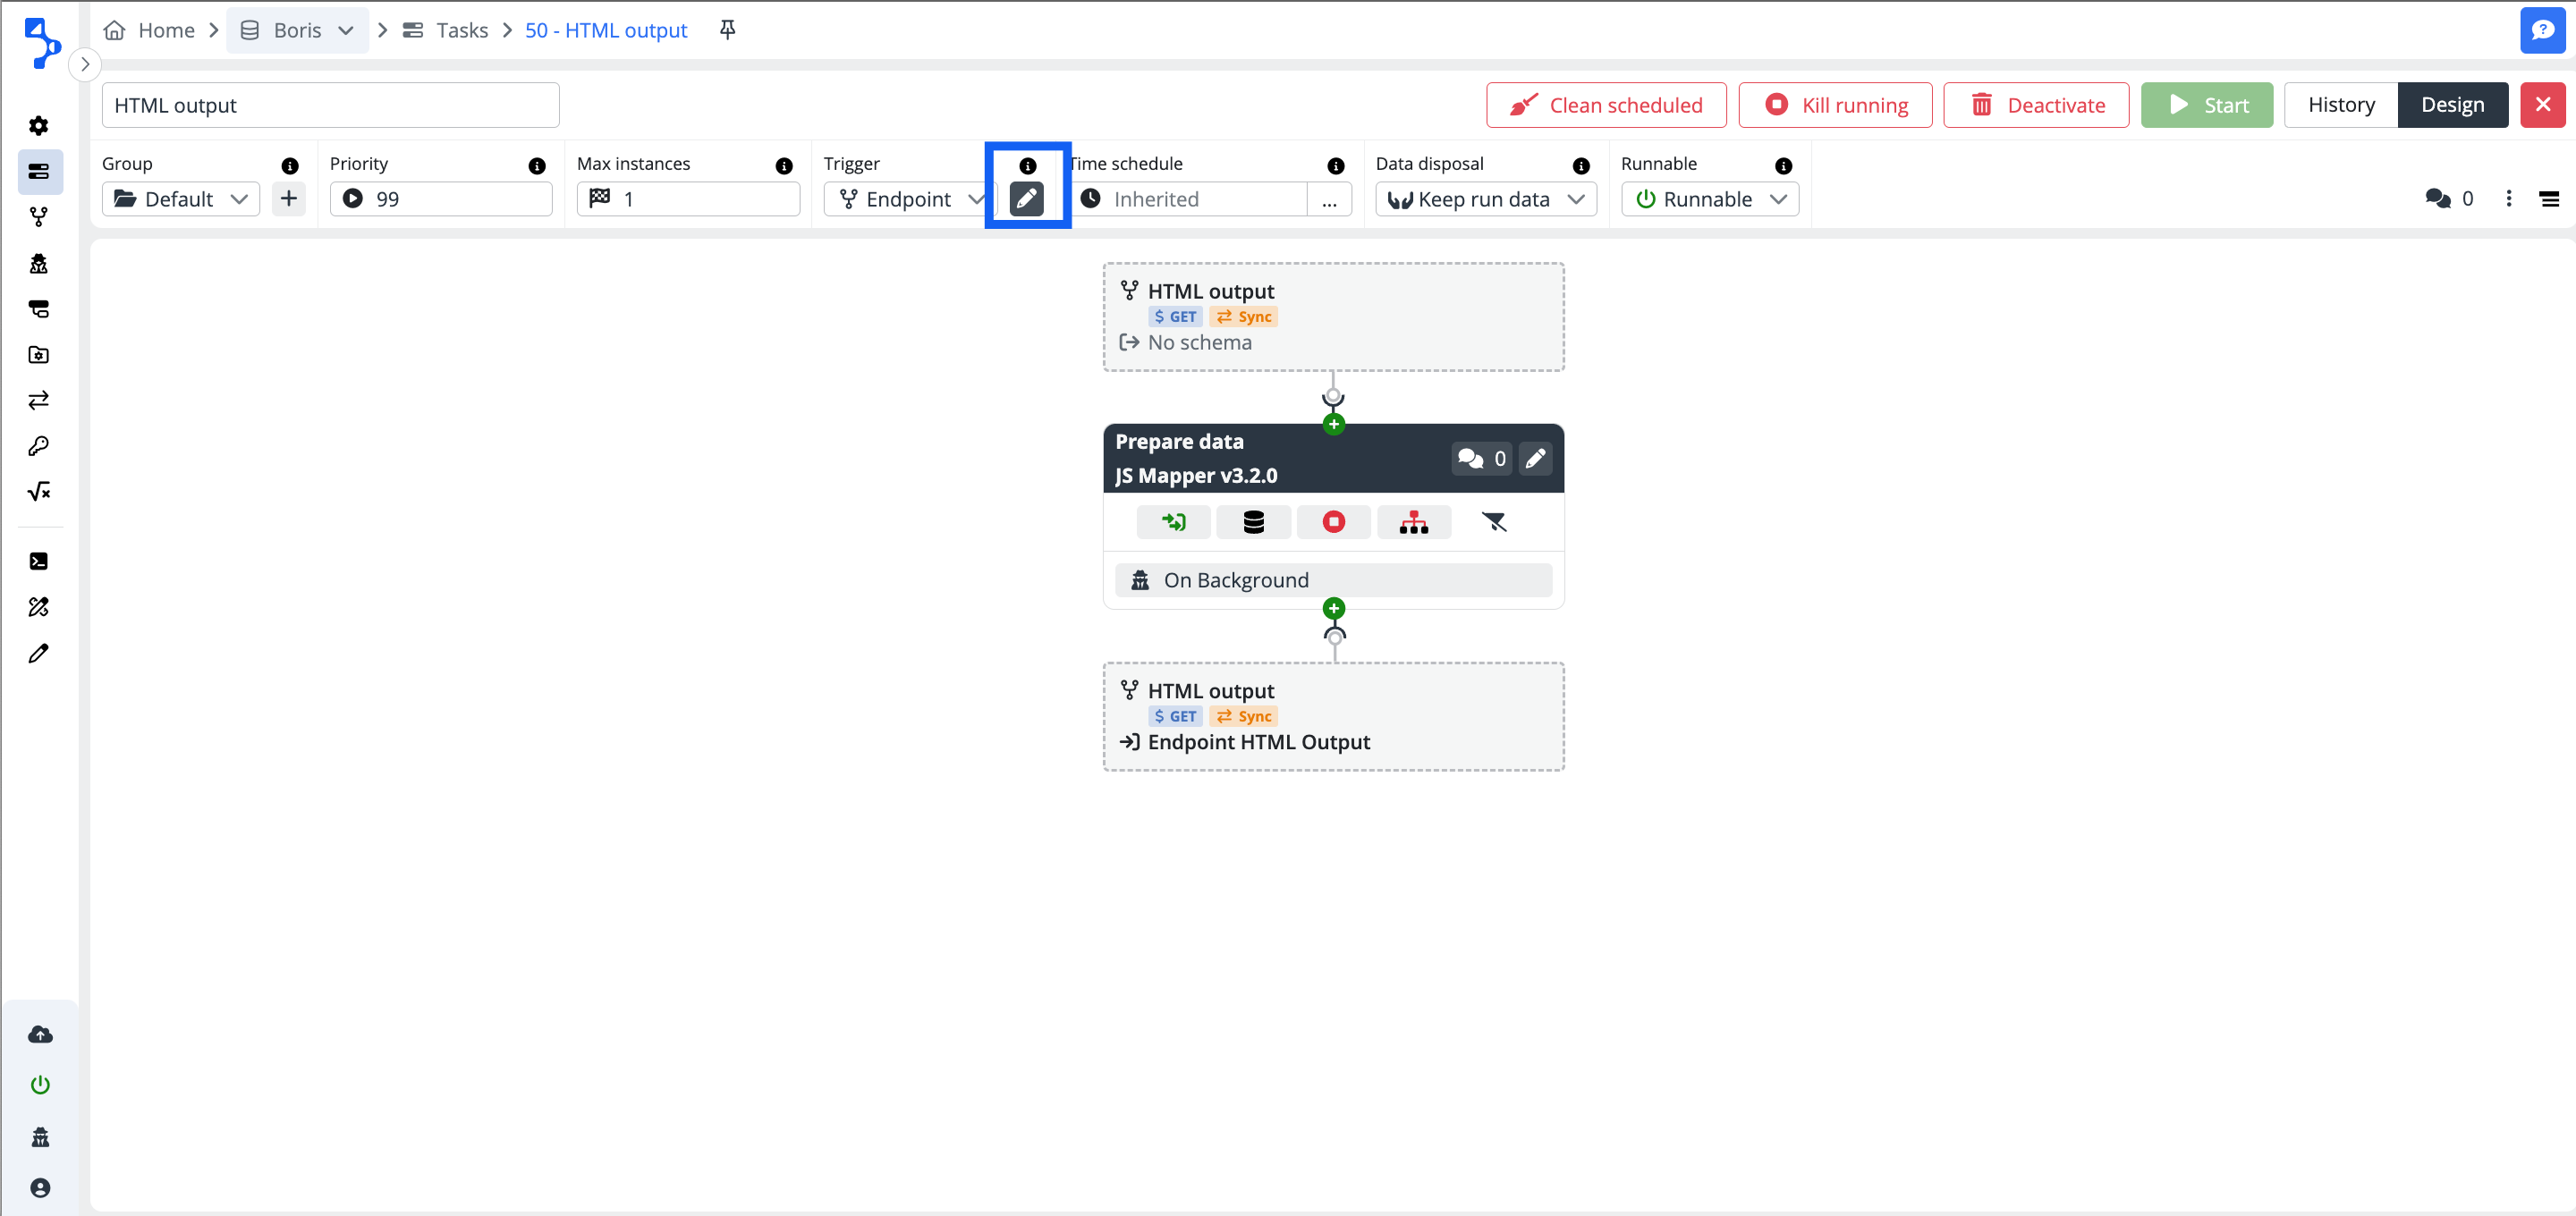
In case, there is a need to access and edit the selected endpoint directly, click the pencil button to the right of the combo box Trigger.
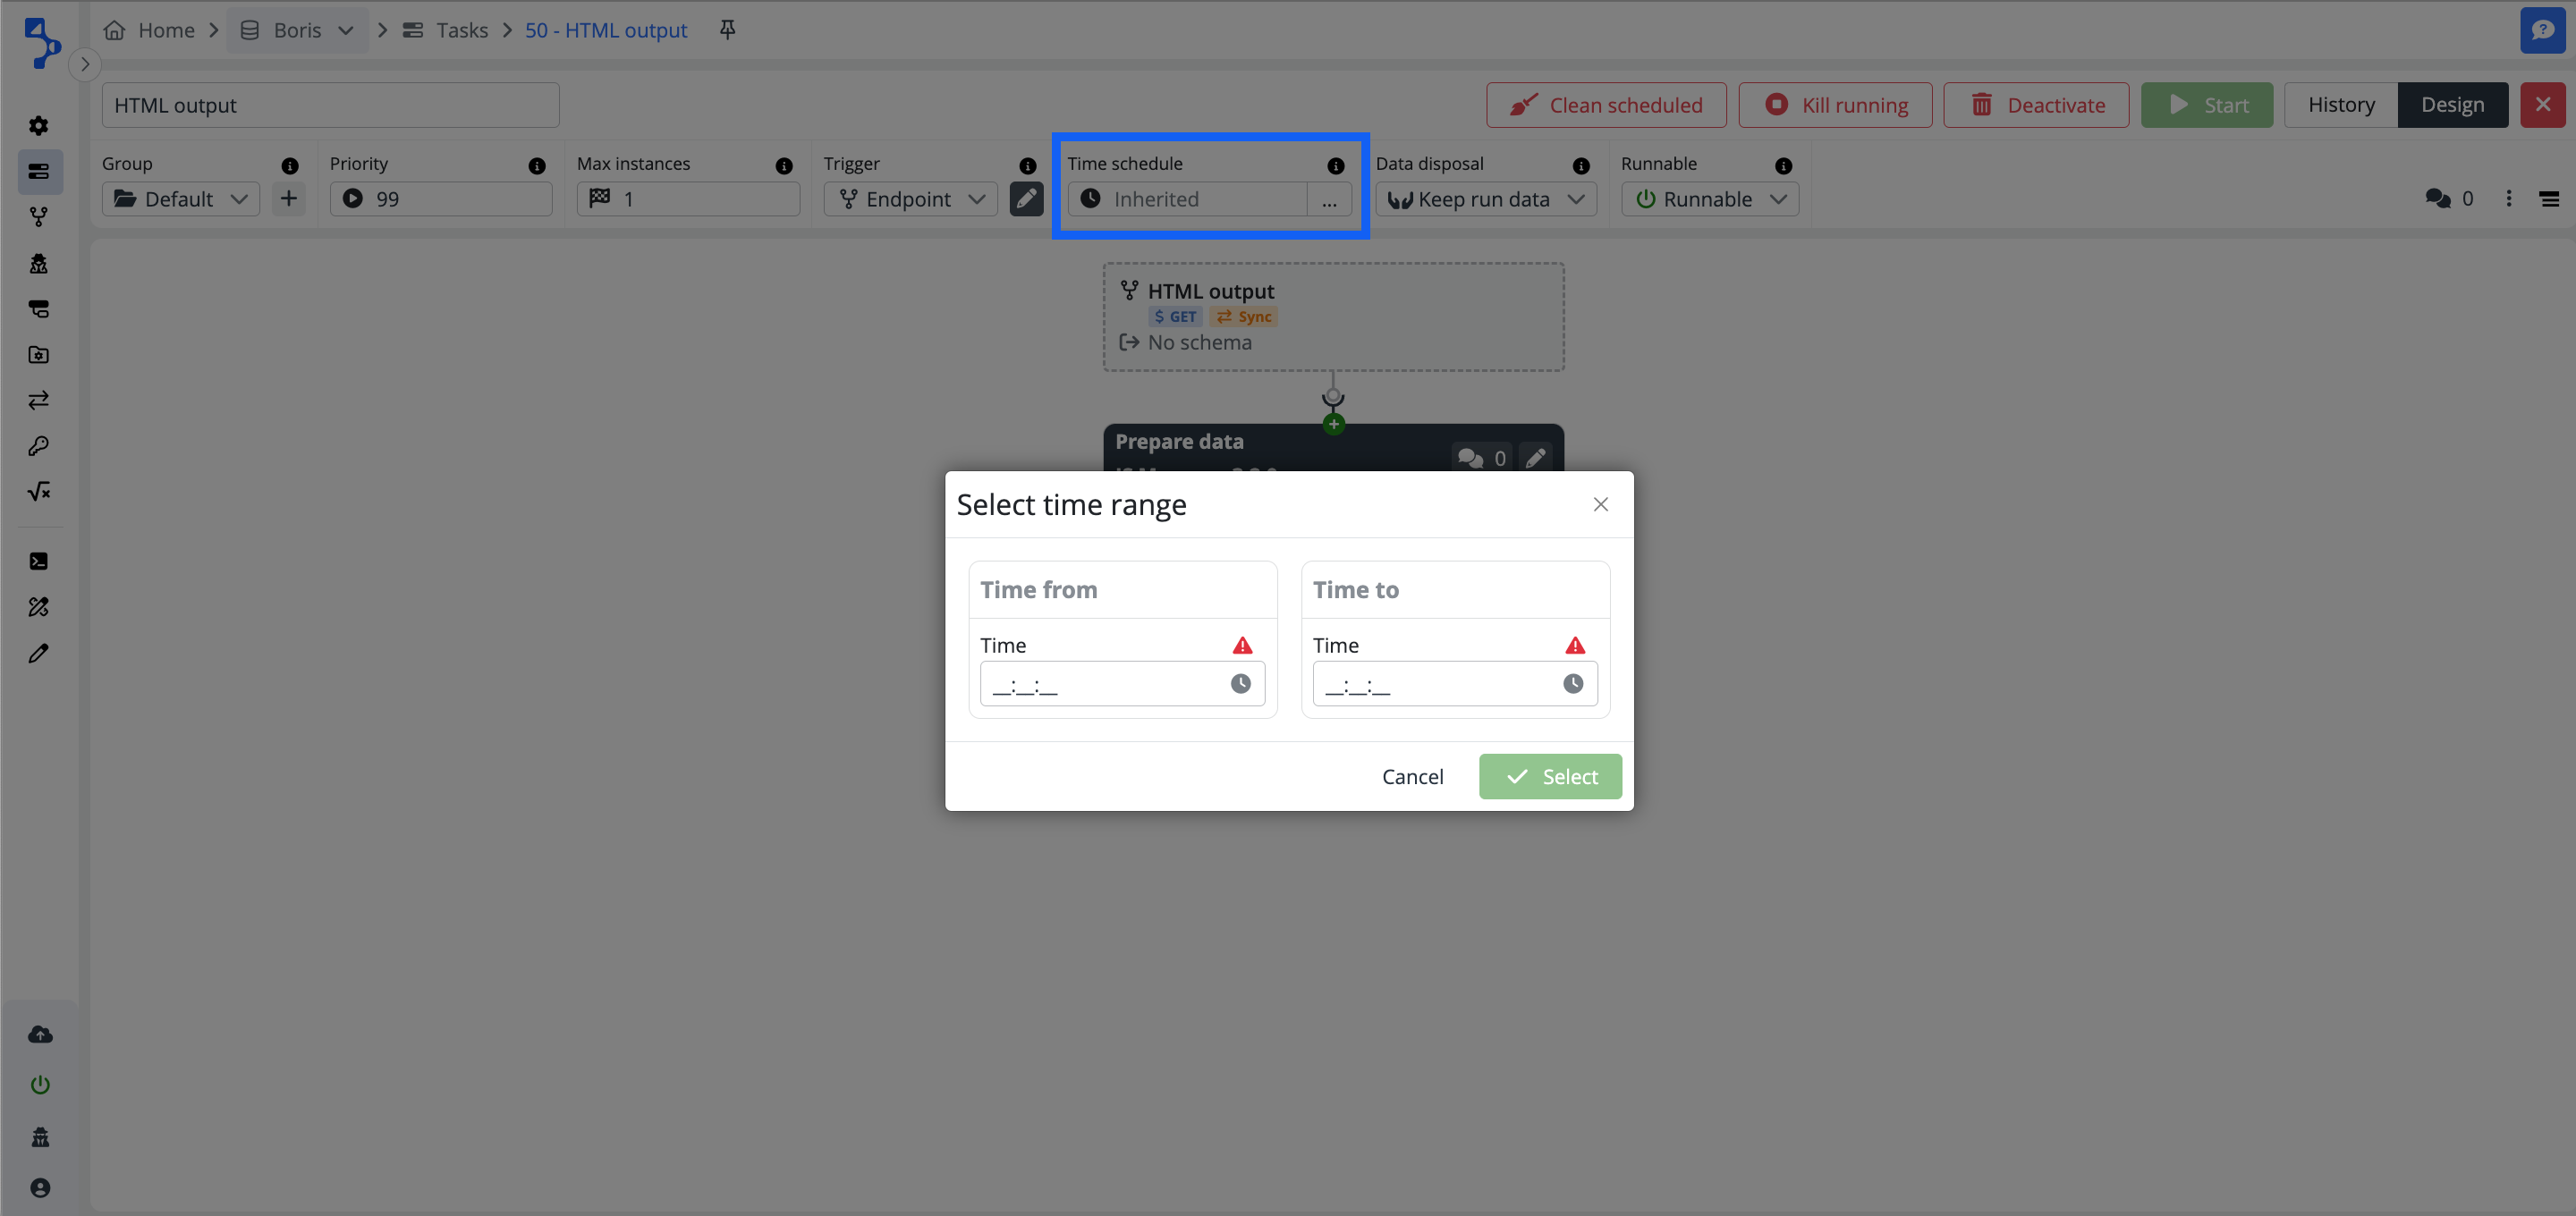
Time schedule
The definition of the operational time of the task. There is a time schedule definition at the company level. The task inherits the company settings. In case the task should operate at the different times, the time schedule needs to be configured at the task level. The task level has precedence.
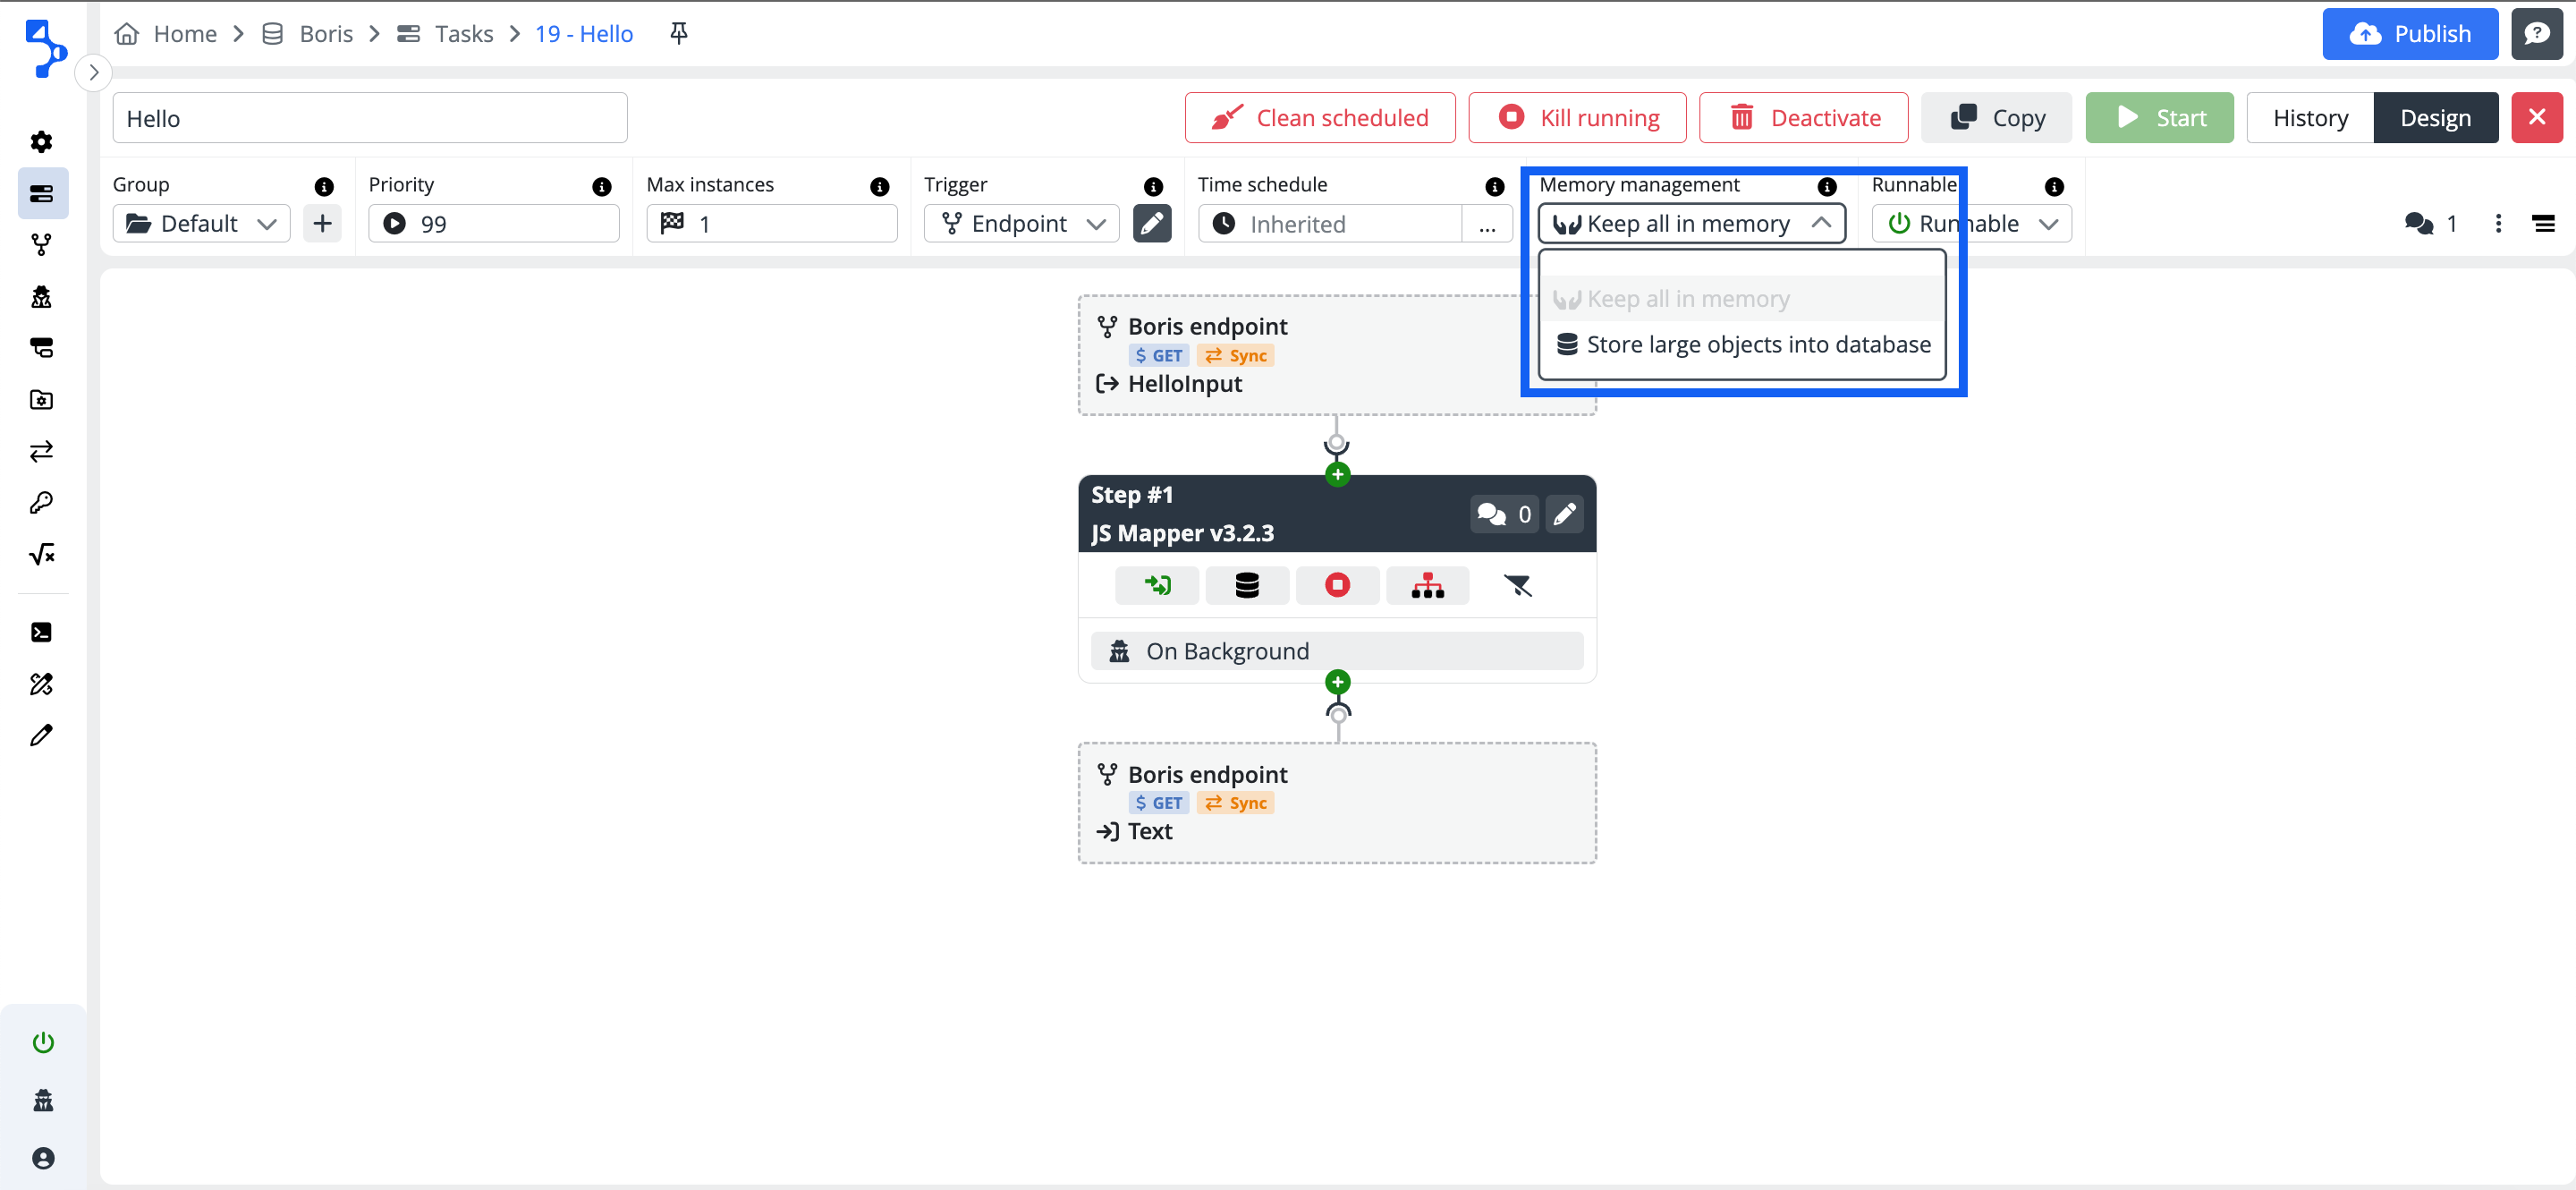
Memory management
If the rest of the task run won't use the data produced by a particular step, the platform can dump it. The dump helps to free up the memory during run time, however, it can raise CPU usage and take up more database space. Use only when large data is processed at the start of the task and then won't be used anymore.
-
Keep all in memory - The default value is setup to keep the run data for utilization in the consequent task steps.
-
Store large object into database - After each task step run, the system does an analysis of data structure and large items, which the task does not use in the next steps are saved to the database and free up the memory space. It affects the performance, if the platform must keep the big item data and is not using them in consequent steps.
Runnable
Make sure the Runnable combo box is set to value Runnable to be able to execute the integration task. The runnable combo box set to value Suspended will result in not executed tasks (scheduled, triggered by endpoint, or manually started).
Comments
The comments option provides you with a tool to document important points related to the task. It may be the detailed purpose of the task, what it does, how it is configured and why. It's up to you if and how you will use this option.
Click on the double bubble icon to enter the comment option. The modal dialog window named as the task will be displayed. The comments option works with the rich text editor i.e. your comments can include formatted text, tables, links, images, etc...
Created comment will be recorded with a timestamp. The author of the comment can edit and or delete the comment. Multiple comments are allowed for one task.
Comments option in the platform
Note that the comments option is used in different parts across the platform in order to have the possibility of meaningful documentation of the integration configuraitons within the platform. You will find the comments option in following parts:
- Task
- Task step
- Endpoint
- Configuration
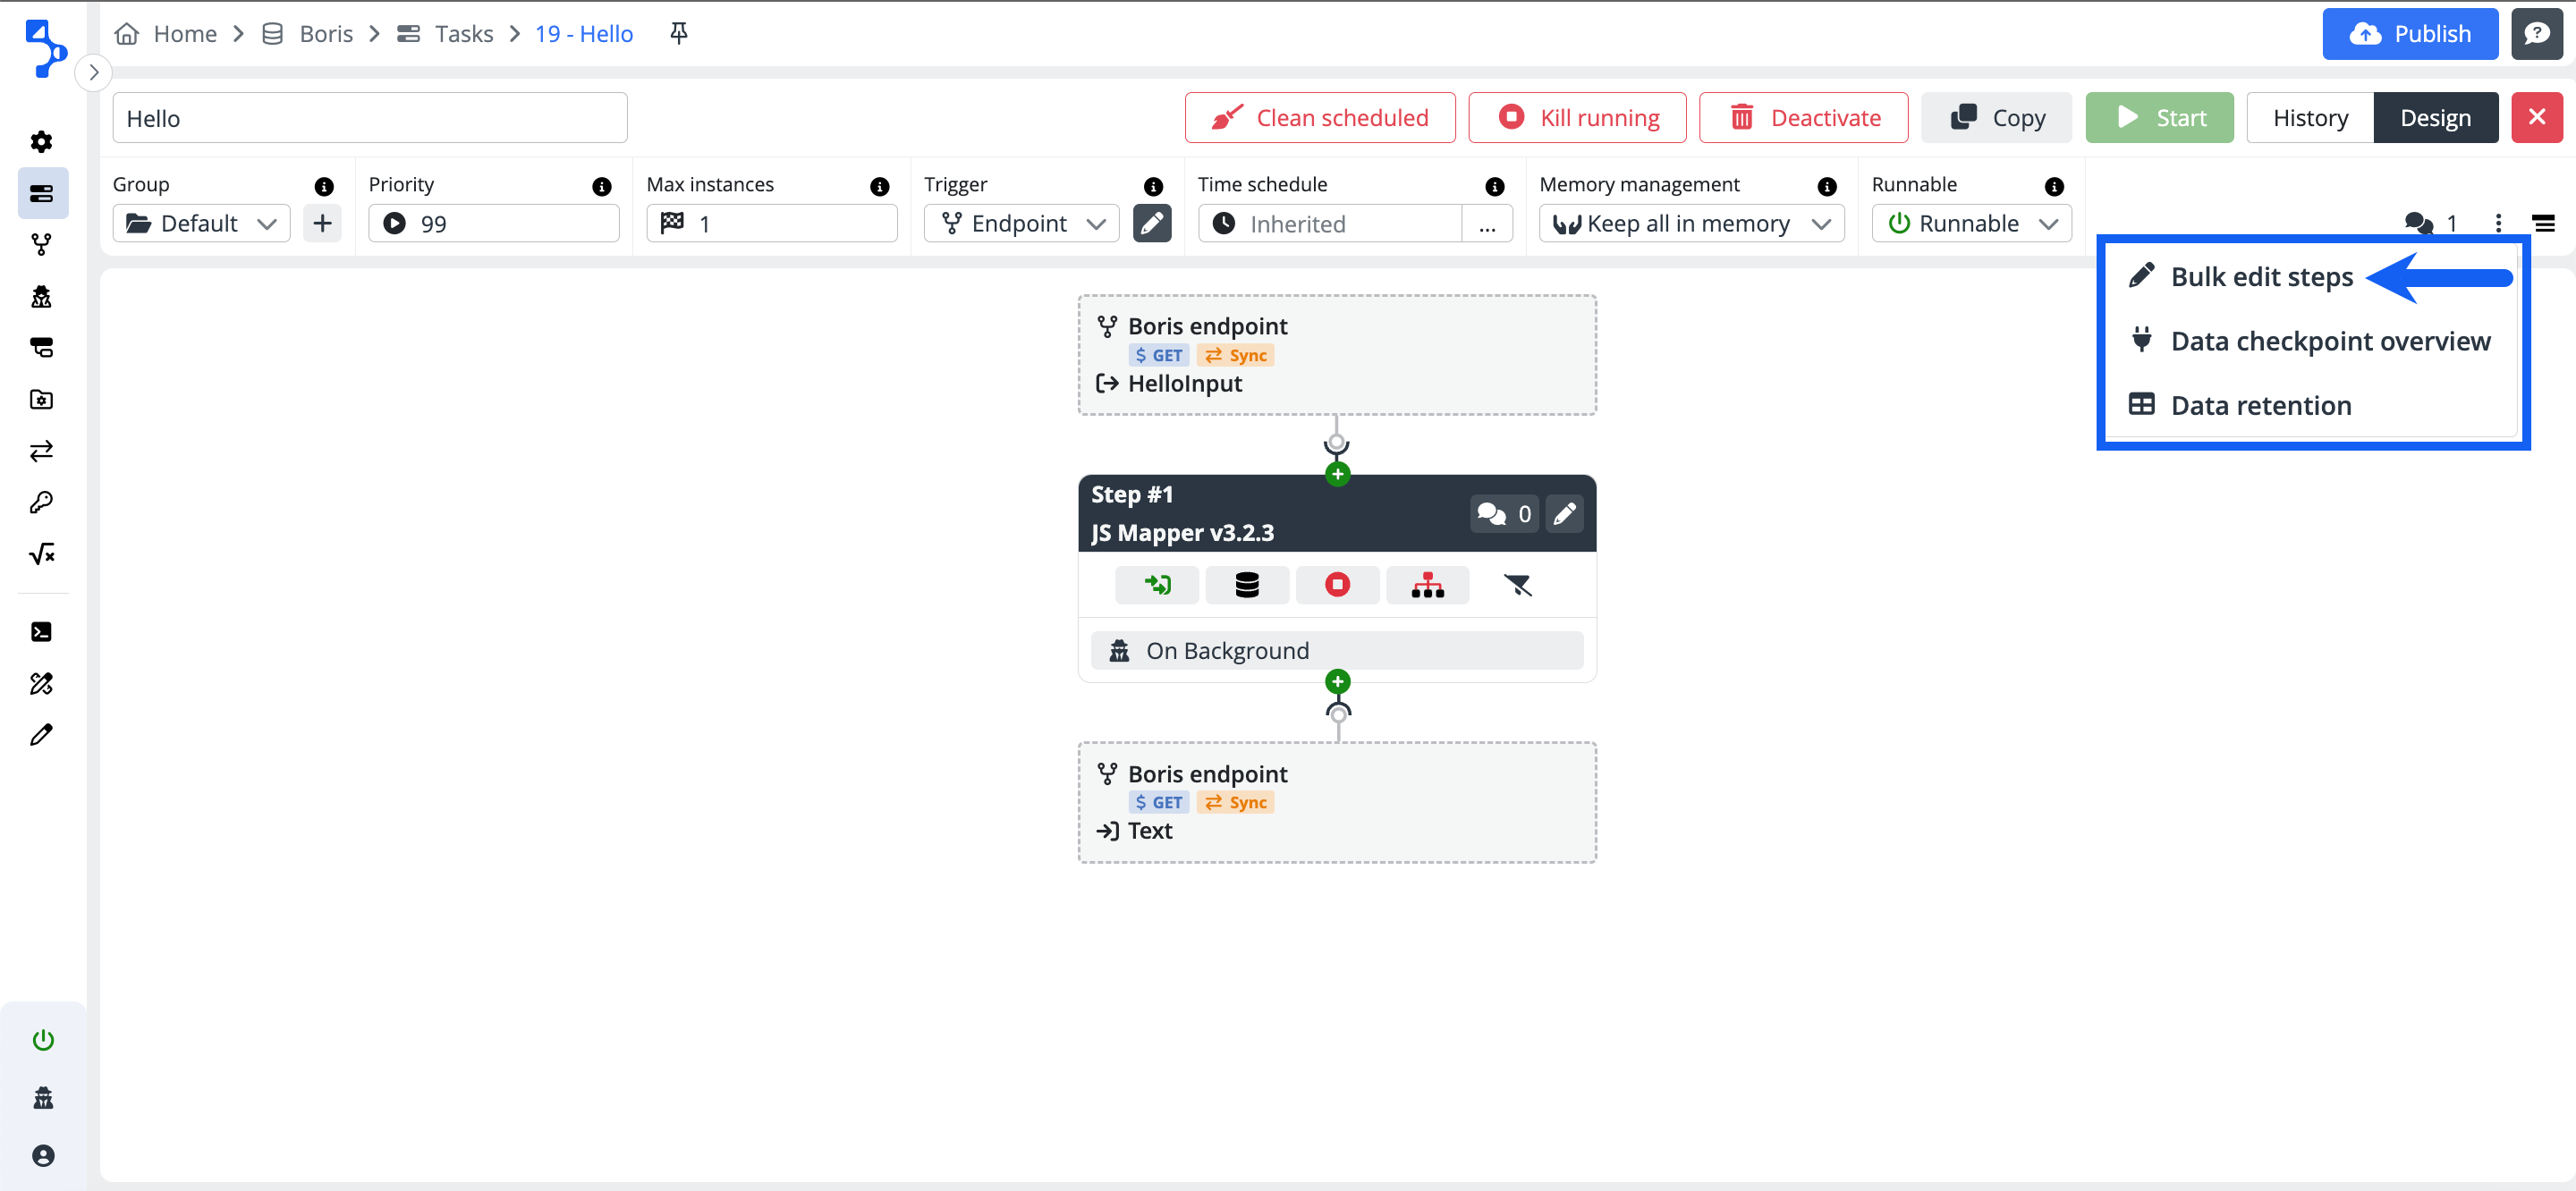
Ellipsis-vertical - action menu
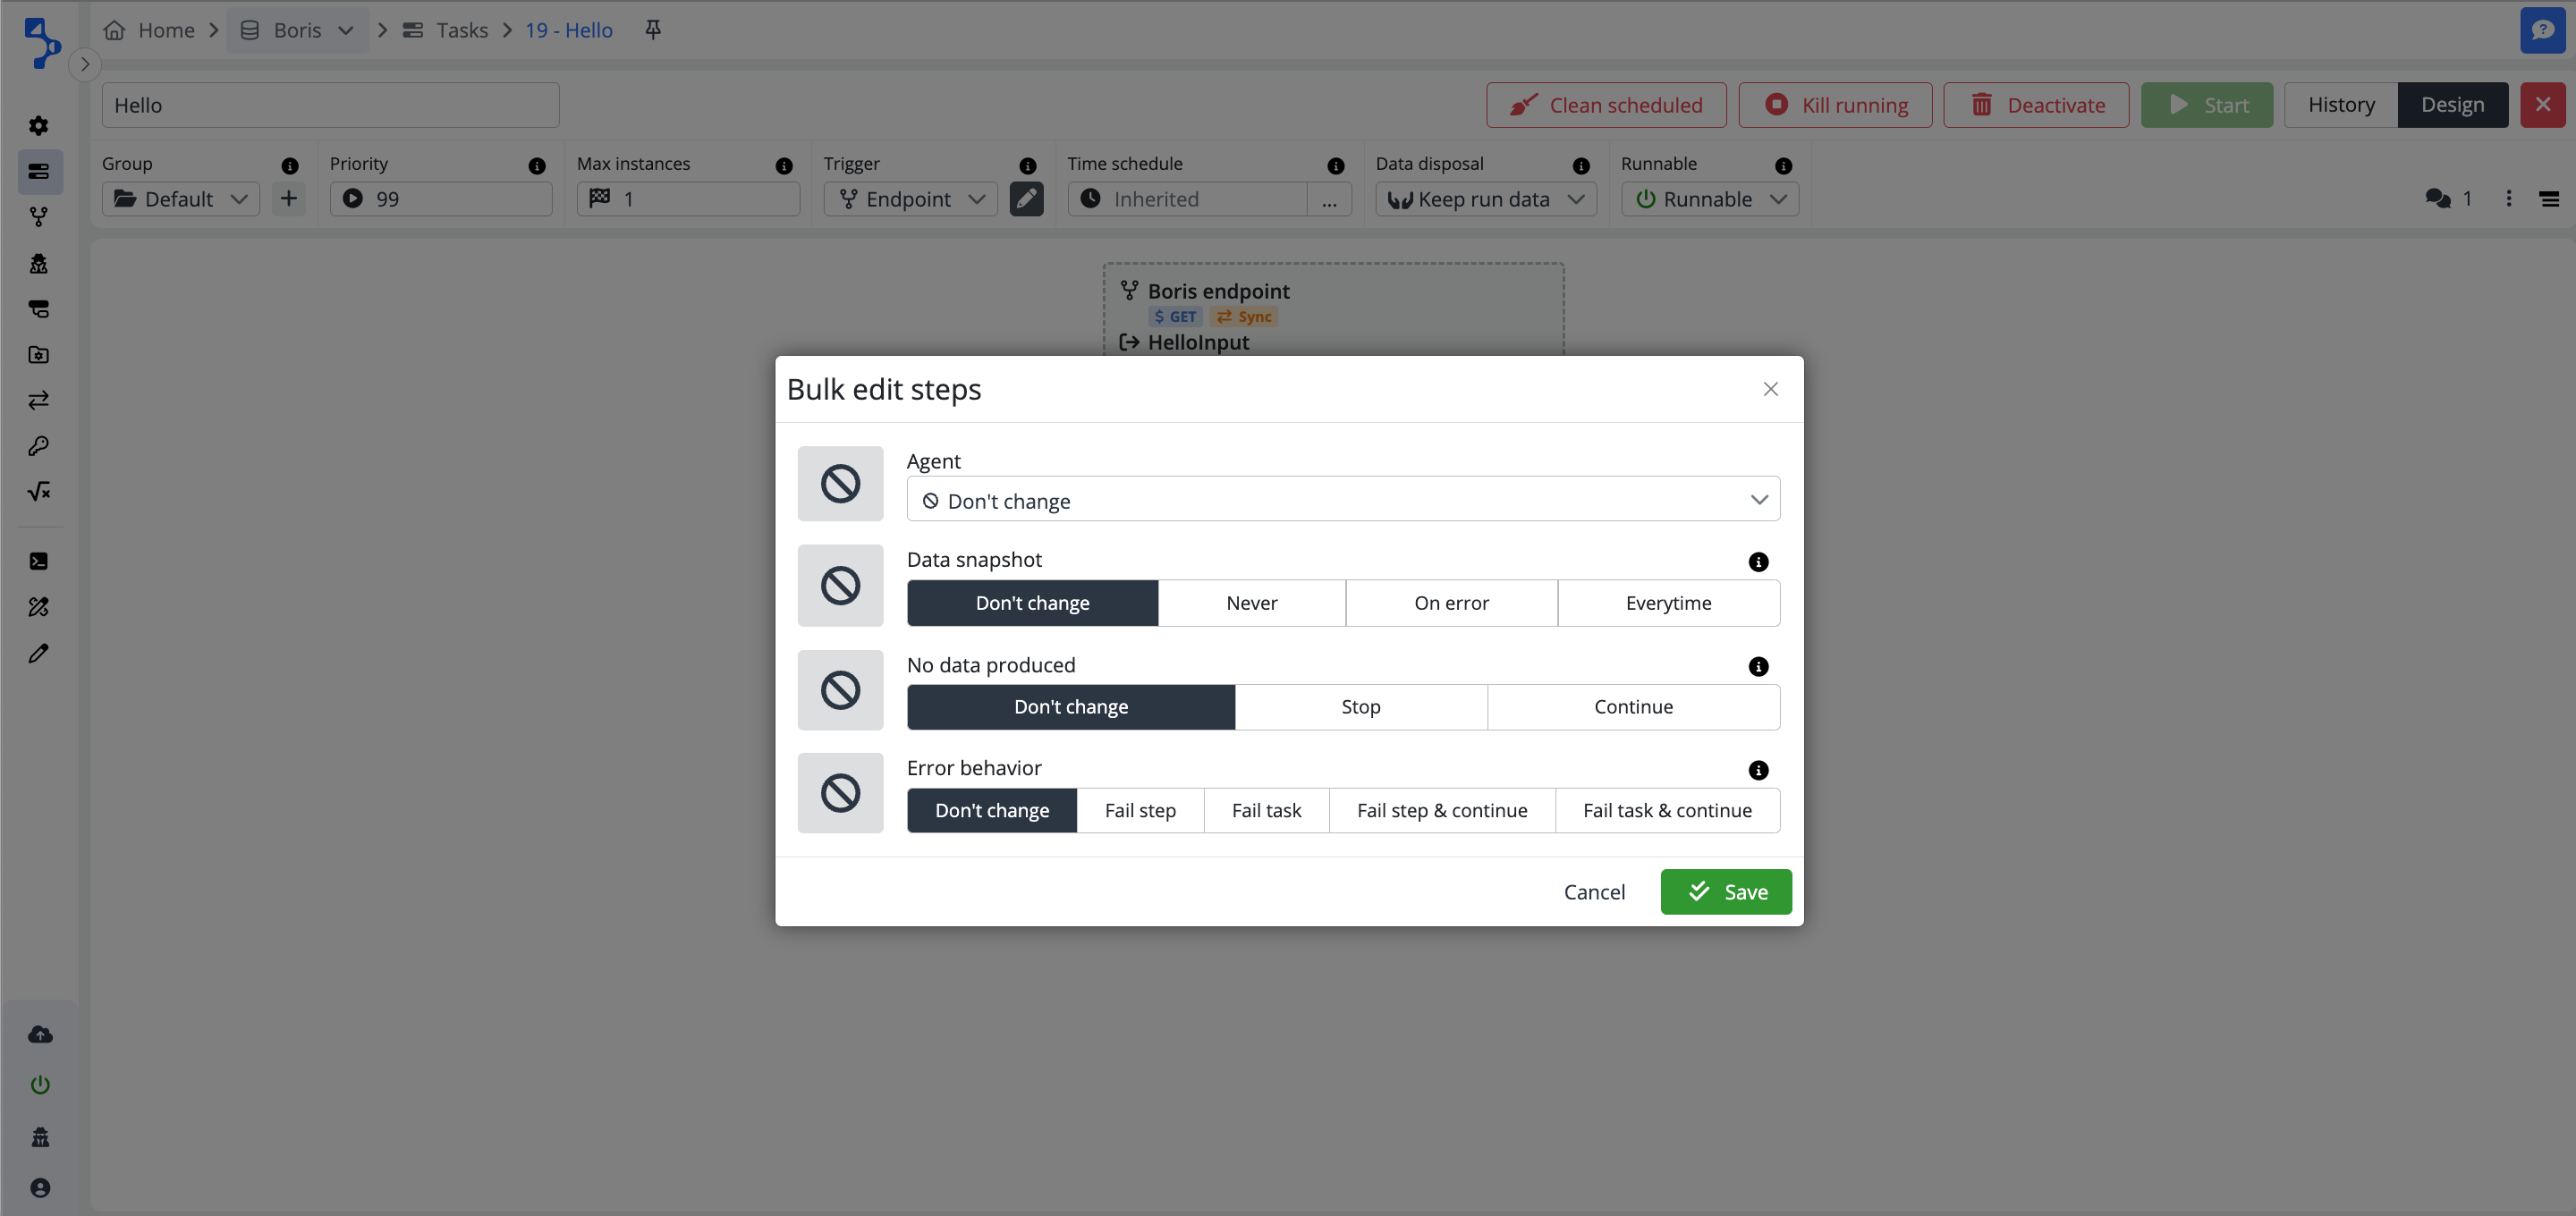
Bulk edit steps
The option starts a modal window allowing you to bulk edit the following configurations:
- Agent
This is the definition of the agent type which should be used on the task steps of this task.
-
Don't change - No change in the task step setup.
-
Background - All the task steps within the integration task will use the background (platform) agent
- Data snapshot
Condition under which the data structure will be stored in the database. Click here for more details.
- On empty output
It prevents the execution of the next step if the current step doesn't produce any output data. Click here for more details.
- Error behavior
Determines how the task behaves when the step fails. Click here for more details
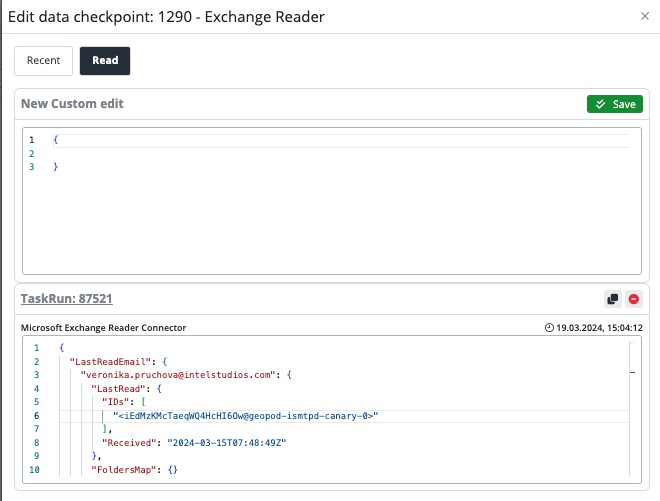
Data checkpoint overview
The data checkpoint column is a column (field), from which the platform takes the last row value after each executed task run and stores it as a Data checkpoint.
The data checkpoint value can be used in the connector such as JS statements to control, which data should be processed in the next run. You can refer to the value using the predefined variable DataCheckpoint.
Order of step
Data checkpoint steps are always displayed in the same order as they occur in the task
Example of use:
Processing data in cycles, where every cycle processes only a subset of the entire set due to the total size. If you use e.g. record ID as a data checkpoint column, the platform will store after each cycle the last processed ID from the data subset processed by the task run.
If your statement is written in a way that will evaluate the value in data checkpoint against the IDs of the records in the data set, you can ensure this way, that only not processed records will be considered in the next task run.
Syntax and use of data check point variable
Pay attention, the predefined variable data checkpoint does have different syntax in different connectors. Make sure you read the relevant parts of the Connector academy to see the concrete syntax for the concrete connector.
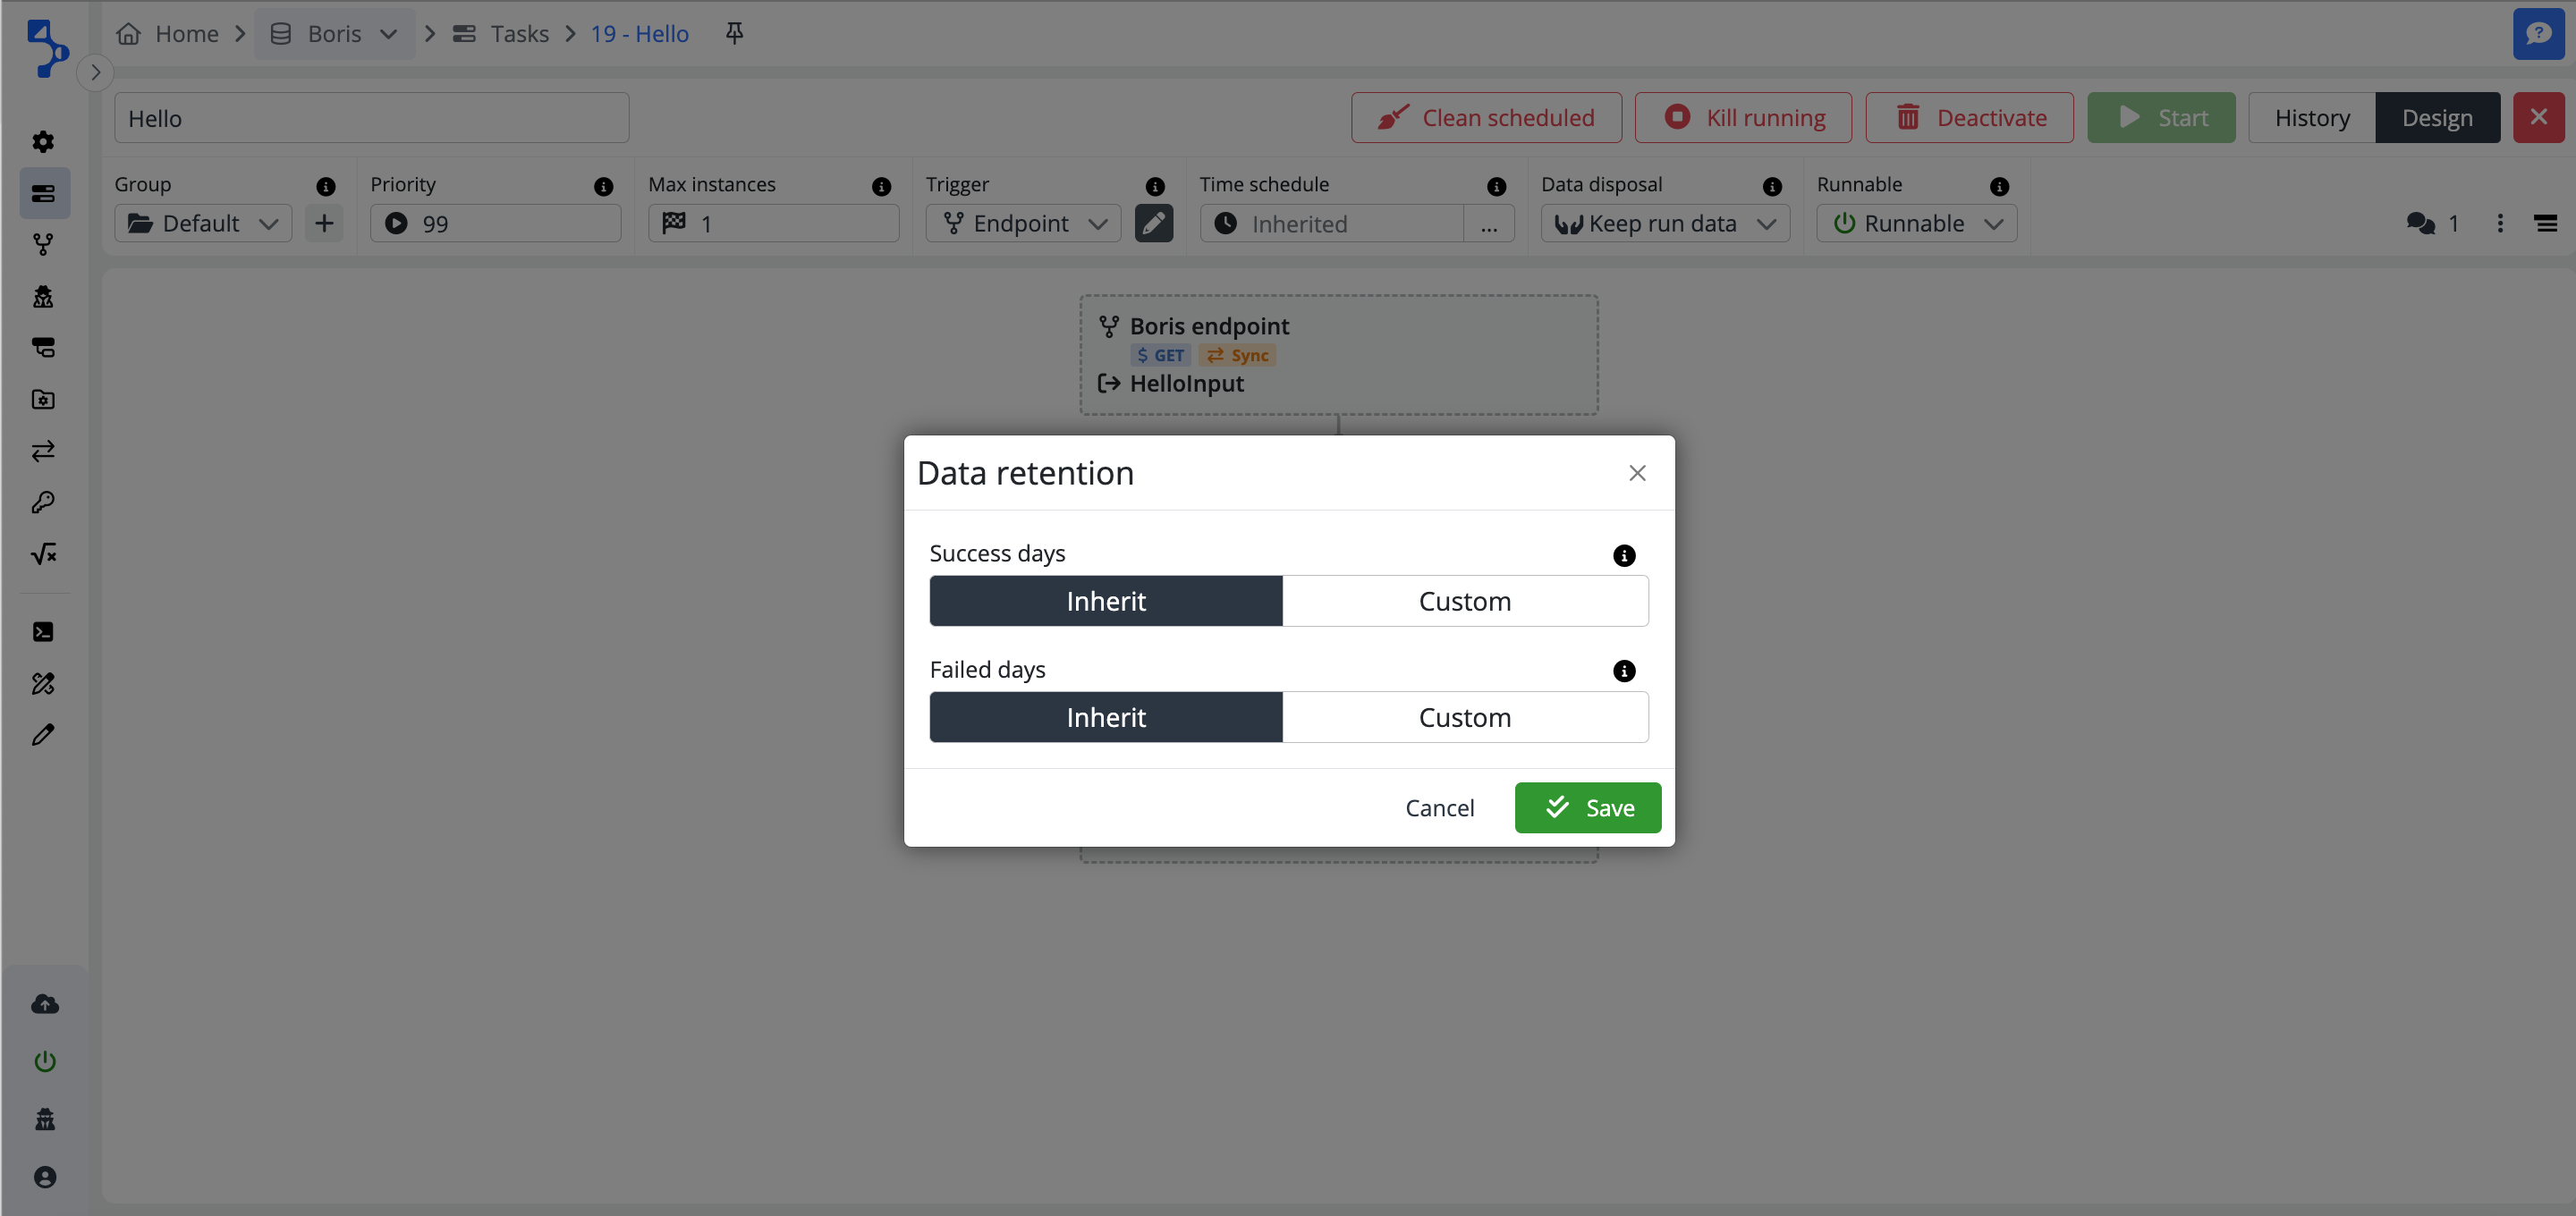
Data retention
The option starts a modal window enabling the configuration of data retention at the task level for all included task steps. The default data retention is setup at the company level. The default value of data retention is inherited from the company level. Individual task level configuration has precedence.
- Success days
Task step runs, task run logs, etc. older than the selected period (in days) are deleted from the database.
-
Inherit - the value set globally for the whole company is used.
-
Custom - a specific value is used regardless of the settings in the company.
- Failed days
Task step runs, task run logs, etc. older than the selected period (in days) are deleted from the database.
-
Inherit - the value set globally for the whole company is used.
-
Custom - a specific value is used regardless of the settings in the company.
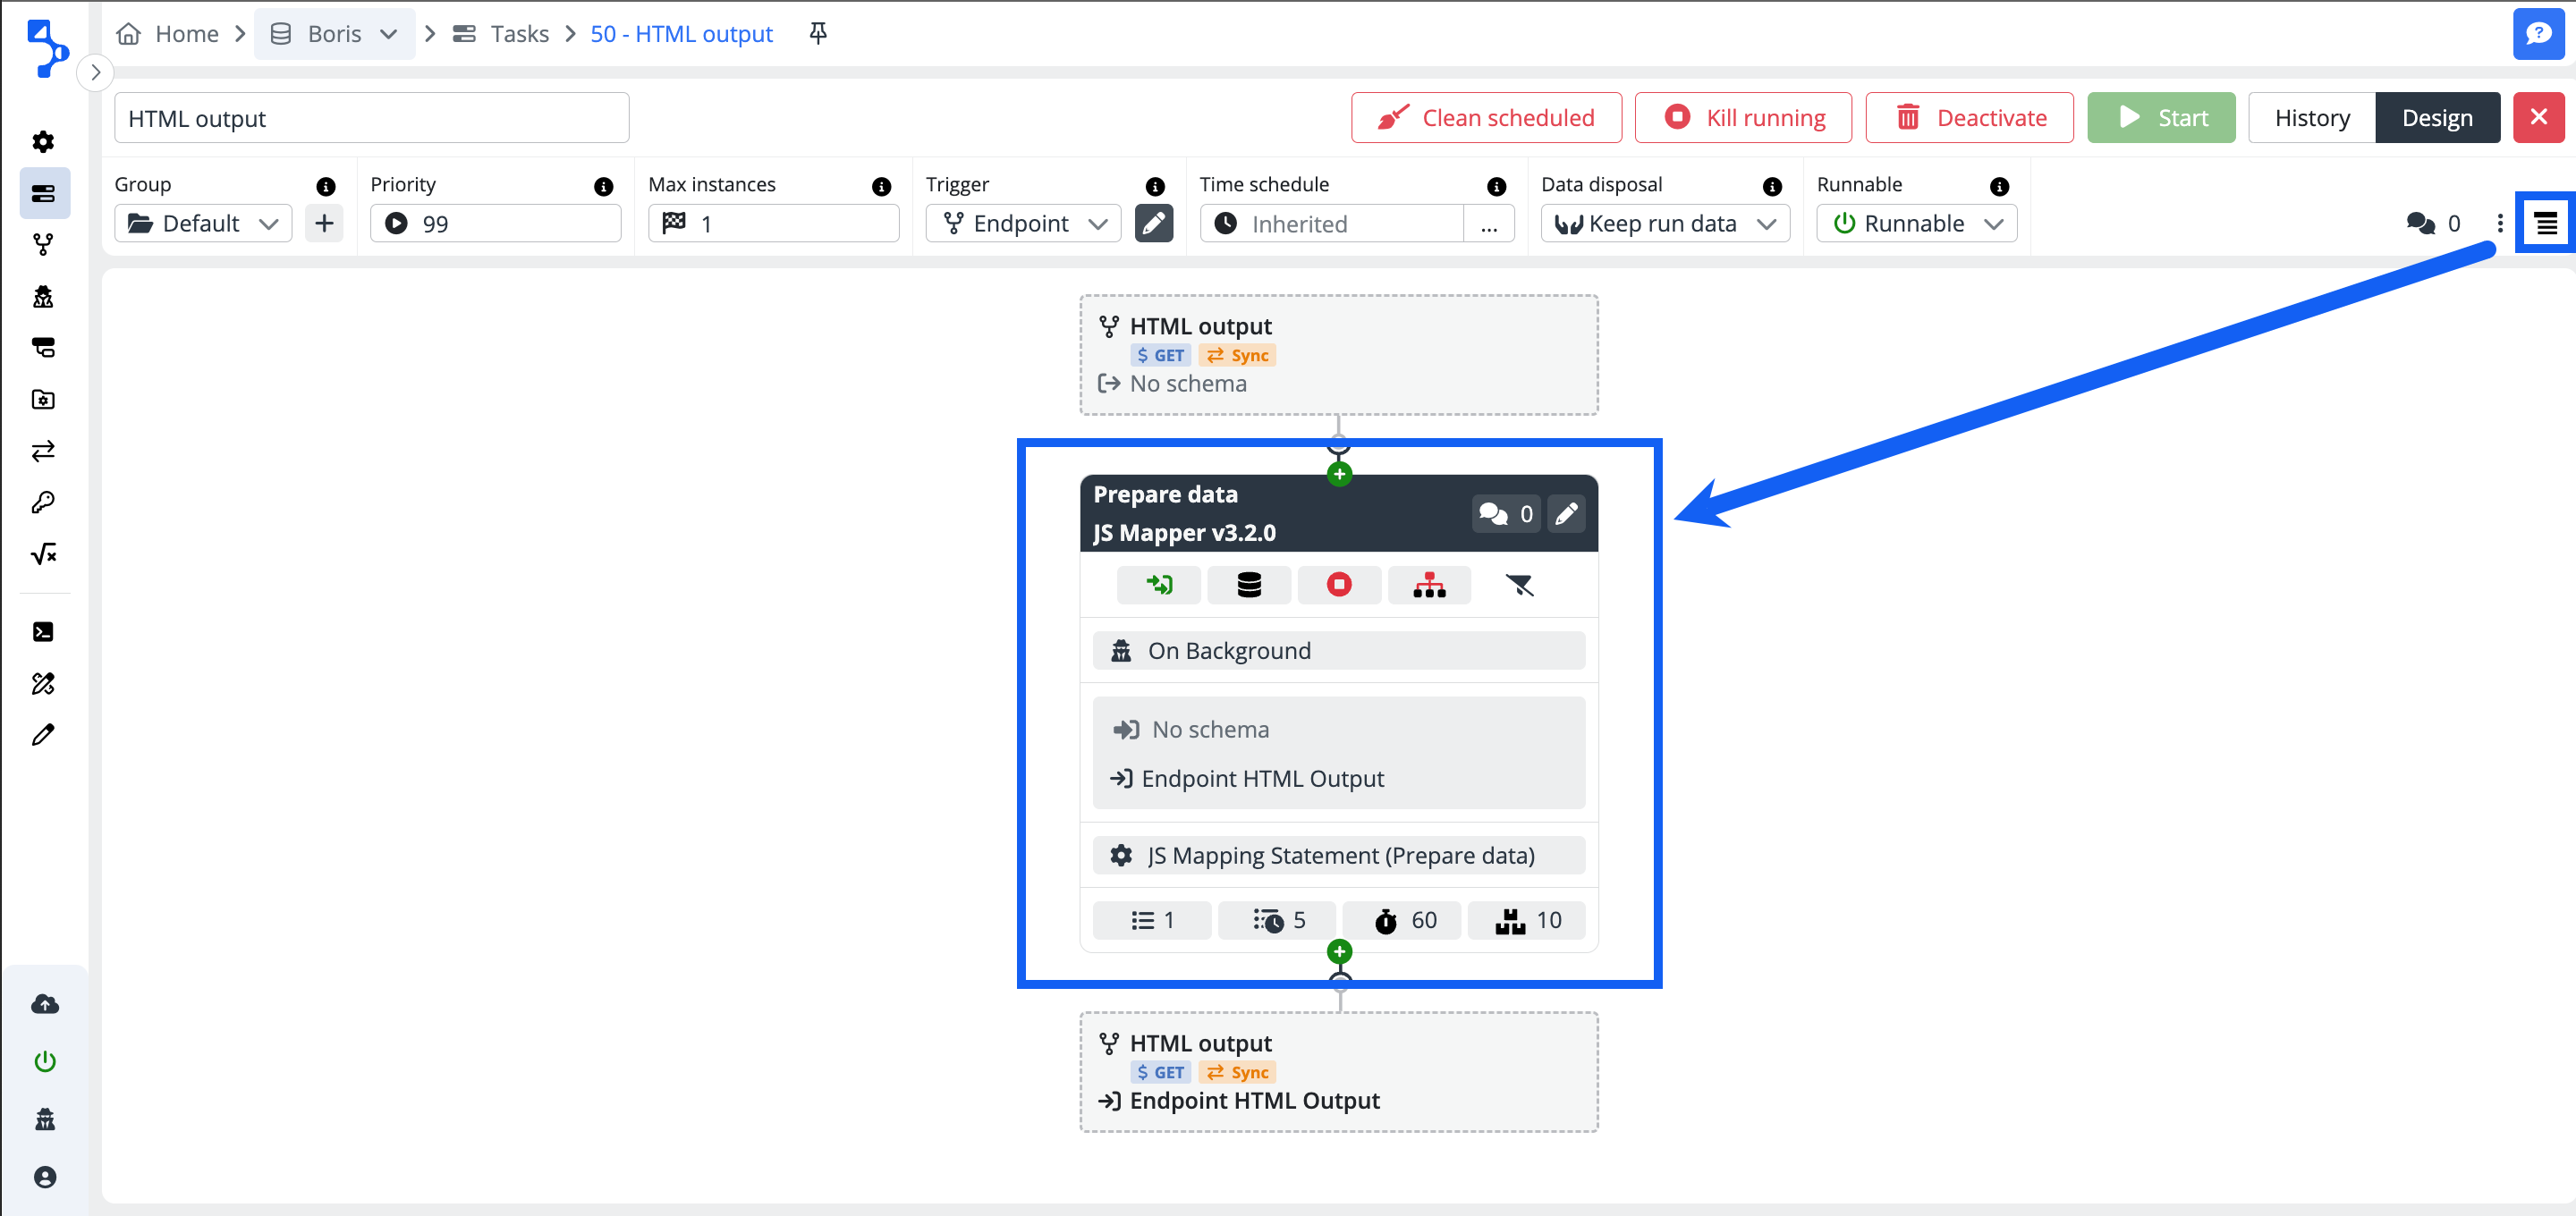
Normal / Detail view
Enables the expansion of the task step configuration element in the task editor to display the required level of detail. There are 2 levels of detail available.
- Normal view - Displays limited information and controls in the task step container.
- Detailed view - Displays extended information and controls in the task step container.
Task design editor
Moving forward, let's delve into the Task design editor. This workspace serves as a dynamic environment where tasks are created and configured. Within this space, users can seamlessly add and interconnect individual task steps, forming a cohesive structure essential for executing an effective and functional integration. This user-friendly workspace facilitates the creation of the intricate process of task development, ensuring that each step is seamlessly incorporated and collaborates harmoniously to achieve a successful integration.
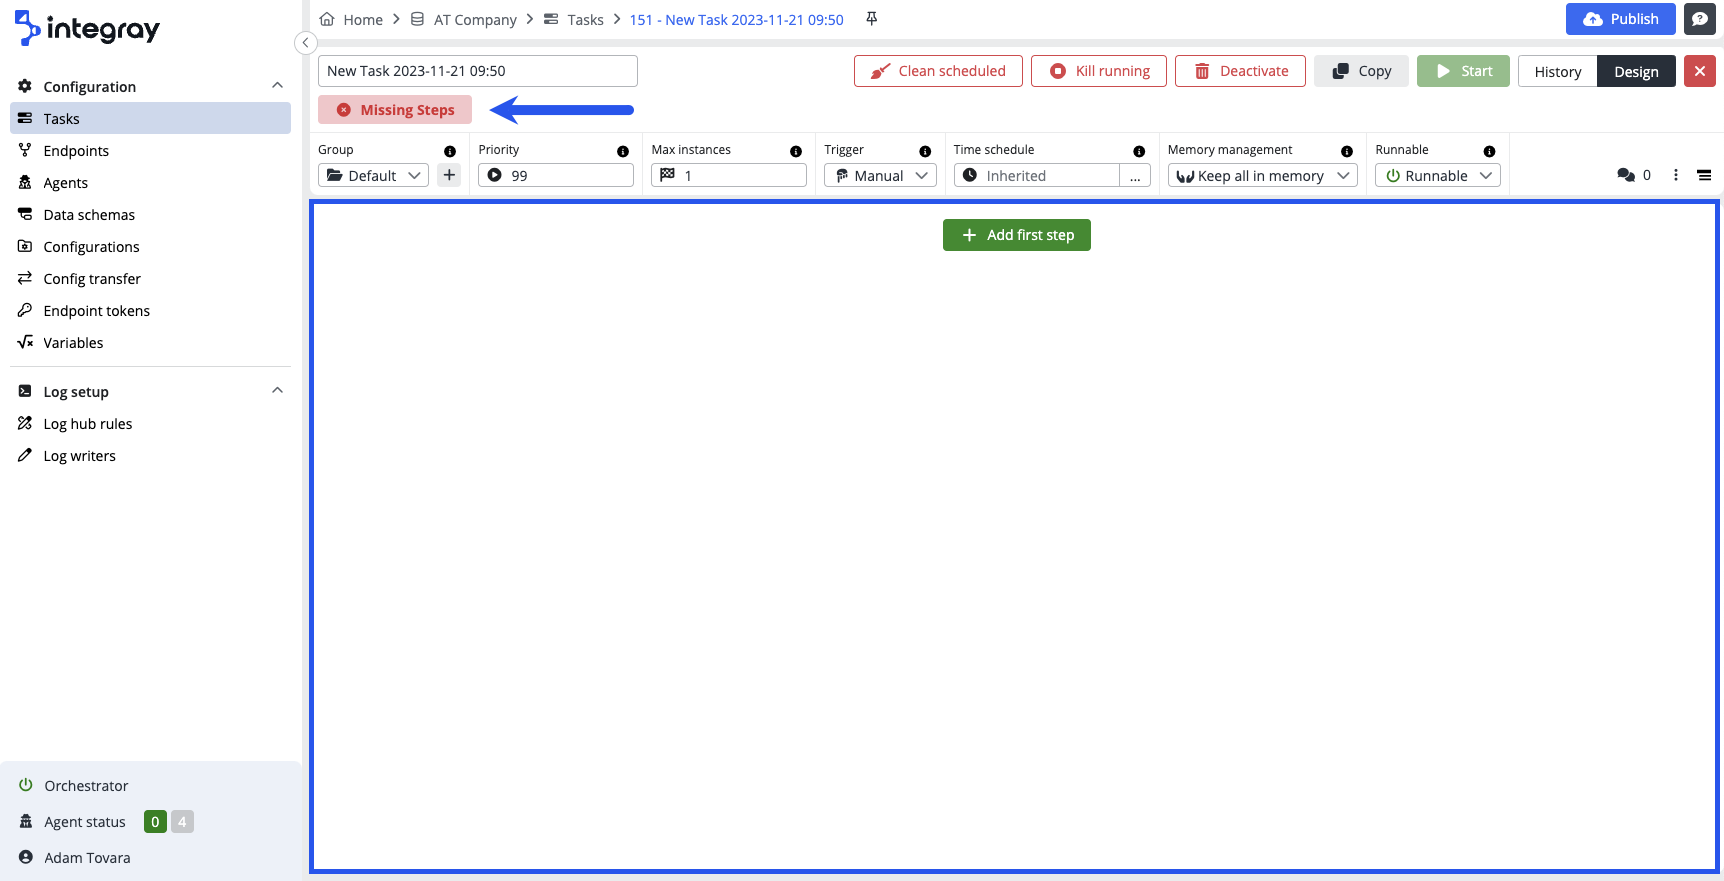
When you create a new task and it does not contain any task step yet, the Task editor is empty and displays only the + Add first step button.
If the task does not include any steps, red Missing steps executability status will be displayed right below the task name.
Within the Task Design Editor, users not only have visibility into the settings of individual Task steps but also a dedicated space for making specific adjustments without the need to navigate directly to the Task Step Editor. This streamlined approach enhances workflow efficiency, saving valuable time for users.
Input processing
The defintion of the data processing mode. Data received on the input side can be further processed:
-
Row by row - Input data processed by single rows/records.
-
Bulk - Input data processed as bulk.
This option is not universally applicable across all Task steps. Its activation depends on the chosen connector, as some may exclusively allow Row by Row processing, others only support Bulk processing and specific connectors offer a user-selectable choice.
Data snapshot
The condition, under which the data structure will be stored in the database. The data structure is accumulated sequentially, so the structure that was created by concatenating the output of the current step and all previous steps is always stored in the database.
-
Never - The data structure will never be stored.
-
On error - The data structure will be saved only in case of a step failure.
-
Everytime - The data structure will be saved every time.
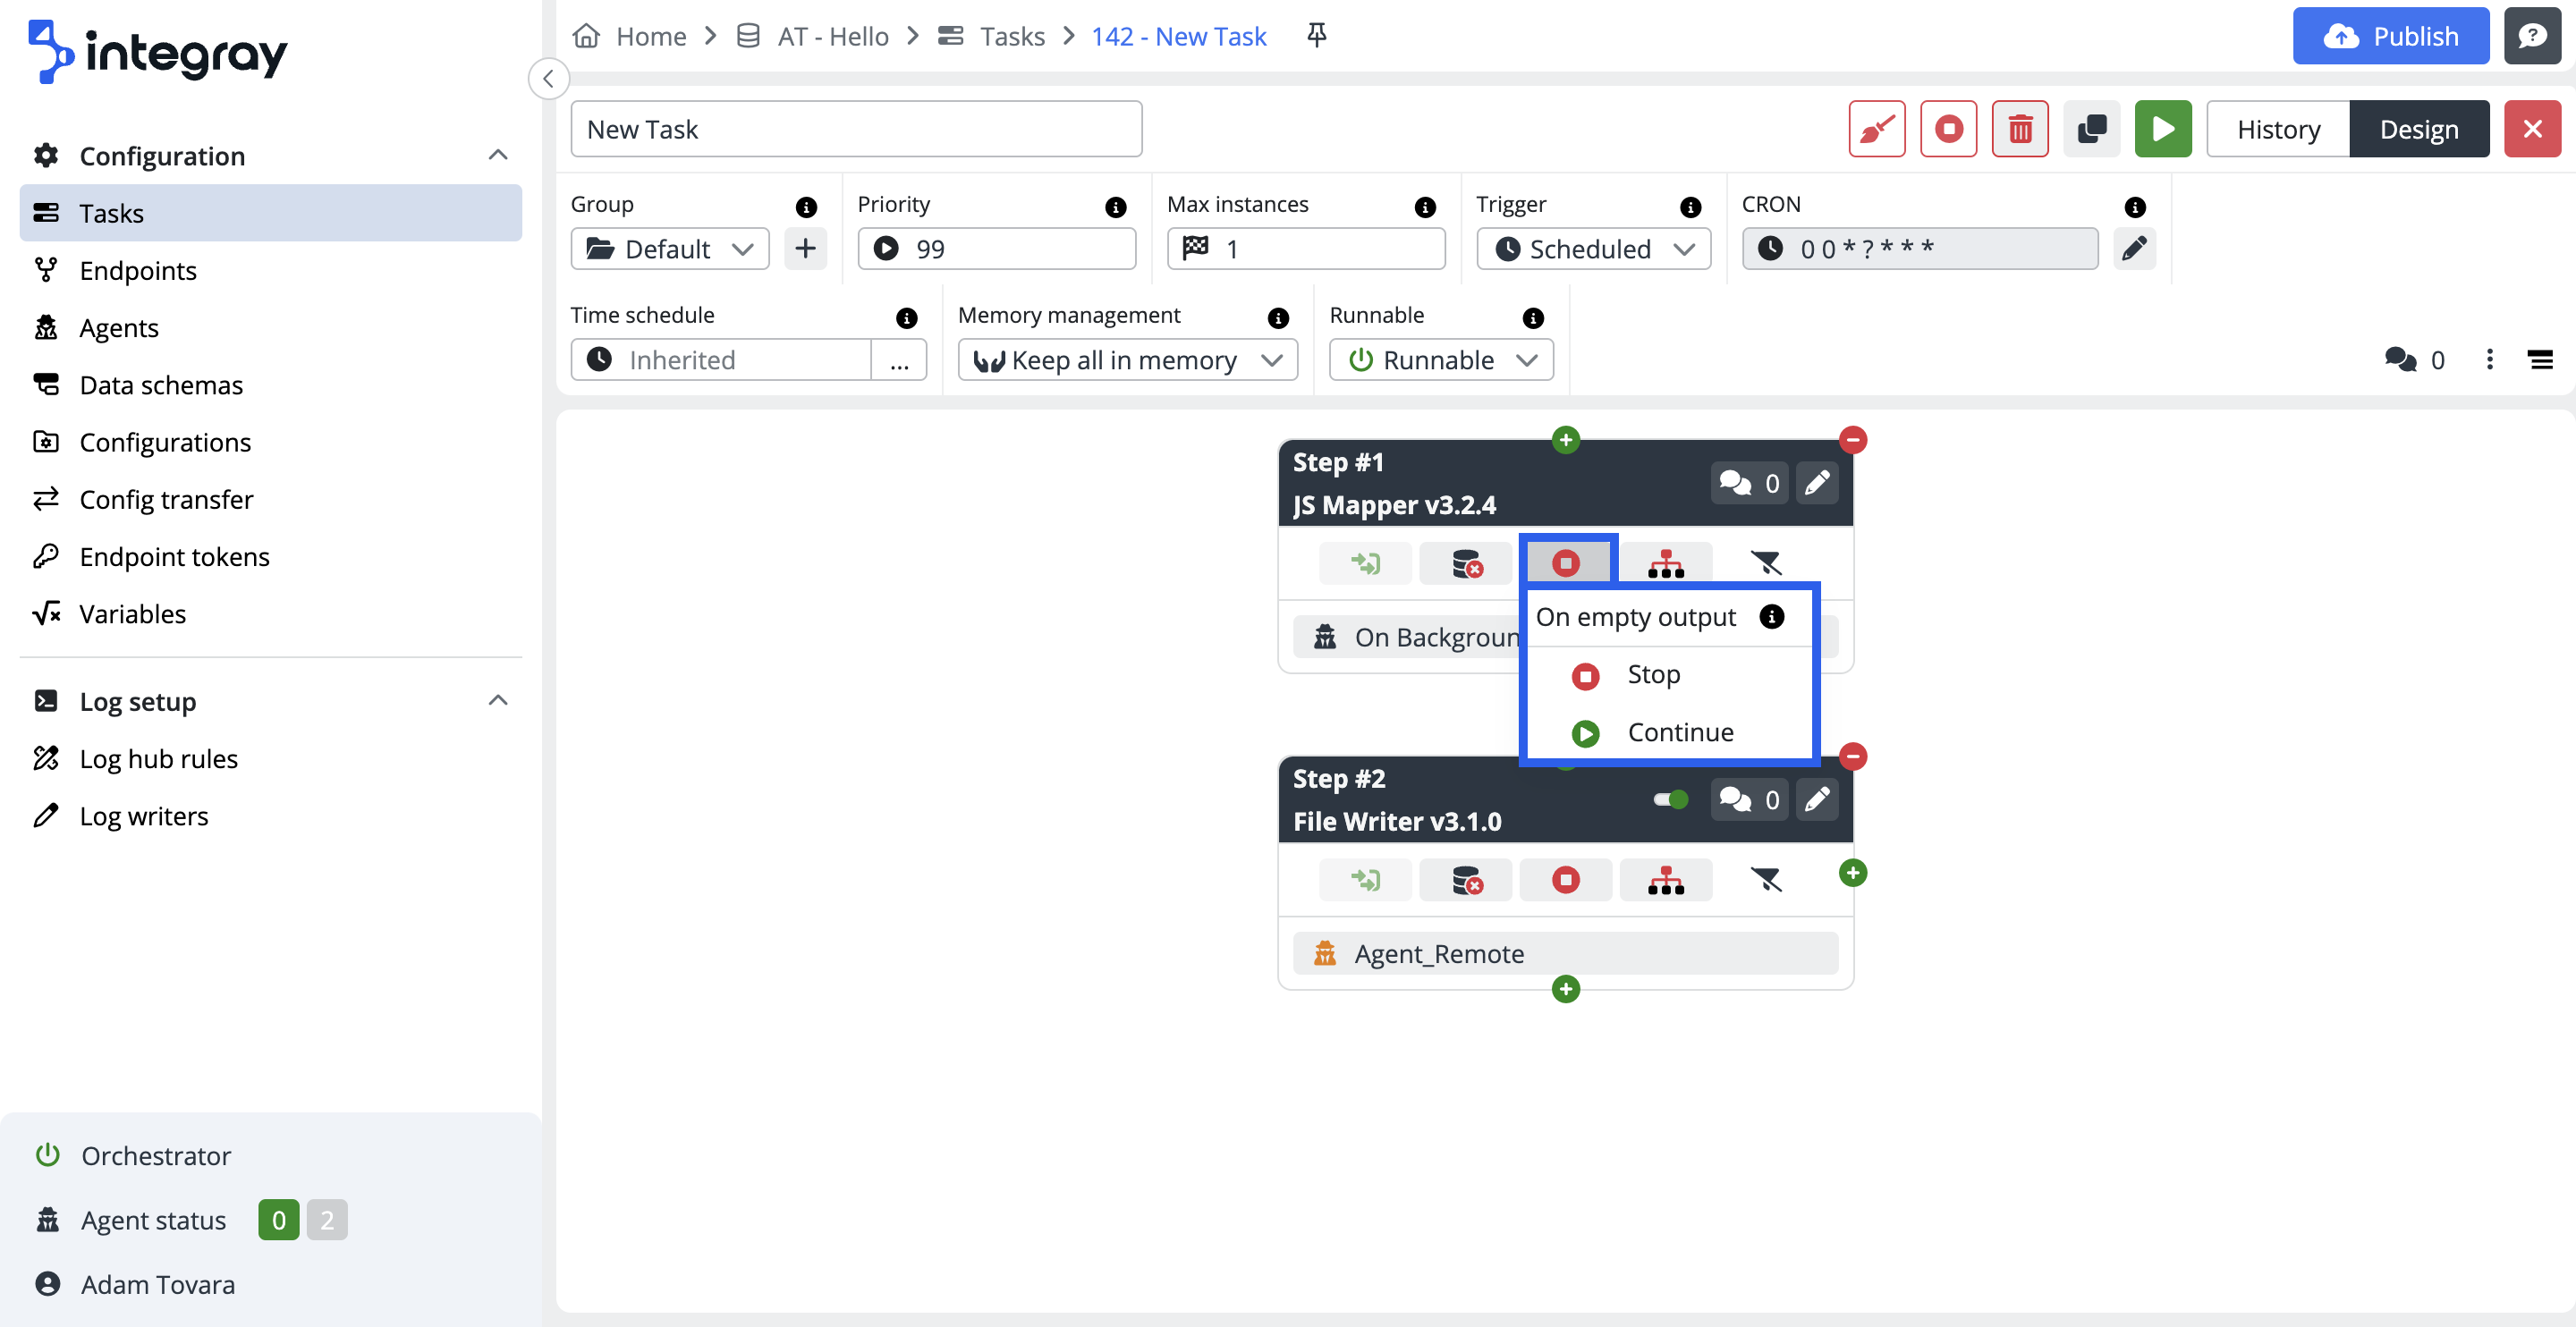
On empty output
Prevents executing the next step if the current step doesn't produce any output data.
-
Stop - The execution of the current task branch will be stopped.
-
Continue - The task will continue with the next steps regardless of whether the step has produced any data or not.
Error behavior
Determines how the task behaves when the step fails.
-
Fail step & continue and Fail task & continue options continue executing the task regardless of the status of the step.
-
Fail step and Fail task options immediately terminate the execution of the task in the current branch. Other branches will finish according to their settings and then the status for the task run will be evaluated.
-
Fail step and Fail step & continue options do not propagate the error status to the task run level. The run is still considered successful (status 2xx), but it is marked as having ended with an error: 202 - FinishedWithErrors.
-
Fail task and Fail task & continue options promote the error status of the step to the task run level. The step is considered failed (status 3xx) and its status will be the same as the failed step status.
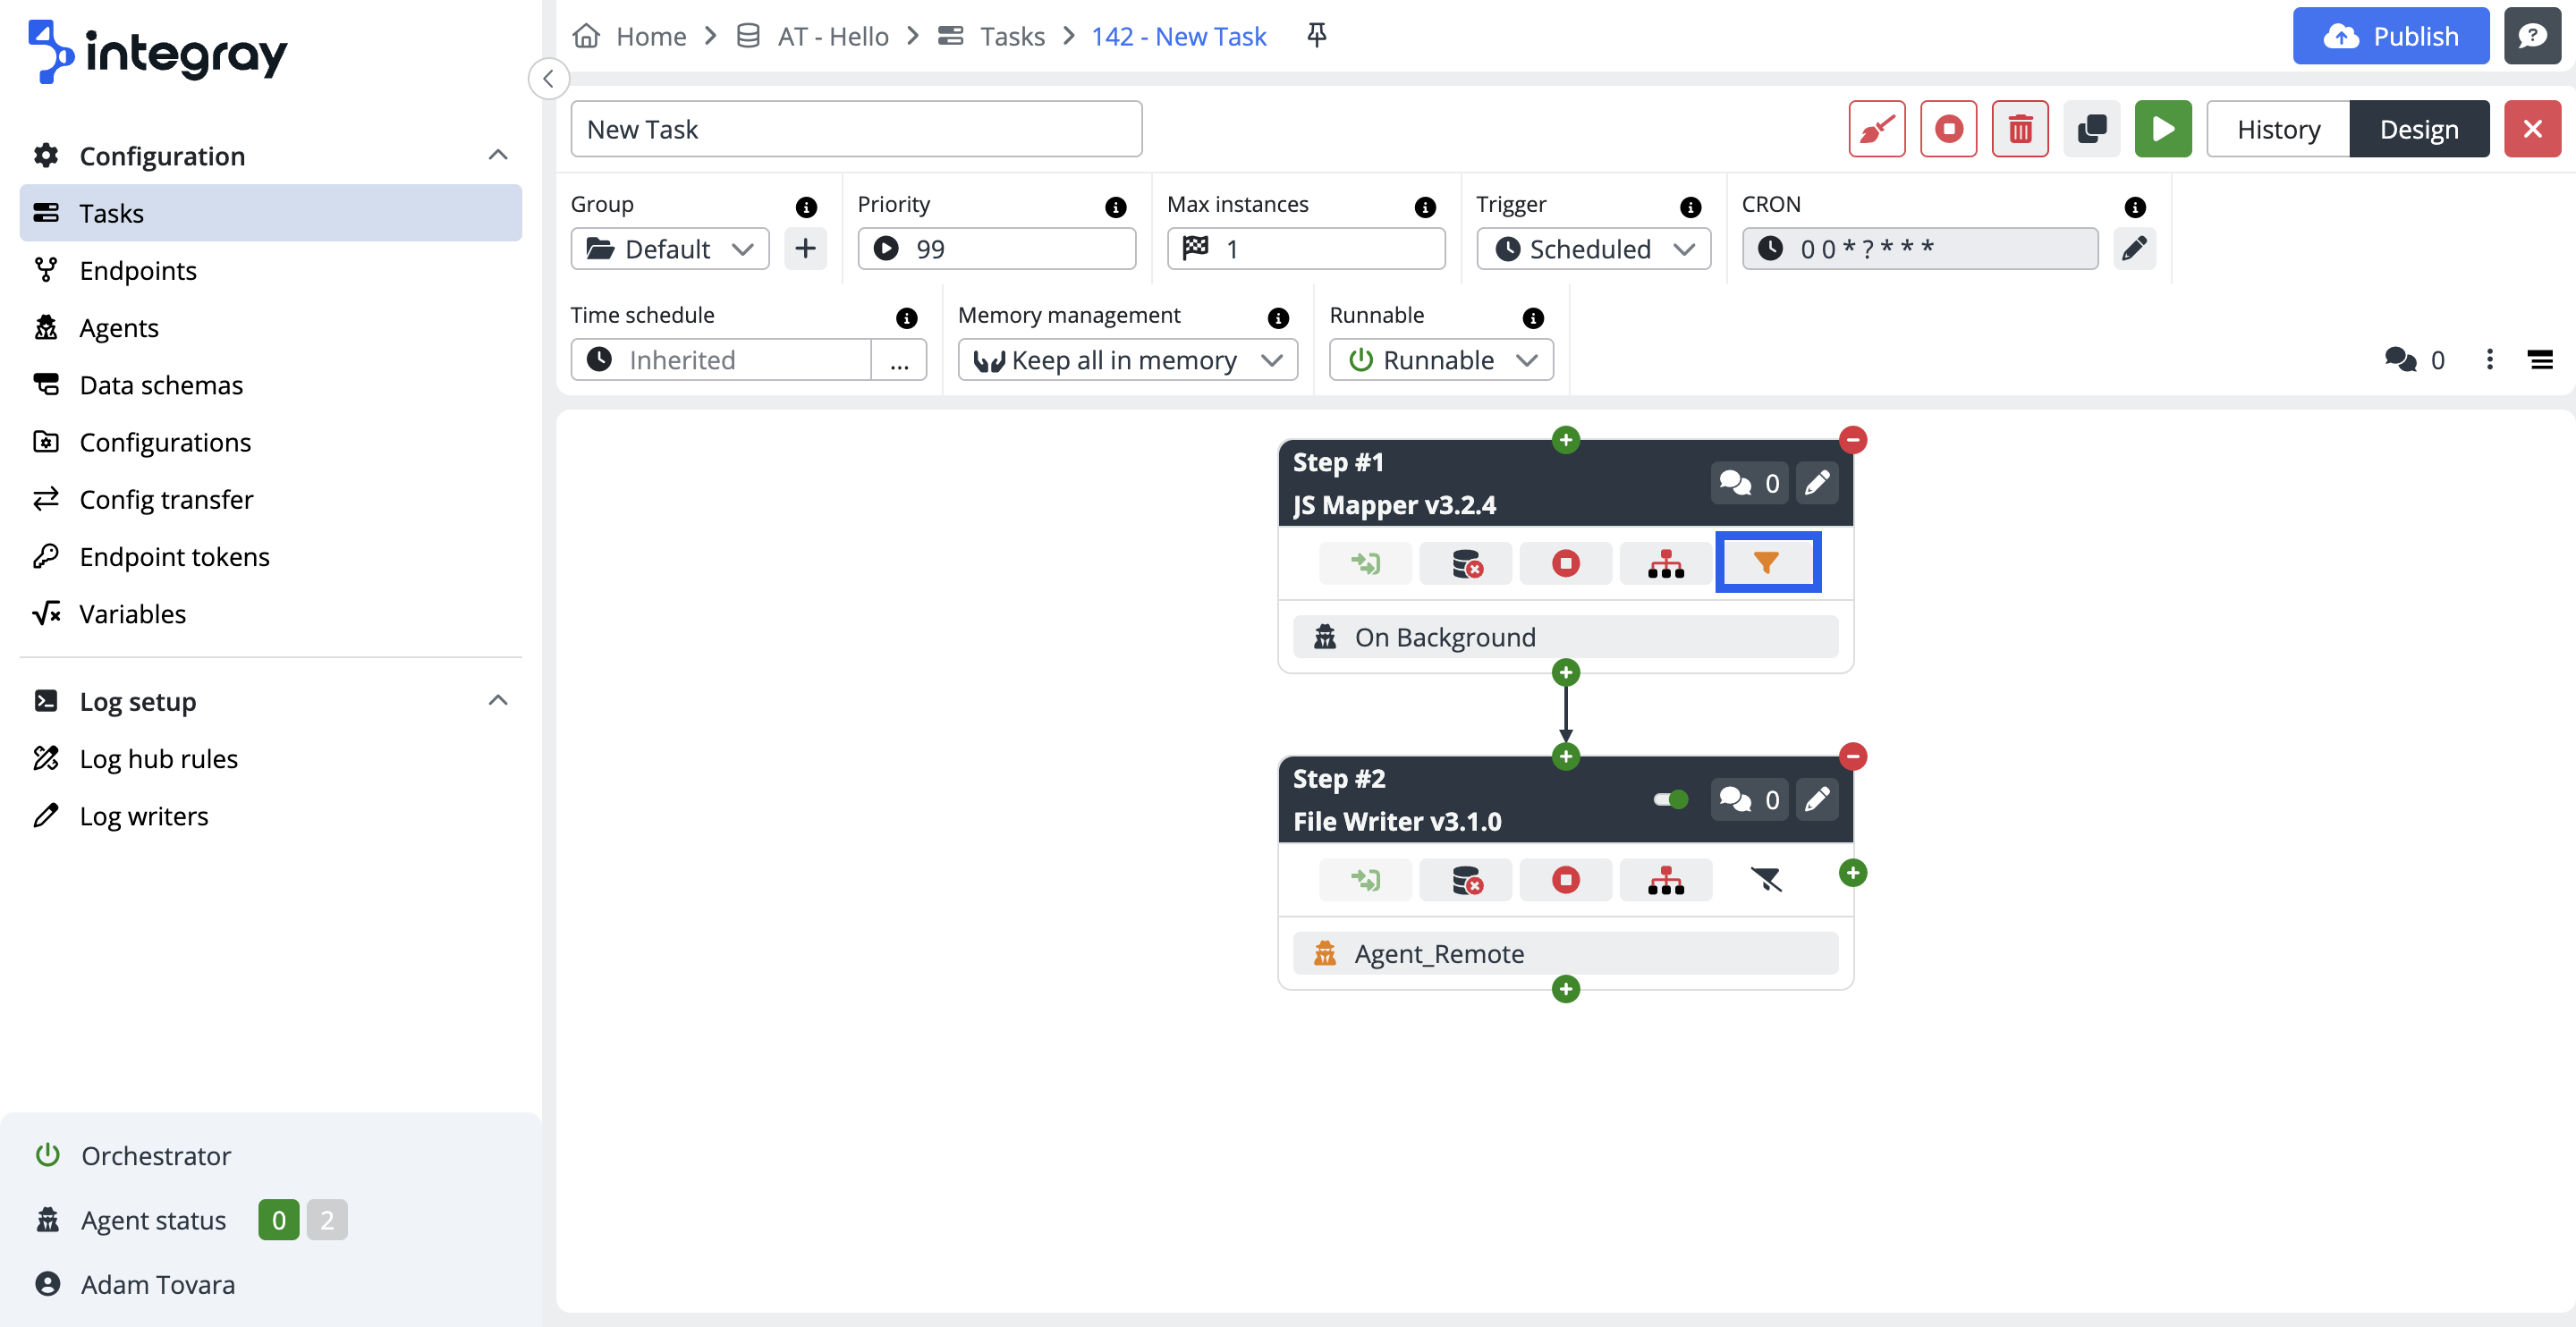
Filter
When a filter is applied to Input Mapping, the icon the icon turns orange. Clicking on the icon opens a window titled Filter Details.
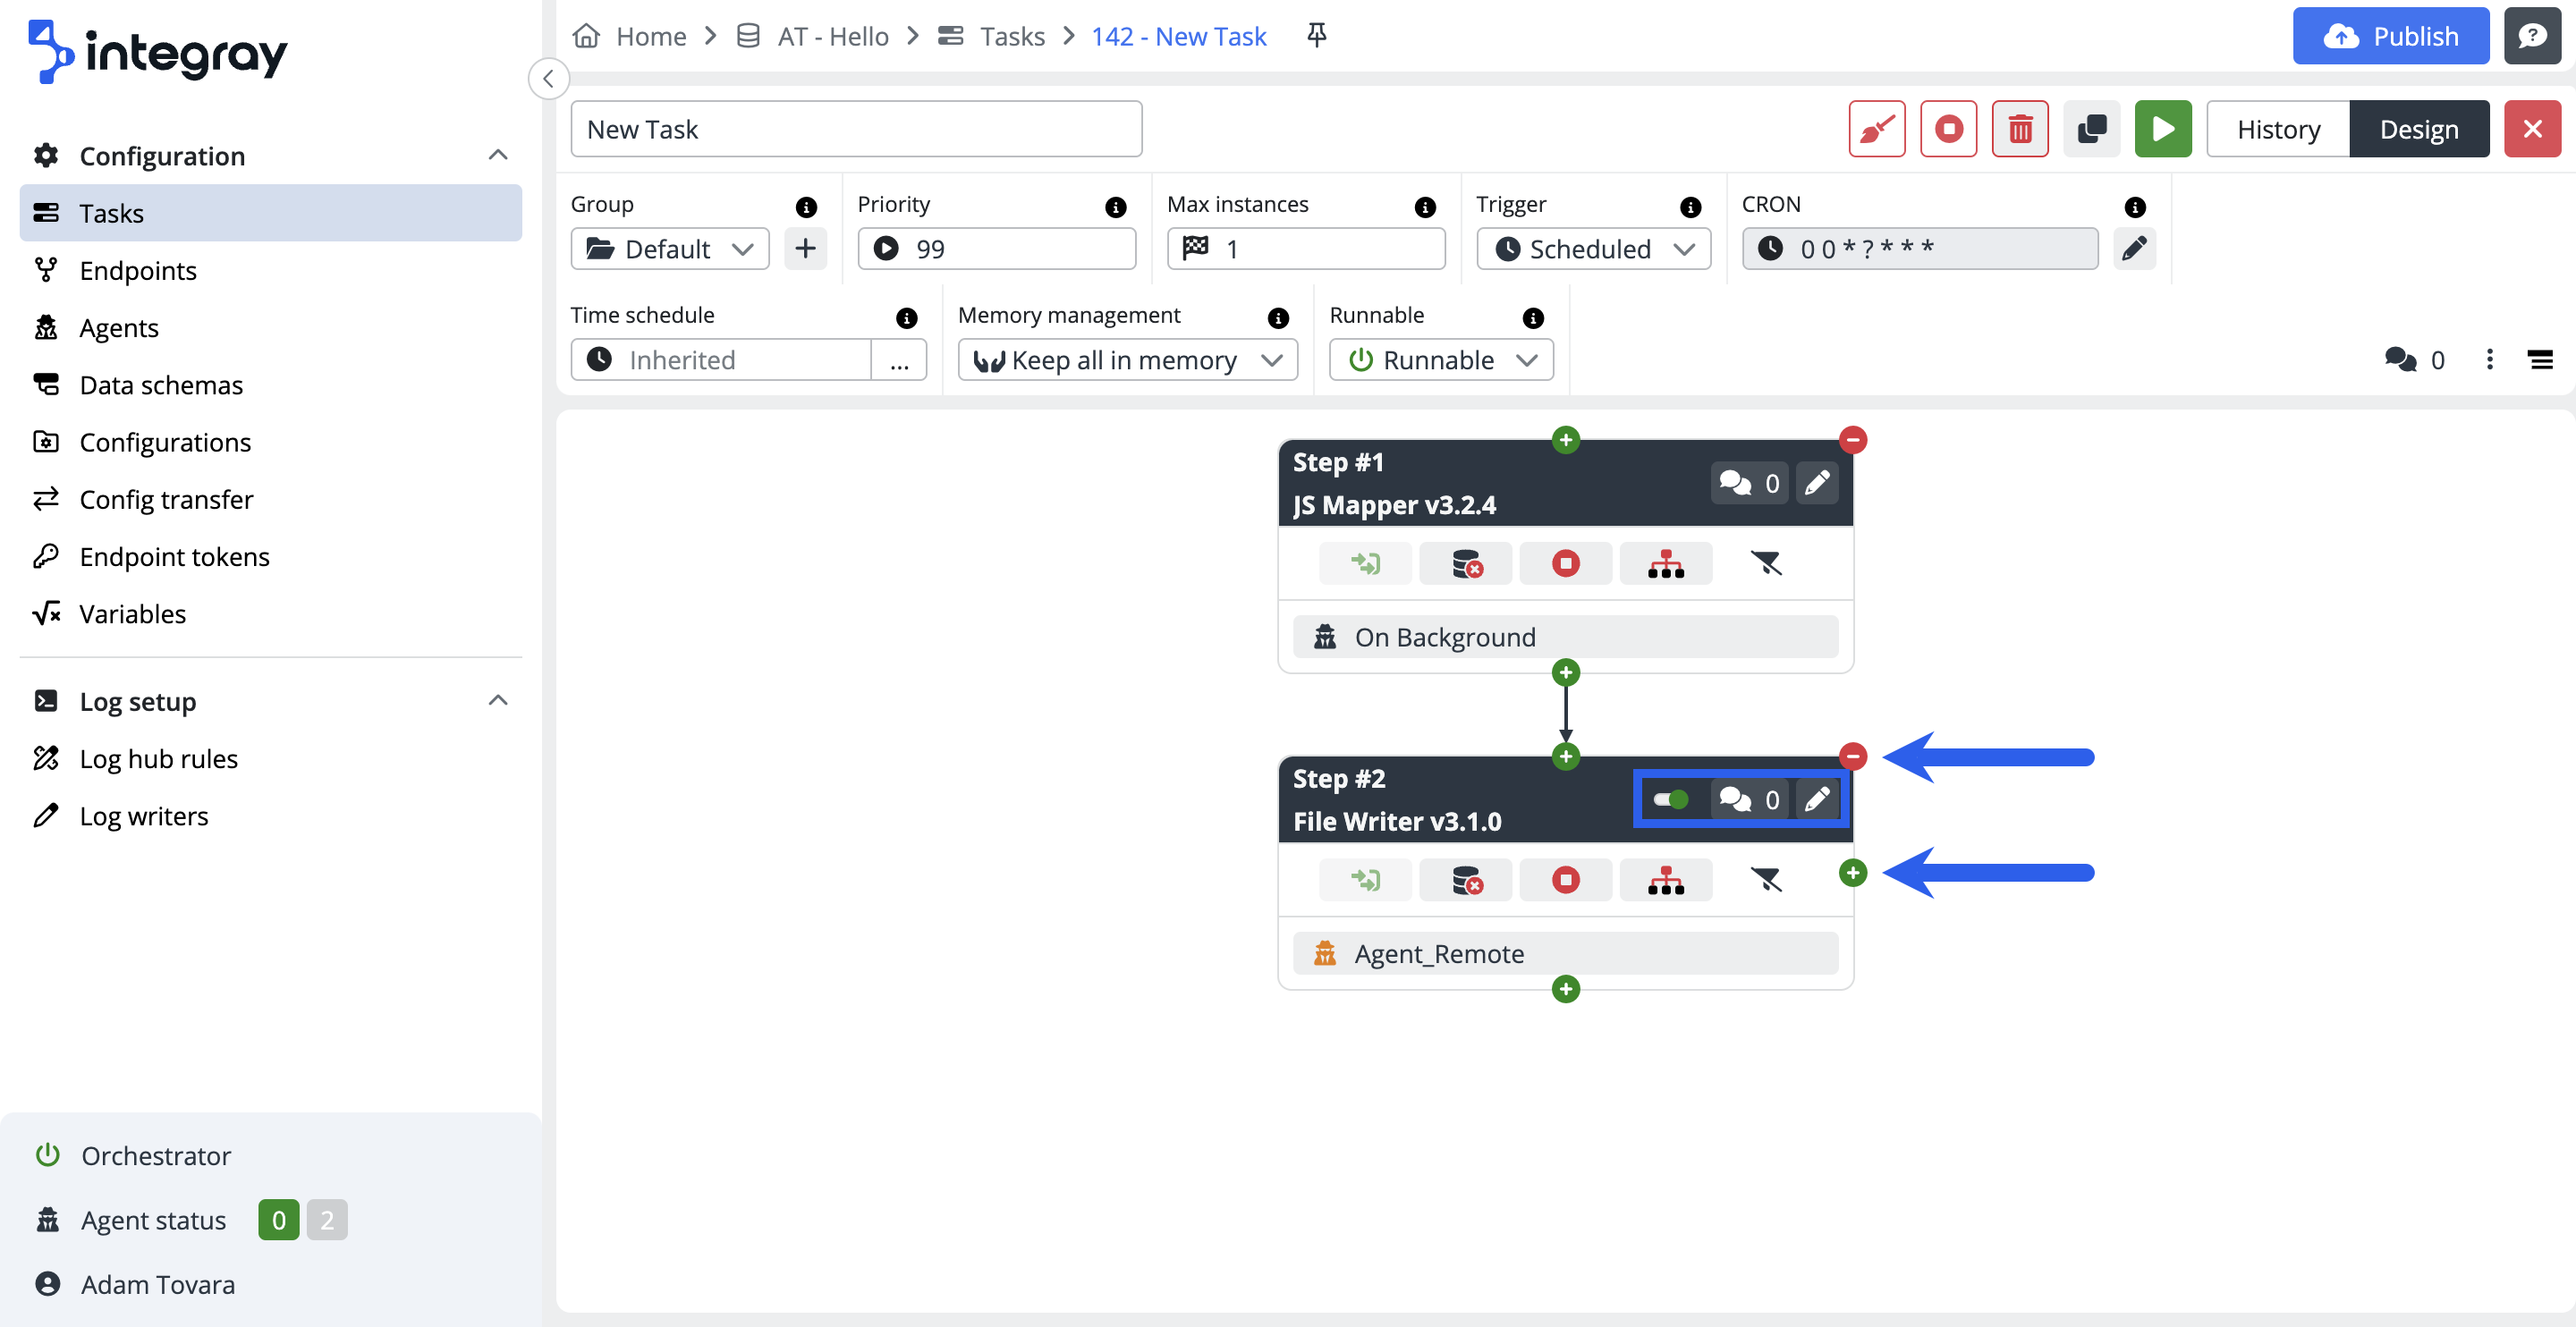
Additional controls are available within the header of each task step. A slider button temporarily turns off the respective Task step and its subsequent steps. The Comment button serves to attach remarks to the specific step. The pencil icon button seamlessly navigates users to the Task step editor. Utilizing the green button with a plus symbol allows for adding a new step, whereas the red button with a minus symbol facilitates the removal of the current step.
Use of slider button
If any task steps in the configurations are not yet complete, which means they contain negative warning messages (more information about Executability status here), you can temporarily fix this by disabling the broken step with this button. Note that the Slider button is not available for the first task step.
